
As I stood in my kitchen, the enticing aroma of garlic and ginger began to weave its magic around me, promising a delightful treat. These Crispy Shrimp Balls are not just an appetizer; they’re a gateway to the vibrant heart of Asian cuisine. With a satisfying crunch on the outside and succulent shrimp nestled within, this recipe comes together with minimal fuss, making it perfect for both seasoned home chefs and weekend warriors alike. Not only do these shrimp balls deliver a burst of authentic flavor, but they also impress at parties, ensuring you become the host of the year! Curious about how to create these crispy wonders in your own kitchen? Let’s dive in!
Why Are Crispy Shrimp Balls So Irresistible?
Flavor-packed: Each bite is a symphony of ginger, garlic, and umami, providing a taste experience that transports you to your favorite Asian eatery.
Effortless Preparation: With just a few ingredients, whipping up these shrimp balls is a breeze, making it ideal for both casual cooks and culinary aficionados.
Crowd Favorite: Perfect for parties, these appetizers will be the star of your next gathering, pleasing guests of all ages with their delightful crunch and juicy filling.
Versatile Options: Feel free to customize the recipe; toss in your favorite veggies or try baking for a healthier twist, like with my Shrimp Casserole Cozy for a delightful alternative.
Dairy-Free Delight: This appetizer fits perfectly into dairy-free diets without compromising on taste or texture, ensuring everyone can enjoy them!
Crispy Shrimp Balls Ingredients
For the Shrimp Mixture
- Raw Shrimp – Use peeled and deveined shrimp for ease in preparation and a smoother texture.
- Green Onions – Adds freshness and flavor; substitute with chives if unavailable.
- Garlic – Infuses aroma and a savory depth; can use garlic powder, but in lesser amounts.
- Fresh Ginger – Essential for the characteristic taste of Asian cuisine; prefer fresh over dried for the best flavor.
- Soy Sauce – Provides umami flavor; swap with tamari for a gluten-free alternative.
For Breading and Binding
- Panko Breadcrumbs – Key for structural crispiness; regular breadcrumbs or crushed crackers work as substitutes.
- Egg – Binds the mixture; use a flax egg for a vegan option.
- Cornstarch – Helps with binding; you can omit if the mixture holds well without it.
For Seasoning and Frying
- Sesame Oil – Enhances depth of flavor; can be replaced with olive oil for a milder taste.
- Salt – Enhances overall flavor; adjust based on the amount of soy sauce used.
- Black Pepper – Adds mild heat; white pepper can create a more authentic Asian flavor.
- Cilantro – Offers a burst of freshness; omit if not preferred.
- Vegetable Oil – Used for frying until crispy; substitute with peanut oil for added flavor.
Get ready to create tantalizing Crispy Shrimp Balls that will wow your family and friends!
Step‑by‑Step Instructions for Crispy Shrimp Balls
Step 1: Prep Shrimp
Begin by preparing your shrimp for these mouthwatering Crispy Shrimp Balls. Roughly chop the peeled and deveined shrimp or pulse them in a food processor until coarsely ground, taking care not to over-pulse. This will help maintain a nice texture. Set the shrimp aside and prepare your mixing bowl for the next step.
Step 2: Mix Ingredients
In a large mixing bowl, combine the chopped shrimp with panko breadcrumbs, a beaten egg, finely chopped green onions, and minced garlic. Add freshly grated ginger, soy sauce, sesame oil, salt, and black pepper to the mixture. For a touch of brightness, include chopped cilantro and cornstarch if needed; mix everything together until well combined. This flavorful blend will be the foundation for your delicious shrimp balls.
Step 3: Form Balls
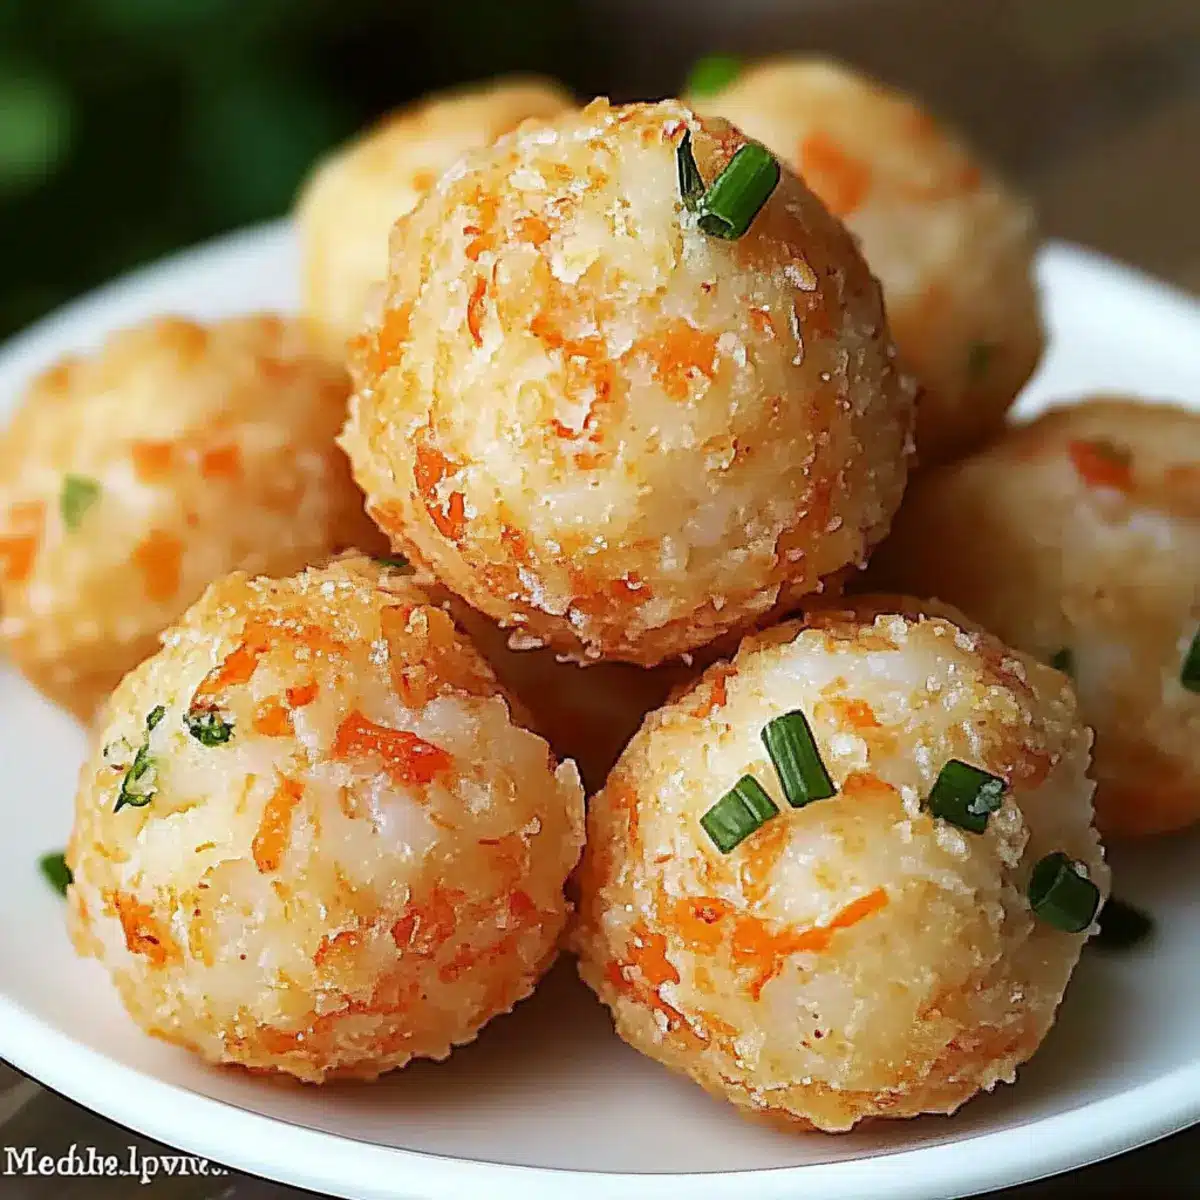
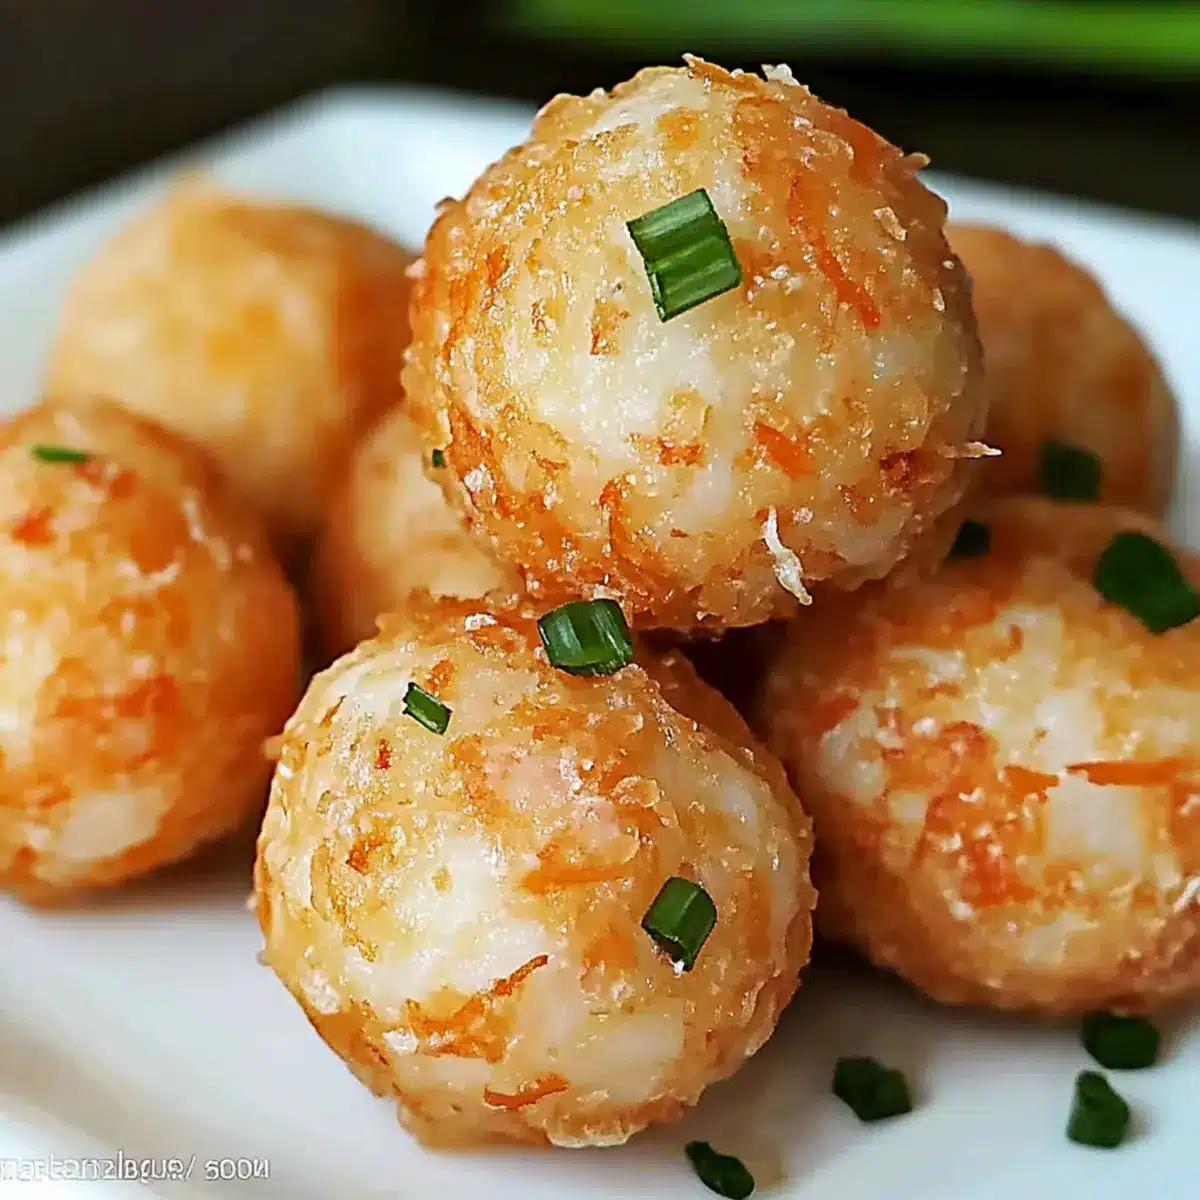
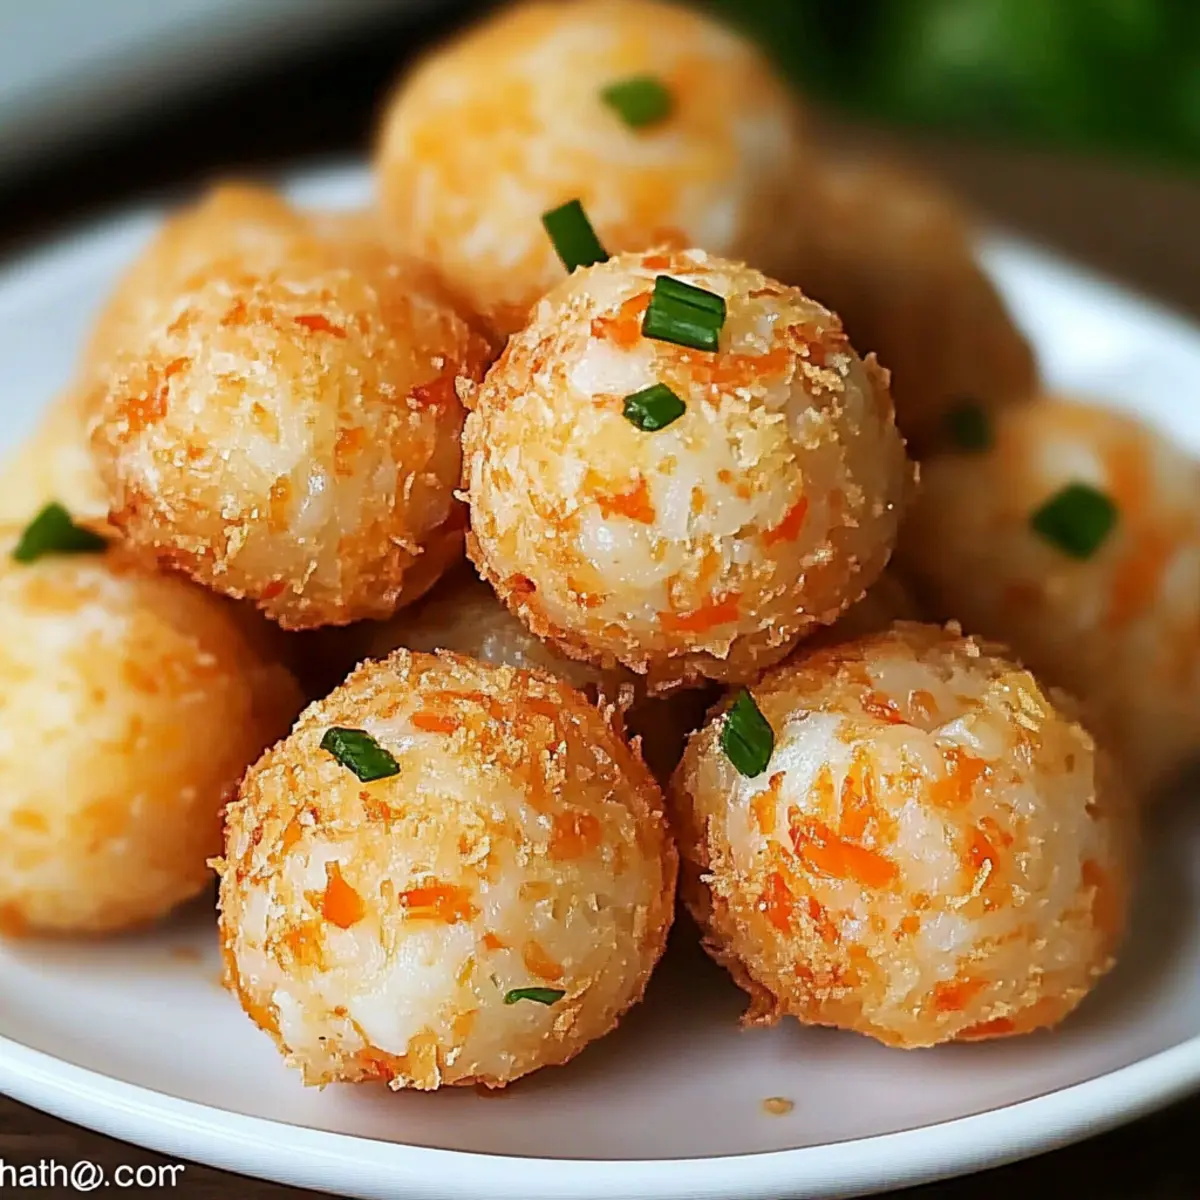
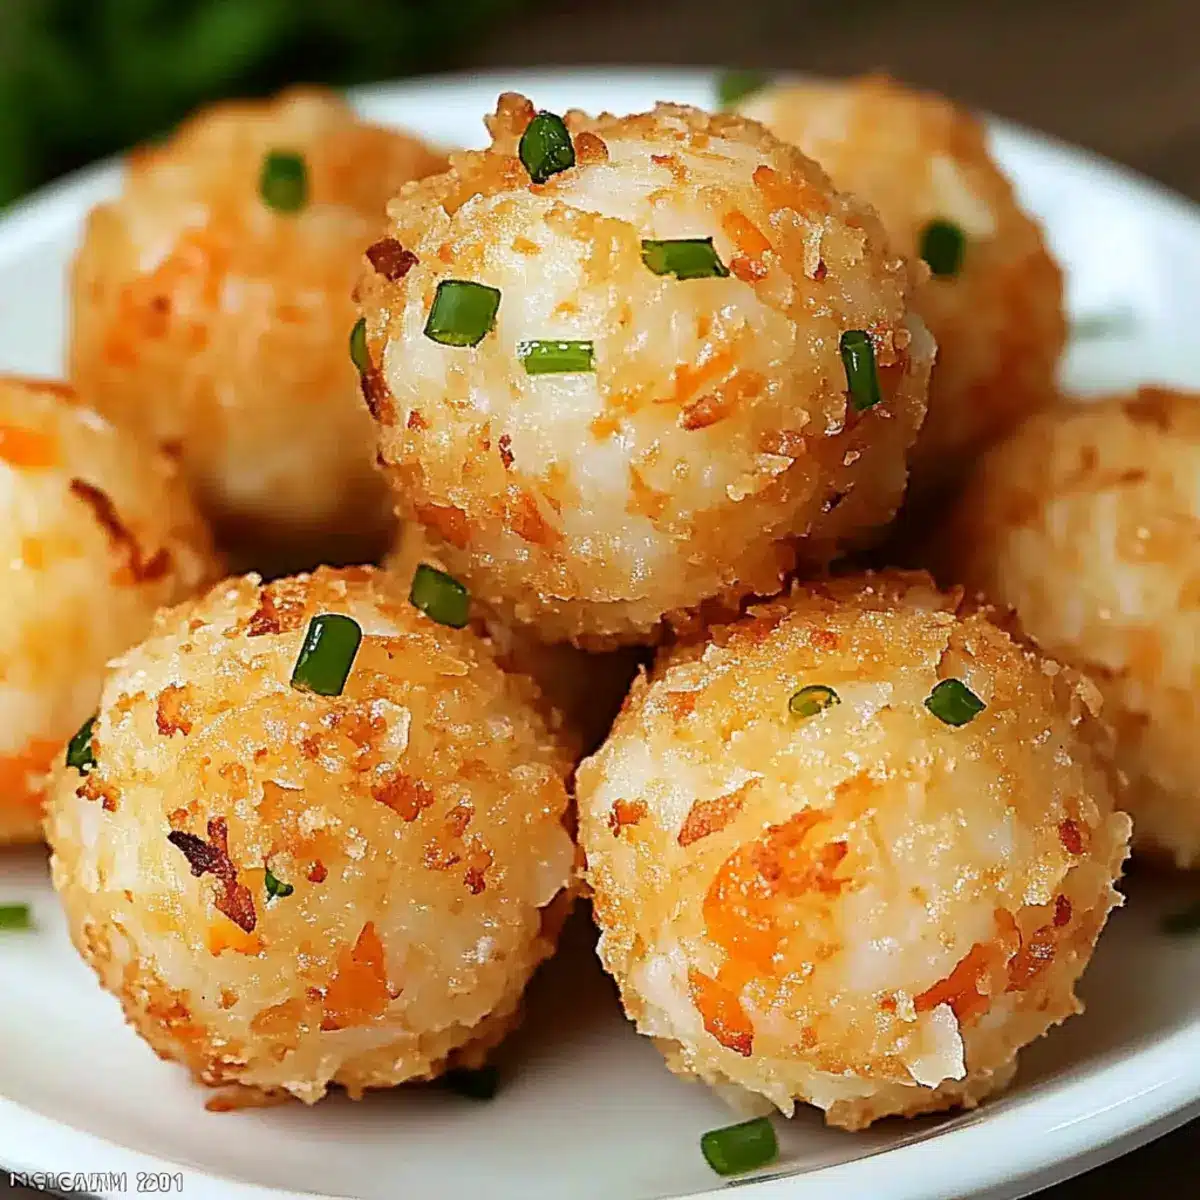
With slightly wet hands, scoop out portions of the shrimp mixture and roll them into 1 to 1.5-inch balls. Aim for about 20 to 25 balls to ensure ample servings for your gathering. The moisture from your hands will help keep the mixture from sticking and will make rolling easier. Once all the balls are formed, place them on a tray for frying.
Step 4: Heat Oil
In a large frying pan, pour in vegetable oil to a depth of about half an inch and heat it over medium-high heat. Use a thermometer to ensure the oil reaches 350°F, which is the ideal temperature for frying. Once hot, the oil should shimmer but not smoke. Proper oil temperature is crucial for that perfect crispy texture.
Step 5: Fry
Carefully add the shrimp balls to the hot oil in batches, ensuring not to overcrowd the pan. Fry each batch for 3 to 4 minutes, turning occasionally, until they are golden brown and crispy all around. Use tongs to gently flip the balls and enhance even cooking. Once done, remove them and place on a paper towel-lined plate to drain excess oil.
Step 6: Serve
Present your delectable Crispy Shrimp Balls hot and fresh, garnished with a sprinkle of fresh herbs if desired. Pair them with vibrant dipping sauces like sweet chili sauce, ponzu, or ginger-scallion oil for an interactive dining experience. Your guests will be eager to indulge in these delightful appetizers at your next gathering!
Make Ahead Options
These Crispy Shrimp Balls are perfect for meal prep enthusiasts looking to save time on busy weeknights! You can form the shrimp balls up to 24 hours in advance; just place them on a baking sheet lined with parchment paper and refrigerate. For longer storage, freeze the uncooked shrimp balls in a single layer on the baking sheet, then transfer them to a freezer-safe bag for up to 3 months. When you’re ready to cook, simply fry them straight from frozen, adding a minute or two to the cooking time. To maintain their delightful texture, ensure your oil is hot enough before frying. Enjoy delicious, homemade shrimp balls with minimal effort and maximum flavor!
How to Store and Freeze Crispy Shrimp Balls
Fridge: Store leftover crispy shrimp balls in an airtight container in the fridge for up to 3 days. This helps maintain their texture and flavor.
Freezer: For longer storage, freeze uncooked shrimp balls in a single layer on a baking sheet, then transfer to a freezer bag for up to 3 months. Cook from frozen, adding extra frying time.
Reheating: To reheat, place fried shrimp balls in a preheated oven at 350°F for 10-15 minutes, or until heated through and crispy. This method revives their delightful crunch.
Make-Ahead Tips: Form the shrimp balls ahead of time and refrigerate for up to 24 hours before cooking. This is a handy way to save time when preparing for gatherings!
What to Serve with Crispy Shrimp Balls?
As you prepare to delight in the crunch and flavor of these shrimp balls, consider what dishes will complement this vibrant appetizer beautifully.
-
Sticky Rice: A beloved side dish that soaks up sauce beautifully, enhancing your dining experience with chewy, satisfying texture.
-
Asian Slaw: A refreshing crunch of cabbage and carrots tossed in a tangy dressing contrasts wonderfully with the crispy shrimp balls, creating a balanced meal.
-
Sweet Chili Sauce: This sauce adds a sweet and spicy kick, perfectly enhancing the shrimp balls’ flavors while inviting a fun interactive element for dipping.
-
Coconut Curry Soup: The creamy richness of this soup balances the crispy texture, creating a harmonious and comforting duo that warms the soul.
-
Sesame Noodles: Tossed in a soy-sesame dressing, these noodles are a flavorful accompaniment that seamlessly connects with the Asian theme of your meal.
-
Fresh Fruit Salad: A mix of tropical fruits like mango and pineapple adds a refreshing sweetness that harmonizes with the delightful spices in the shrimp.
-
Sapporo or Japanese Beer: Enjoy bubbly refreshments while the crispness of the beer pairs perfectly with the crunchy exterior of the shrimp balls, heightening the dish’s richness.
-
Mango Sorbet: This light dessert provides a refreshing, fruity finish to your meal, cleansing the palate after the savory shrimp balls.
Crispy Shrimp Balls: Variations & Substitutions
Feel free to get creative with these Crispy Shrimp Balls; the possibilities are endless and can be tailored to your tastes!
- Vegetable Boost: Add finely chopped bell peppers or carrots for extra nutrition and color. They bring a lovely sweetness and crunch to the mix.
- Spicy Kick: Incorporate chili paste or sriracha for a delightful heat level. It adds a zing that’s perfect for spice lovers, elevating the flavor profile.
- Baked Version: Instead of frying, place the shrimp balls on a baking sheet, brush lightly with oil, and bake at 400°F until golden. It’s a fantastic healthier twist that keeps them crispy!
- Coconut-Infused: Mix in shredded coconut for a tropical flair. It pairs beautifully with shrimp, adding an intriguing sweetness and a delightful texture.
- Herb Variation: Swap cilantro for fresh basil or mint for a twist on flavor. Each adds a unique freshness that pairs well with the shrimp.
- Nutty Delight: Drizzle some toasted sesame oil into the mixture for a deeper, nuttier flavor. It brings a warm richness to these tasty bites.
- Gluten-Free Alternative: Substitute panko breadcrumbs with crushed rice crackers for a crunchy, gluten-free option. They maintain that incredible texture you love!
- Crispy Cod: Try using cod instead of shrimp for a delicious twist on my Parmesan Crusted Cod recipe. The flavors and textures you’ll create are just as enticing!
Let your culinary imagination run wild, and enjoy these variations with friends and family, ensuring everyone finds their favorite way to experience these Crispy Shrimp Balls!
Expert Tips for Crispy Shrimp Balls
- Ingredient Temperature Matters: Keeping your shrimp and other ingredients cold ensures a better texture and prevents the mixture from being too mushy.
- Oil Temperature Check: Use a thermometer to monitor the oil’s temperature; it should be around 350°F for perfect frying. Too hot burns quickly, while too cool results in greasy shrimp balls.
- Flavor Test: Before forming all the shrimp balls, taste a small amount of the mixture; adjust seasoning to your preference, especially the soy sauce.
- Avoid Overcrowding: Frying in batches prevents the temperature from dropping, ensuring each batch cooks evenly and maintains that delightful crispiness.
- Mix Variations: Feel free to customize your crispy shrimp balls by adding your favorite herbs or spices for a unique twist that elevates the dish.
Crispy Shrimp Balls Recipe FAQs
How do I select the best shrimp for this recipe?
Absolutely! When choosing shrimp, look for fresh, translucent specimens without any dark spots. If you’re using frozen shrimp, opt for peeled and deveined ones for ease. I often recommend wild-caught shrimp for superior flavor, but farmed can work too, as long as they’re sustainably sourced.
How should I store leftover Crispy Shrimp Balls?
For sure! Place any leftover crispy shrimp balls in an airtight container in the refrigerator. They’ll stay fresh for up to 3 days. Just remember to reheat them effectively to retain that crispy goodness!
Can I freeze uncooked shrimp balls, and how do I do it?
Yes, you can! To freeze uncooked shrimp balls, first, lay them out in a single layer on a baking sheet and freeze until firm. Then, transfer them to a freezer bag for storage. They can be kept frozen for up to 3 months. When ready to cook, fry them straight from the freezer, just adding a little more time to the cooking process.
What if my shrimp mixture feels too wet or too dry?
Very good question! If the mixture is too wet, add a bit more panko breadcrumbs or cornstarch until it firms up. On the other hand, if it’s too dry, adding a touch of beaten egg or a splash of soy sauce can help. Be sure to do a quick taste test before forming the balls to ensure the flavors are right!
Are there any dietary considerations with this recipe?
Absolutely! This recipe is dairy-free, making it a hit for those who avoid dairy products. If you have shellfish allergies, this might not be suitable. For a vegetarian or vegan option, you could try making a veggie version by substituting the shrimp with finely chopped mushrooms or a mixture of your favorite vegetables and using a flax egg instead of a chicken egg.
Can I make Crispy Shrimp Balls ahead of time?
Yes! Form the balls and refrigerate them for up to 24 hours before frying. This is an excellent option for party prep! Just remember to cover them tightly to prevent drying out. You can also make them in advance and freeze a batch, which gives you flexibility when hosting.
Crispy Shrimp Balls: A Delightful Asian Party Treat
Ingredients
Equipment
Method
- Begin by preparing your shrimp for these mouthwatering Crispy Shrimp Balls. Roughly chop the peeled and deveined shrimp or pulse them in a food processor until coarsely ground.
- In a large mixing bowl, combine the chopped shrimp with panko breadcrumbs, a beaten egg, finely chopped green onions, minced garlic, freshly grated ginger, soy sauce, sesame oil, salt, and black pepper. Mix everything together until well combined.
- With slightly wet hands, scoop out portions of the shrimp mixture and roll them into 1 to 1.5-inch balls. Aim for about 20 to 25 balls.
- In a large frying pan, pour in vegetable oil to a depth of about half an inch and heat it over medium-high heat until it reaches 350°F.
- Carefully add the shrimp balls to the hot oil in batches, frying each for 3 to 4 minutes until golden brown and crispy. Remove and place on a paper towel-lined plate to drain.
- Present your Crispy Shrimp Balls hot and fresh, garnished with fresh herbs if desired, paired with vibrant dipping sauces.
Leave a Reply