
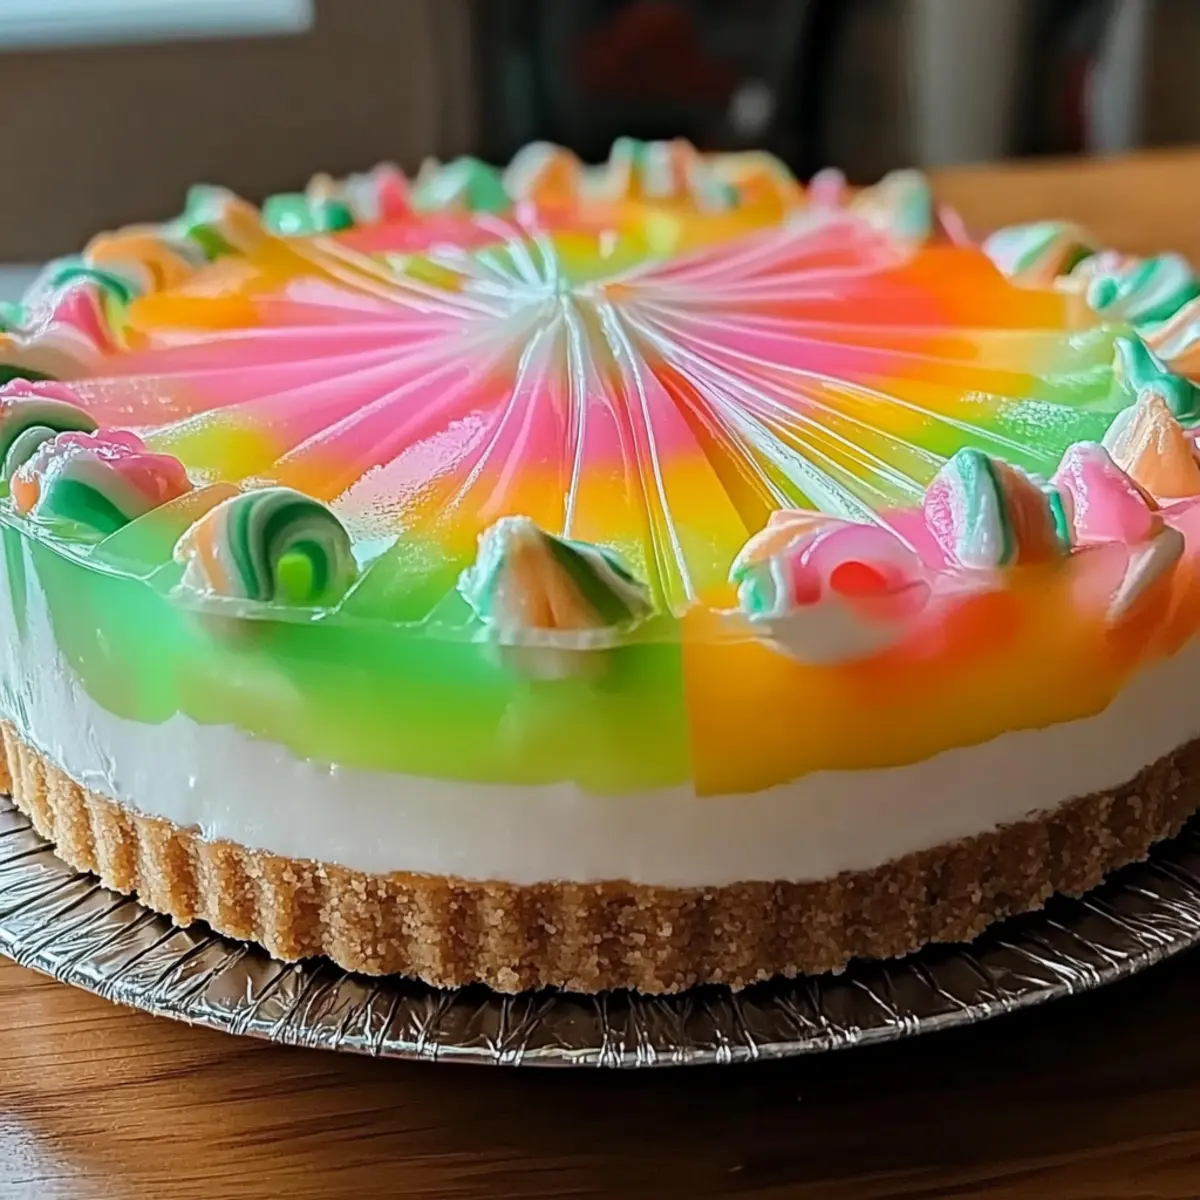
In the midst of spring’s vibrant bloom, I found myself reminiscing about the sweet treats that filled my childhood Easter celebrations. What could be more nostalgic than an Easter No-Bake Jello Pie? This delightful dessert combines a creamy, dreamy layer of cream cheese with the invigorating zing of fruity jello, all snugly nestled in a crispy graham cracker crust. It’s not just a feast for the eyes—this pie is effortlessly easy to prepare, making it the perfect option for busy home chefs looking to whip up something special without the fuss. Plus, it’s a family-friendly crowd-pleaser that caters to various dietary preferences, ensuring everyone can enjoy a slice. So, are you ready to add a splash of color and joy to your Easter gathering? Let’s dive into making this whimsical treat together!
Why Is This Pie So Special?
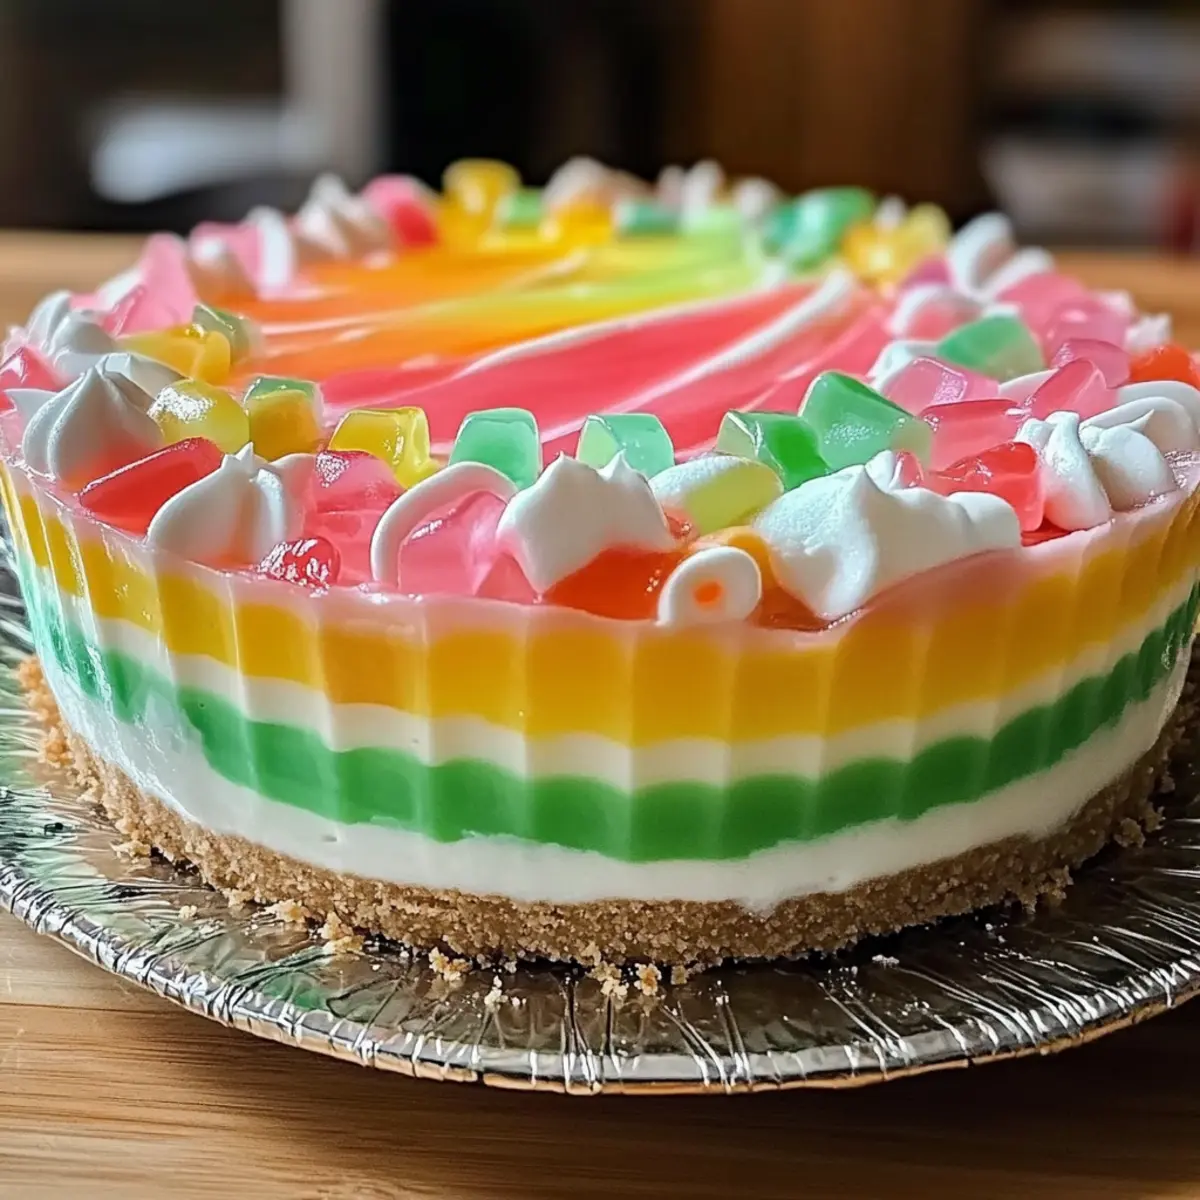
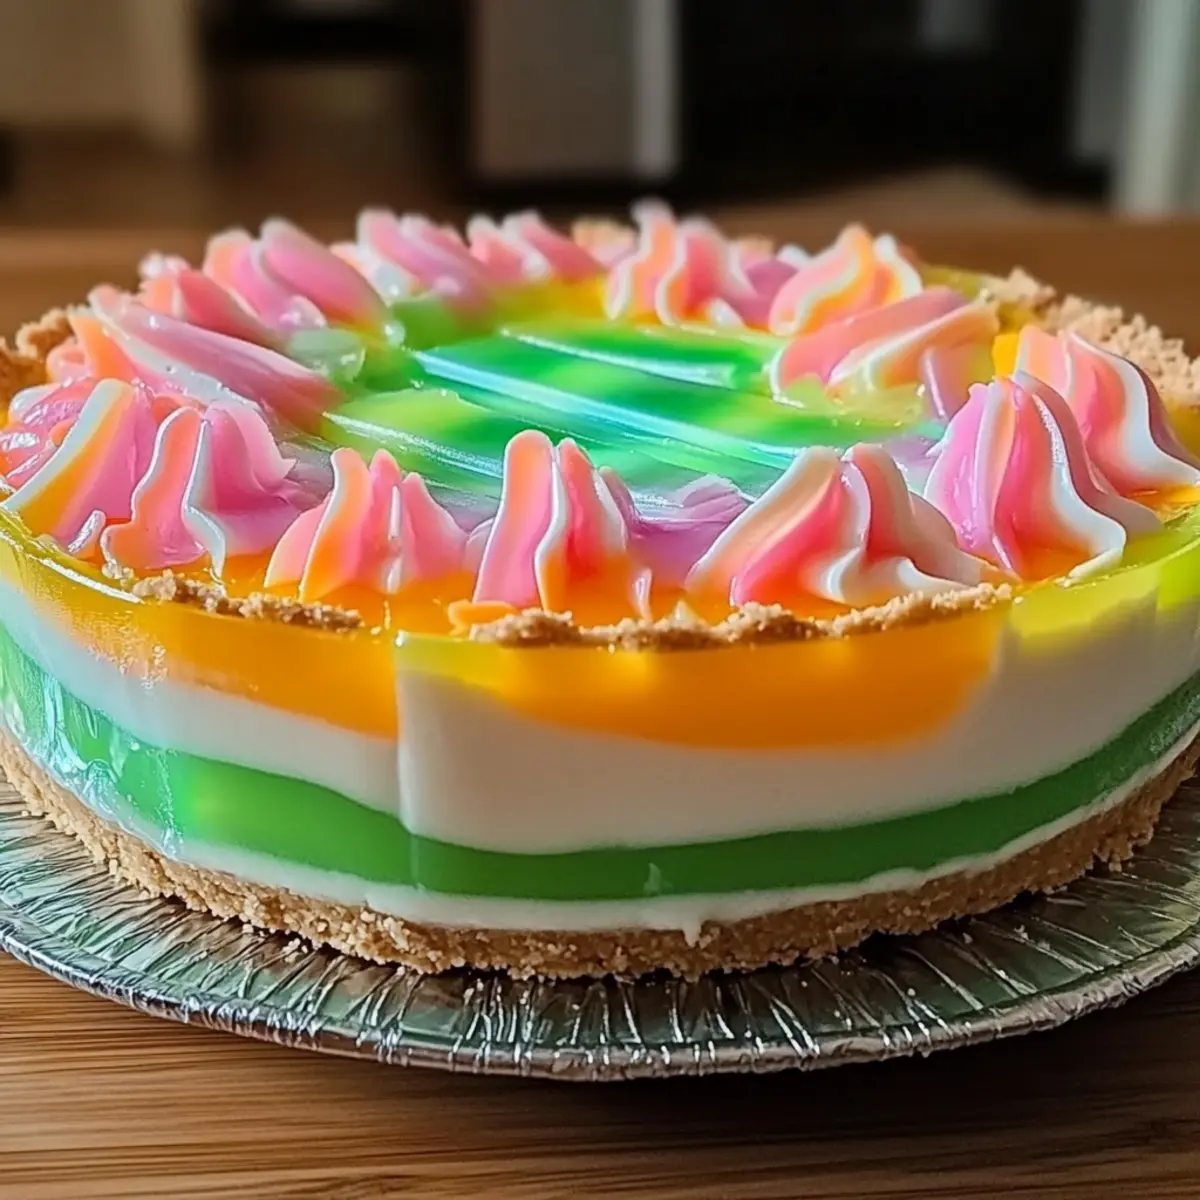
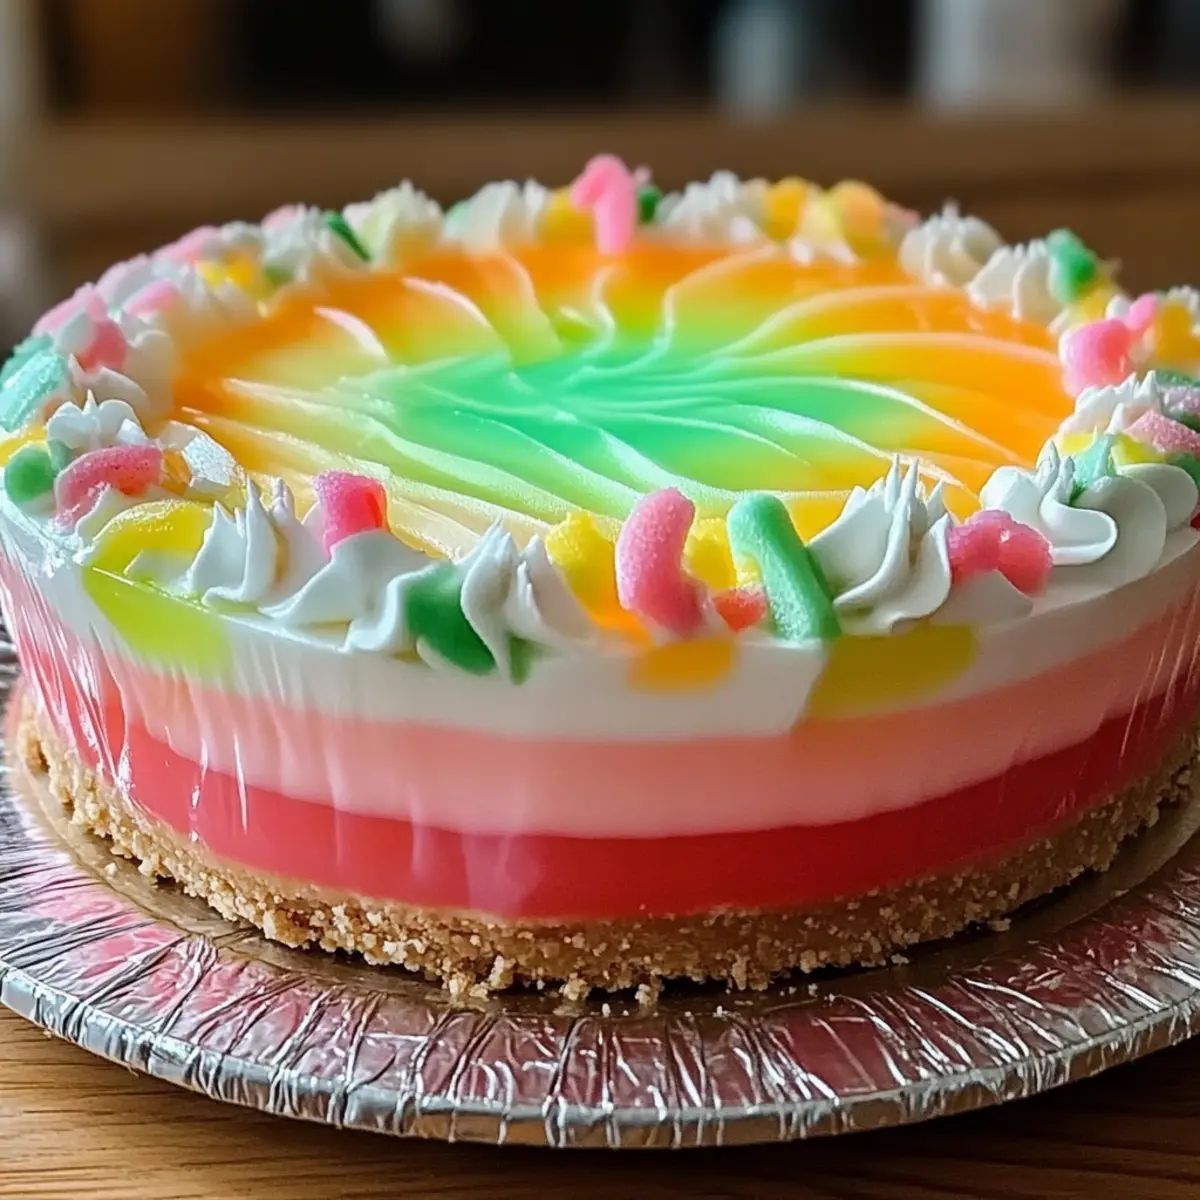
Colorful Layers: The vibrant jello layers create visual appeal that draws everyone in.
Rich, Creamy Indulgence: Each slice features a smooth cream cheese layer that melts in your mouth, offering sheer bliss.
No-Bake Convenience: With zero baking required, it’s a fantastic time-saver, perfect for busy days.
Family-Friendly Delight: This dessert is a hit for both kids and adults; its nostalgic flavors spark joy.
Versatile Variations: Customize with different Jello flavors or crusts, ensuring a unique treat every time.
If you’re looking for more easy and delicious dessert ideas, you might enjoy my Baked Donut Healthier recipe or the irresistible Peanut Butter Bake. Enjoy!
Easter No Bake Jello Pie Ingredients
For the Crust
• Graham Cracker Crust – Adds a sweet and crunchy base; you can swap it for an Oreo crust for a chocolatey twist.
For the Cream Cheese Layer
• Cream Cheese – Provides a rich, creamy texture; use vegan alternatives for dairy-free options.
• Granulated Sugar – Sweetens the layer; feel free to reduce or use natural sweeteners for a lighter dessert.
• Vanilla Extract – Infuses delightful flavor; almond extract can offer a nutty alternative.
For the Jello Layers
• Boiling Water – Essential for dissolving the Jello; ensure it’s piping hot to activate the gelatin.
• Cold Water – Mixes with the Jello; follow package instructions for accurate proportions.
• Jello (Various Flavors and Colors) – Brings vibrant colors and fruity taste; opt for sugar-free versions for a guilt-free treat.
For Topping and Decoration
• Whipped Topping – Gives a light, fluffy finish; choose dairy-free options for a vegan treat.
• Optional Easter Candies or Sprinkles – Elevate the festive appeal; use edible decorations to make it extra special.
Dive into creating your Easter No Bake Jello Pie with these ingredients for a delightful dessert that your family will love!
Step‑by‑Step Instructions for Easter No Bake Jello Pie
Step 1: Prepare the Cream Cheese Layer
In a mixing bowl, beat 8 ounces of softened cream cheese with 1/2 cup of granulated sugar and 1 teaspoon of vanilla extract using an electric mixer until smooth and creamy. This should take about 2-3 minutes. Ensure there are no lumps for a velvety texture. Set the mixture aside while you start with the jello layers.
Step 2: Prepare the First Jello Layer
Boil 1 cup of water in a small saucepan, then remove from heat. Stir in a box of your chosen Jello powder (3 ounces), mixing thoroughly until fully dissolved, which takes about 2 minutes. Add 1/2 cup of cold water to the mixture and let it cool slightly at room temperature for about 10 minutes before pouring onto the crust.
Step 3: Pour First Jello Layer
Carefully pour the cooled Jello mixture over the prepared graham cracker crust in a pie dish. Ensure the mixture evenly covers the crust and spreads without disturbing it. Place the pie in the refrigerator and chill for about 1-2 hours, or until the Jello layer is set and firm to the touch.
Step 4: Spread Cream Cheese Layer
Once the first Jello layer is set, remove the pie from the refrigerator. Gently spread the cream cheese mixture over the Jello layer using a spatula, smoothing it evenly from the center outwards. Take your time for a beautiful finish, and then return to the refrigerator for about an hour, allowing it to firm up.
Step 5: Prepare the Second Jello Layer
In another bowl, repeat the process for the second Jello layer. Start by boiling another cup of water, then stir in another box of Jello until dissolved. Follow with the same amount of cold water. Allow this mixture to cool to room temperature for about 10 minutes, as you’ll want it adequately cooled before layering.
Step 6: Pour and Chill
Once the second Jello mixture is slightly cooler, gently pour it over the cream cheese layer. Take care to avoid disturbing the cream cheese layer beneath. Place the pie back in the refrigerator and let it set for a minimum of 2 hours, ensuring the Jello is fully firm and the layers are stable.
Step 7: Decorate and Serve
When the pie is fully set, remove it from the refrigerator. Top with a generous layer of whipped topping, spreading it evenly. Get festive by adding optional Easter candies or colorful sprinkles on top for a delightful presentation. Slice into your Easter No Bake Jello Pie, and it’s ready to impress at your holiday gathering!
Easter No Bake Jello Pie Variations
Feel free to put your own spin on this delightful pie to suit your taste buds and dietary needs!
- Dairy-Free: Substitute cream cheese with vegan cream cheese for a delicious dairy-free option. It’s creamy and delightful, making everyone at the table happy.
- Sugar-Free: Use sugar-free Jello and a natural sweetener in the cream cheese layer to reduce sugar while still enjoying the same great taste. It’s the perfect way to indulge without the guilt.
- Different Crusts: Try using an Oreo crust instead of graham crackers for a chocolatey twist. The combination of chocolate and fruity jello is a surprisingly delicious match!
- Mix and Match Jello Flavors: Combine different flavors of Jello for a rainbow effect, such as berry and citrus blends. Each slice will surprise your guests with a burst of fruity goodness!
- Add Fresh Fruits: Top each slice with seasonal fruits, like strawberries or blueberries, for an extra layer of flavor and freshness. The burst of fruit will enhance the overall dessert experience.
- Nutty Crunch: Incorporate crushed nuts into the crust or as a topping to add both flavor and crunch. It will bring a new delightful texture to your Jello pie!
- Almond Flavor: Swap vanilla extract for almond extract for a nutty essence that beautifully complements the fruity jello flavors. A fragrant hint that makes it even more enticing!
- Fun Toppings: Jazz up the pie with edible flowers or holiday-themed sprinkles for a festive look that’s sure to impress during holidays or celebrations.
For more delicious recipes and ideas, don’t miss out on the easy Baked Donut Healthier recipe or the luscious Peanut Butter Bake. Have fun customizing!
Expert Tips for Easter No Bake Jello Pie
-
Ensure Proper Dissolution: Make sure the Jello is completely dissolved in boiling water; otherwise, it won’t set properly and may lead to a soggy layer.
-
Softened Cream Cheese: Always let your cream cheese reach room temperature before mixing. This ensures a smooth, lump-free cream cheese layer that blends beautifully.
-
Adjust Sweetness: If using sugar-free Jello, remember to taste the cream cheese mixture and adjust the sweetness to balance flavors in your Easter No Bake Jello Pie.
-
Layer Care: When pouring Jello over the cream cheese layer, do it gently to prevent mixing. This allows for distinct, vibrant layers that are visually appealing.
-
Chill Time: Don’t rush the setting process! Allow enough chilling time for each layer to ensure firmness and a great texture.
-
Experiment with Flavors: Feel free to substitute with your favorite Jello flavors and crust types for a unique twist on the traditional Easter No Bake Jello Pie.
What to Serve with Easter No-Bake Jello Pie
Elevate your Easter celebration with these delightful pairings that complement the vibrant flavors and textures of your no-bake dessert.
- Fresh Fruit Salad: A medley of seasonal fruits brightens up the table and adds a refreshing contrast to the rich pie.
- Sugary Coconut Macaroons: Chewy and sweet, these cookies echo the tropical notes of Jello while providing a satisfying chew.
- Lemonade Spritzer: This refreshing drink balances the sweetness of the pie, offering a zesty twist that invigorates the palate.
- Chocolate Ganache Tart: A rich, indulgent option that contrasts beautifully with the lightness of the Jello pie; perfect for chocolate lovers!
- Minty Green Salad: Crisp greens topped with a zesty vinaigrette punctuate the meal with a fresh, herbaceous note.
- Vanilla Ice Cream: A scoop of creamy ice cream on the side adds a luscious touch, making each bite of pie even more decadent.
- Easter Egg Cupcakes: Cupcakes topped with colorful icing can serve double duty as a sweet treat and festive decoration for your table.
- Sparkling Water with Lime: A simple, effervescent drink that cleanses the palate, enhancing the fruity flavors of the Jello pie.
- Carrot Cake Slices: A slice of moist carrot cake brings traditional Easter flavors to the mix, pairing well with the pie’s sweetness.
How to Store and Freeze Easter No Bake Jello Pie
Fridge: Store leftovers in an airtight container in the refrigerator for up to 3-4 days to maintain freshness and flavor.
Freezer: Freezing is not recommended for the Easter No Bake Jello Pie, as the texture of the jello may become grainy upon thawing.
Reheating: This dessert is best enjoyed chilled, so there’s no need to reheat. Simply slice and serve straight from the fridge!
Prepare Ahead: You can make the pie a day in advance for convenience. Just ensure it is well covered to stay fresh in the fridge.
Make Ahead Options
This Easter No-Bake Jello Pie is an excellent choice for meal prep, making it a breeze to whip up ahead of your holiday celebrations! You can prepare the graham cracker crust and the cream cheese layer up to 24 hours in advance, storing them separately in the refrigerator (covering the cream cheese layer with plastic wrap to prevent drying out). The Jello layers can also be made a day ahead—just allow them to set completely. When you’re ready to serve, layer the cream cheese over the first Jello layer, then add the second layer of Jello and chill for a few hours. This way, you can enjoy a vibrant, delicious dessert with minimal effort on the day of your gathering!
Easter No Bake Jello Pie Recipe FAQs
How do I choose the right Jello flavors?
Absolutely! You can select your favorite flavors or switch them based on seasonal fruits. For spring, fruity flavors like raspberry, strawberry, or lemon can bring a burst of color and freshness to your Easter No Bake Jello Pie. Sugar-free varieties work great too for a lighter option!
What’s the best way to store leftovers?
Very simple! Store your leftover Easter No Bake Jello Pie in an airtight container in the refrigerator, and it will stay fresh for up to 3-4 days. Make sure it’s covered properly to prevent any absorption of odors from other foods.
Can I freeze the Easter No Bake Jello Pie?
I recommend against freezing this pie. Freezing can cause the jello layers to become grainy when thawed, affecting the delightful texture you’ve created. It’s best enjoyed fresh, but you can prepare it a day ahead and keep it in the fridge!
What should I do if my Jello doesn’t set properly?
If you find that your Jello hasn’t set as expected, it might be due to insufficient dissolution in hot water. For the next attempt, ensure you boil the water thoroughly and mix the Jello powder until fully dissolved. Additionally, check the expiration date on your gelatin for best results!
Can I make the pie dairy-free?
Oh, absolutely! For a dairy-free alternative, simply swap the cream cheese with vegan cream cheese and use dairy-free whipped topping. The rest of the ingredients remain the same, allowing everyone at your table to enjoy a slice of this delightful Easter No Bake Jello Pie!
Easter No Bake Jello Pie: Delightful Dessert for Family Fun
Ingredients
Equipment
Method
- Beat cream cheese, sugar, and vanilla in a bowl until smooth and set aside.
- Boil water; mix in Jello powder until dissolved. Add cold water and cool slightly.
- Pour Jello mixture over crust; chill until set, about 1-2 hours.
- Spread cream cheese mixture over set Jello layer; chill for 1 hour.
- Repeat boiling and mixing process for second Jello layer, cool slightly.
- Gently pour second Jello layer over cream cheese layer; chill for 2 hours until firm.
- Top with whipped topping and optional decorations before serving.
Leave a Reply