
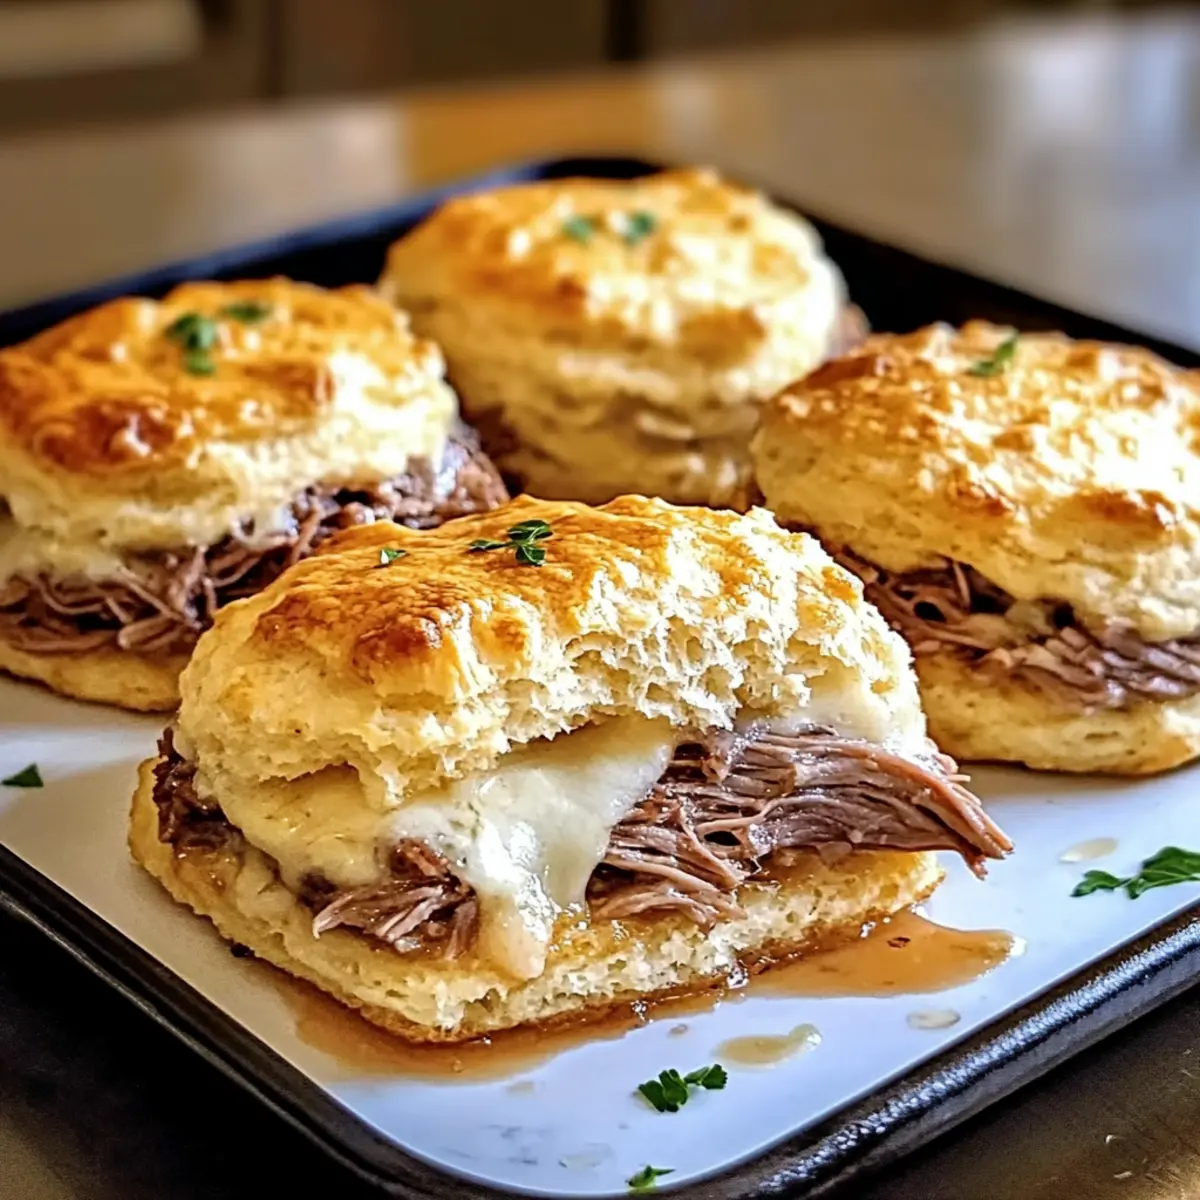
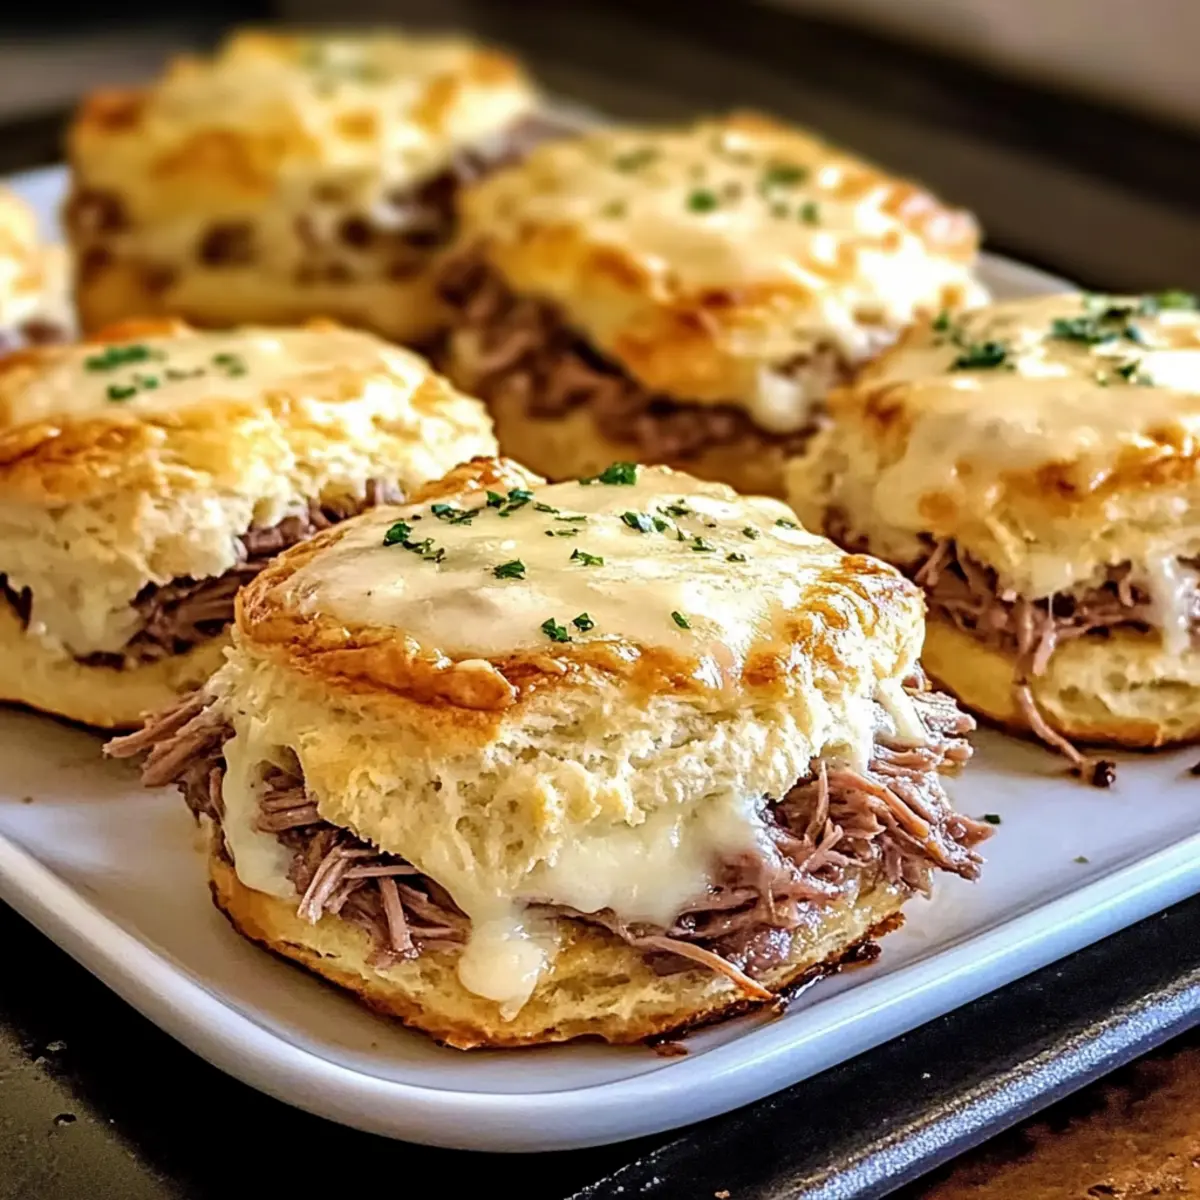
In the hustle and bustle of life, there are days when we crave something that wraps us in warmth and comfort—like a cozy hug from a loved one. That’s exactly what my Baked French Dip Biscuits bring to the table. Each golden-brown biscuit is a delightful combination of savory roast beef and gooey melted cheese, making this dish a true family favorite. Not only is this recipe an easy way to serve up comfort food, but it also effortlessly transforms any busy weeknight into a special occasion. Plus, they pair beautifully with a side of au jus for dipping, ensuring each bite is rich in flavor and nostalgia. Ready to dive into this deliciously satisfying meal? Let’s get started!

What Makes These Biscuits So Special?
Irresistible Flavor: Each bite is a harmonious mix of tender roast beef and gooey melted cheese, making them a joy to savor.
Effortless Preparation: With an easy-to-follow process, even kitchen novices can whip these up quickly.
Crowd-Pleasing: Perfect for family gatherings or cozy dinners, these biscuits are sure to impress everyone at the table.
Versatile Variations: Substitute turkey, or try different cheeses for unique twists—endless possibilities await! These biscuits remind me of the loving warmth of home-cooked meals, similar to my Oatmeal Peanut Butter Energy Bites that are equally comforting.
Perfect Pairing: Don’t forget to serve them with a side of au jus—it’s the ultimate dipping companion!
Baked French Dip Biscuits Ingredients
• Get ready to bake the ultimate comfort food!
For the Biscuits
- Ready-Made Biscuit Dough – Using pre-made dough saves time and ensures consistent texture.
- Flour – A sprinkle for dusting your work surface to prevent sticking.
For the Filling
- Thinly Sliced Roast Beef – Opt for high-quality beef for a rich, savory flavor in your Baked French Dip Biscuits.
- Cheddar or Swiss Cheese – These melt beautifully and bring that gooey goodness everyone loves.
For the Au Jus
- Beef Broth – Essential for a flavorful dipping sauce; homemade or store-bought works well!
- Worcestershire Sauce – Adds depth and richness to your au jus for perfect complementing.
Get ready to gather these ingredients and dive into a lovingly crafted meal that your family will adore!
Step‑by‑Step Instructions for Baked French Dip Biscuits Recipe: A Comforting, Family-Friendly Meal
Step 1: Preheat the Oven
Begin by preheating your oven to 400°F (205°C). This will ensure a perfectly baked crust for your Baked French Dip Biscuits. While the oven warms up, gather your baking sheet and line it with parchment paper, creating a non-stick surface that will make cleanup a breeze.
Step 2: Prepare the Biscuit Dough
Take your ready-made biscuit dough out of the refrigerator and gently roll it out on a floured surface. Cut out circular shapes using a biscuit cutter of your choice, about 3 inches in diameter. The size allows enough room for a hearty filling, while being easy to handle as you assemble the biscuits.
Step 3: Fill the Biscuits
Take half of the biscuit circles and lay them on your prepared baking sheet. Place a slice of savory roast beef and a piece of gooey cheese on each circle. Make sure to leave a little space around the edges, as you will want to seal them tightly to avoid any filling leaking out during baking.
Step 4: Seal the Biscuits
Now, take the remaining biscuit circles and gently place them on top of the filled ones, pressing down around the edges. Use your fingers to pinch or fold the edges together, creating a secure seal. This ensures that the delicious filling stays enclosed as your Baked French Dip Biscuits bake to golden perfection.
Step 5: Bake the Biscuits
Slide the baking sheet into your preheated oven and bake for approximately 25 minutes, or until the biscuits are golden brown and puffed. Keep an eye on them as they bake; you want that warm, inviting aroma to fill your kitchen without burning!
Step 6: Serve with Au Jus
Once baked, remove your Baked French Dip Biscuits from the oven and allow them to cool slightly on the baking sheet. Serve them warm alongside a small bowl of au jus for dipping, enhancing both their flavor and texture. This comforting family meal is now ready to be savored with loved ones!
Baked French Dip Biscuits Variations
Feel free to get creative and tailor these comforting biscuits to suit your taste buds!
-
Turkey Twist: Substitute roast beef with thinly sliced turkey for a lighter option. This variation still packs a punch in flavor. Perfect for those holiday leftovers!
-
Spicy Cheese: Swap the cheddar or Swiss for pepper jack cheese to add an extra kick. The heat complements the savory beef perfectly, making every bite exciting.
-
Veggie Boost: Add sautéed mushrooms and onions inside the biscuits for depth of flavor and texture. These veggies meld beautifully with the meat and cheese, enhancing the overall experience.
-
Garlic Butter Brush: Melt butter with minced garlic and brush it over the biscuits before baking for a fragrant finish. This adds layers of flavor that elevate the dish.
-
Whole Wheat Dough: For a healthier twist, use whole wheat biscuit dough. It’s a wholesome swap that gives you that hearty feel without sacrificing taste.
-
Au Jus Enhancement: Spice up your au jus by adding a dash of red wine or balsamic vinegar. This brings a sophisticated depth to your dipping sauce.
-
Sweet Heat Option: Incorporate a touch of hot honey into the filling for a sweet and spicy surprise. This playful variation can intrigue your taste buds!
-
Mini Bites: Shape small, bite-sized biscuits instead of regular ones for a fun appetizer. These are perfect for parties or when you just want a little something to snack on!
If you love unique twists, you might also enjoy my No-Bake Chocolate Peanut Butter Oatmeal Cookies or find inspiration in these Irresistible Garlic Butter Baked Cod for a delightful change of pace.
What to Serve with Baked French Dip Biscuits?
Creating the perfect meal is all about balance and flavor, and these delightful biscuits deserve some tasty companions.
-
Creamy Mashed Potatoes: Smooth and buttery, they provide a comforting contrast to the savory filling of the biscuits.
-
Fresh Garden Salad: Crisp greens tossed with a tangy vinaigrette add brightness, cutting through the richness of the biscuits for a refreshing bite.
-
Roasted Vegetables: The caramelized sweetness of roasted carrots and Brussels sprouts pairs beautifully, adding texture and earthy flavors.
-
Coleslaw: The crunch and tang of coleslaw create a nice contrast, enhancing the overall flavor experience with every bite.
-
French Fries: Golden, crispy fries are a classic choice, bringing a familiar and satisfying element to your comforting meal.
-
Au Jus: Don’t forget the warm, savory au jus for dipping—the ultimate accompaniment that enhances the flavors in each biscuit!
-
Sparkling Lemonade: For a refreshing drink, this zesty beverage brightens up the spread and adds a hint of fizz, making every meal feel special.
-
Chocolate Chip Cookies: To finish off, serve up some classic cookies that add a nostalgic touch and sweet ending to your homestyle meal.
How to Store and Freeze Baked French Dip Biscuits
Fridge: Store leftover Baked French Dip Biscuits in an airtight container for up to 3 days to keep them fresh. Reheat in the oven for best results.
Freezer: For long-term storage, wrap baked biscuits tightly in plastic wrap and then in aluminum foil. They’ll stay fresh for up to 2 months in the freezer.
Reheating: To reheat frozen biscuits, simply place them on a baking sheet and warm them in a preheated oven at 350°F (175°C) for about 15-20 minutes until heated through.
Avoid Moisture: To prevent sogginess after thawing, do not microwave these biscuits; oven reheating maintains their delightful flaky texture while enhancing the savory flavors inside.
Expert Tips for Baked French Dip Biscuits
- Seal Securely: Ensure that the biscuit edges are tightly pinched to prevent the filling from leaking during baking. A good seal is key for perfect Baked French Dip Biscuits!
- Dough Thickness: Roll the biscuit dough to an even thickness; inconsistent thickness can lead to uneven baking and texture. Aim for about 1/4 inch for best results.
- Cheese Placement: Place the cheese directly on the beef for better melting. This technique helps create that gooey consistency we all love!
- Preheat Well: Make sure your oven is fully preheated before baking. A hot oven will give you that golden-brown crust everyone desires.
- Serving Fresh: These biscuits are best served immediately after baking. However, if you need to prepare them ahead of time, consider refrigerating unbaked versions and increasing baking time accordingly.
- Experiment with Fillings: Don’t be afraid to customize your filling! Try different meats or cheese types to create a unique twist on the comforting Baked French Dip Biscuits.
Make Ahead Options
These Baked French Dip Biscuits are perfect for meal prep enthusiasts who need to save time during busy weeknights! You can prepare the biscuit dough and fill it with roast beef and cheese up to 24 hours in advance. Simply assemble the biscuits and place them on a baking sheet. Cover tightly with plastic wrap and refrigerate. When you’re ready to enjoy them, preheat your oven and bake for an additional 5 minutes if they are chilled. This ensures they bake thoroughly and stay just as delicious, allowing you the convenience of a scrumptious meal without the last-minute rush. Enjoy the ease of having a comforting, homemade dish ready to go!
Baked French Dip Biscuits Recipe FAQs
How do I choose the right roast beef for this recipe?
Choosing high-quality, thinly sliced roast beef is key for flavor. Look for cuts labeled “rare” or “medium rare” to ensure tenderness and juicy goodness, which work beautifully for your Baked French Dip Biscuits.
Can I store these biscuits in the fridge?
Absolutely! To keep your Baked French Dip Biscuits fresh, store them in an airtight container in the refrigerator for up to 3 days. When you’re ready to enjoy them again, reheat them in the oven to retain that lovely flaky texture.
What’s the best way to freeze Baked French Dip Biscuits?
To freeze your biscuits, wrap each baked biscuit tightly in plastic wrap, then wrap them in aluminum foil for extra protection. They’ll stay fresh in the freezer for up to 2 months. When you’re ready to enjoy, simply place them on a baking sheet and warm them in a preheated oven at 350°F (175°C) for about 15-20 minutes until heated through.
How can I prevent the filling from leaking during baking?
To ensure that your filling stays nestled inside, make sure to securely pinch or seal the edges of the biscuit dough when you fold them over. This creates a tight barrier, preventing any savory roast beef and cheese from escaping while baking!
Can I make these biscuits ahead of time?
Yes, you can prepare the biscuits in advance! Assemble the Baked French Dip Biscuits, then place them on a baking sheet and refrigerate. Just remember to increase the baking time by a few minutes when you’re ready to bake, as chilled biscuits may need some extra love to cook through properly.
Are there any dietary concerns I should be aware of?
Yes, if you have allergies or dietary restrictions, be sure to double-check the packaging of all ingredients. The biscuit dough and cheese might contain allergens like gluten or dairy. You can also use gluten-free biscuit dough or a dairy-free cheese alternative if you need to accommodate specific dietary needs for your family!

Baked French Dip Biscuits Recipe: Cozy Family Comfort Food
Ingredients
Equipment
Method
- Preheat your oven to 400°F (205°C). Gather your baking sheet and line it with parchment paper.
- Roll out the ready-made biscuit dough on a floured surface and cut into circular shapes of about 3 inches in diameter.
- Lay half of the biscuit circles on the prepared baking sheet, and place a slice of roast beef and cheese on each.
- Take the remaining biscuit circles and place them on top of the filled ones, pinching the edges to seal.
- Bake in the preheated oven for approximately 25 minutes, or until golden brown and puffed.
- Allow to cool slightly and serve warm with a bowl of au jus for dipping.
Leave a Reply