
You know that satisfying moment when you realize dessert can be both effortless and delicious? That’s exactly what I felt when I discovered these 4-Ingredient No-Bake Chocolate Oat Cookies. With just a handful of ingredients and zero baking required, they’re perfect for anyone looking to whip up a quick sweet treat without the fuss. Not only are they a crowd-pleaser, but they also make for a healthy snack packed with fiber and energy to keep you going throughout the day. Whether you’re craving a late-night indulgence or need a pick-me-up after a hectic day, these cookies have got your back. Don’t you just love that feeling when a simple recipe turns into something truly marvelous? Let’s dive into the details and get ready to create some unforgettable bites!
Why Are These Cookies So Irresistible?
Effortless Preparation: These no-bake cookies require just four ingredients and minimal effort, perfect for those busy days when you need a quick sweet fix.
Decadent Chocolate Flavor: The rich cocoa is not only delicious but creates a satisfying indulgence that chocolate lovers will adore.
Healthy Twist: Packed with fiber and protein from the oats and nut butter, these cookies serve as a guilt-free treat that keeps you energized.
Customizable Options: With easy variations like using gluten-free alternatives or swapping ingredients, you can cater to any dietary needs while keeping the taste phenomenal.
Crowd Favorite: Whether it’s for a family gathering or just a cozy night in, these cookies are always a hit, reminiscent of beloved snacks from childhood. Try them alongside our 30-Minute Prawn Rice for a delightful meal!
Chocolate Oat Cookie Ingredients
• Simple yet satisfying, let’s gather what you need!
For the Cookie Base
- Oats – Quick oats provide the ideal chewy texture and structure for these cookies.
- Nut Butter (Peanut/Almond) – Acts as a natural binder; substitute with sun butter for a nut-free option.
- Cocoa Powder – Use unsweetened cocoa for a rich chocolate flavor that doesn’t overwhelm the sweetness.
- Sweetener (Honey or Maple Syrup) – Adds the perfect touch of sweetness; try agave syrup for a vegan alternative.
Step‑by‑Step Instructions for 4-Ingredient No-Bake Chocolate Oat Cookies
Step 1: Combine Dry Ingredients
In a large mixing bowl, measure out your quick oats and unsweetened cocoa powder. Stir them together until they are evenly mixed and all the oats are coated in cocoa. This step sets a chocolaty foundation for your cookies, making it a vital part of the process. Use a whisk for this task to ensure a smooth blend.
Step 2: Add Nut Butter
Next, add your choice of nut butter—peanut, almond, or sunflower—to the oat and cocoa mixture. Mix thoroughly with a spatula or spoon until the nut butter is fully incorporated. The mixture should become thick and sticky, creating a cohesive base for your cookies. This step helps bind everything together, making it essential for the success of your Easter Rice Krispies Nests.
Step 3: Incorporate Sweetener
Drizzle in your honey or maple syrup to the combined ingredients in the bowl. Mix diligently until the sweetener is fully absorbed, creating a dough-like consistency. The mixture should be clumping together and not overly dry. This sweet element not only enhances the flavor but also helps hold your cookies together.
Step 4: Form Cookie Dough
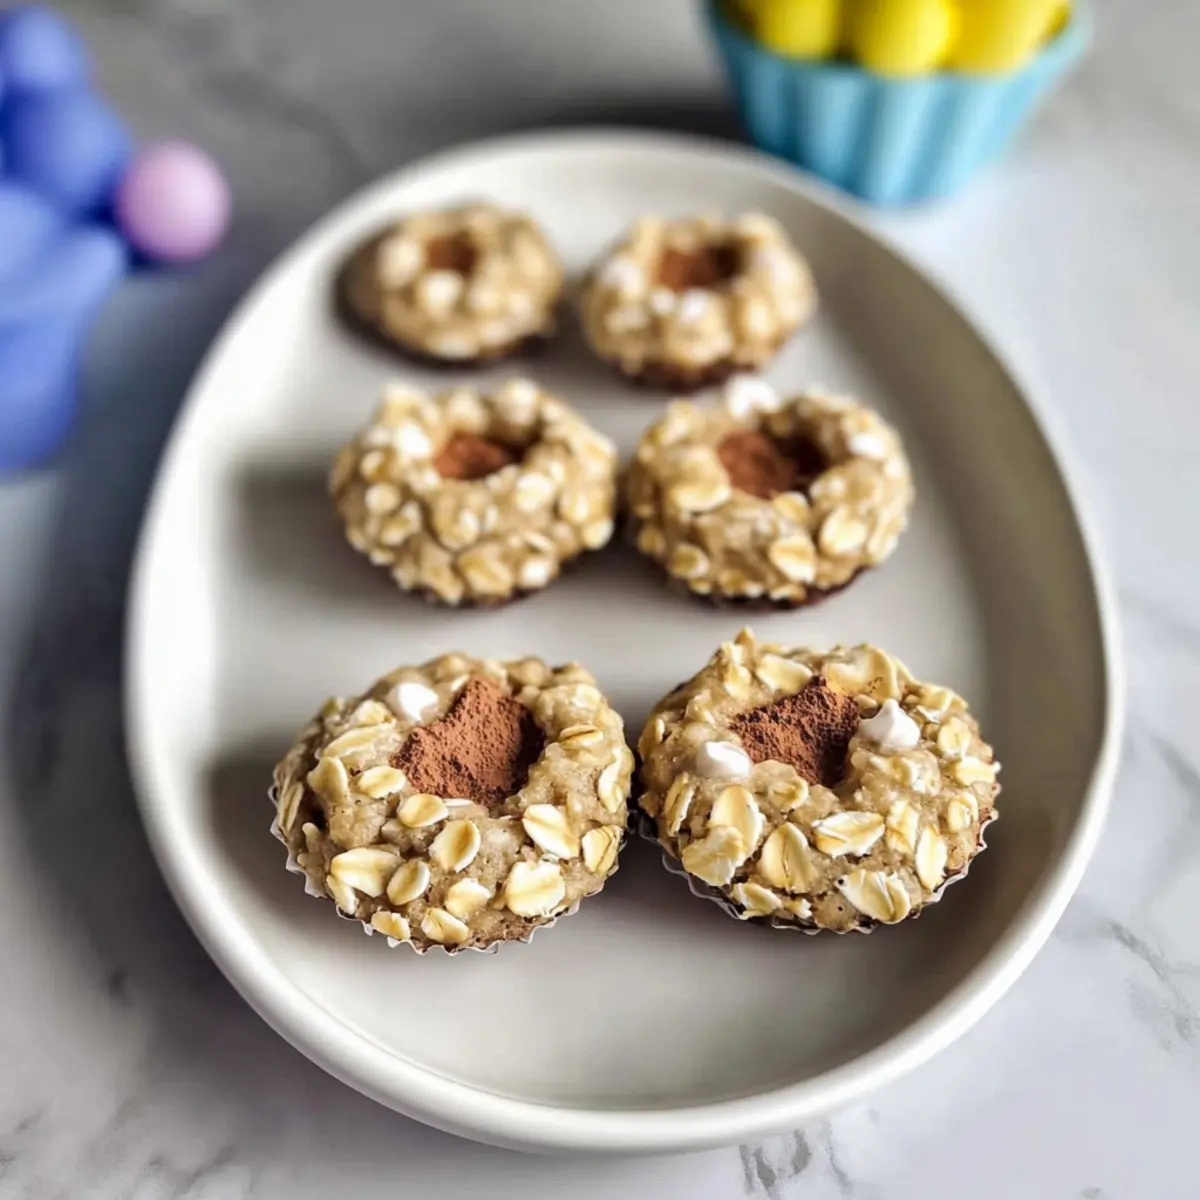
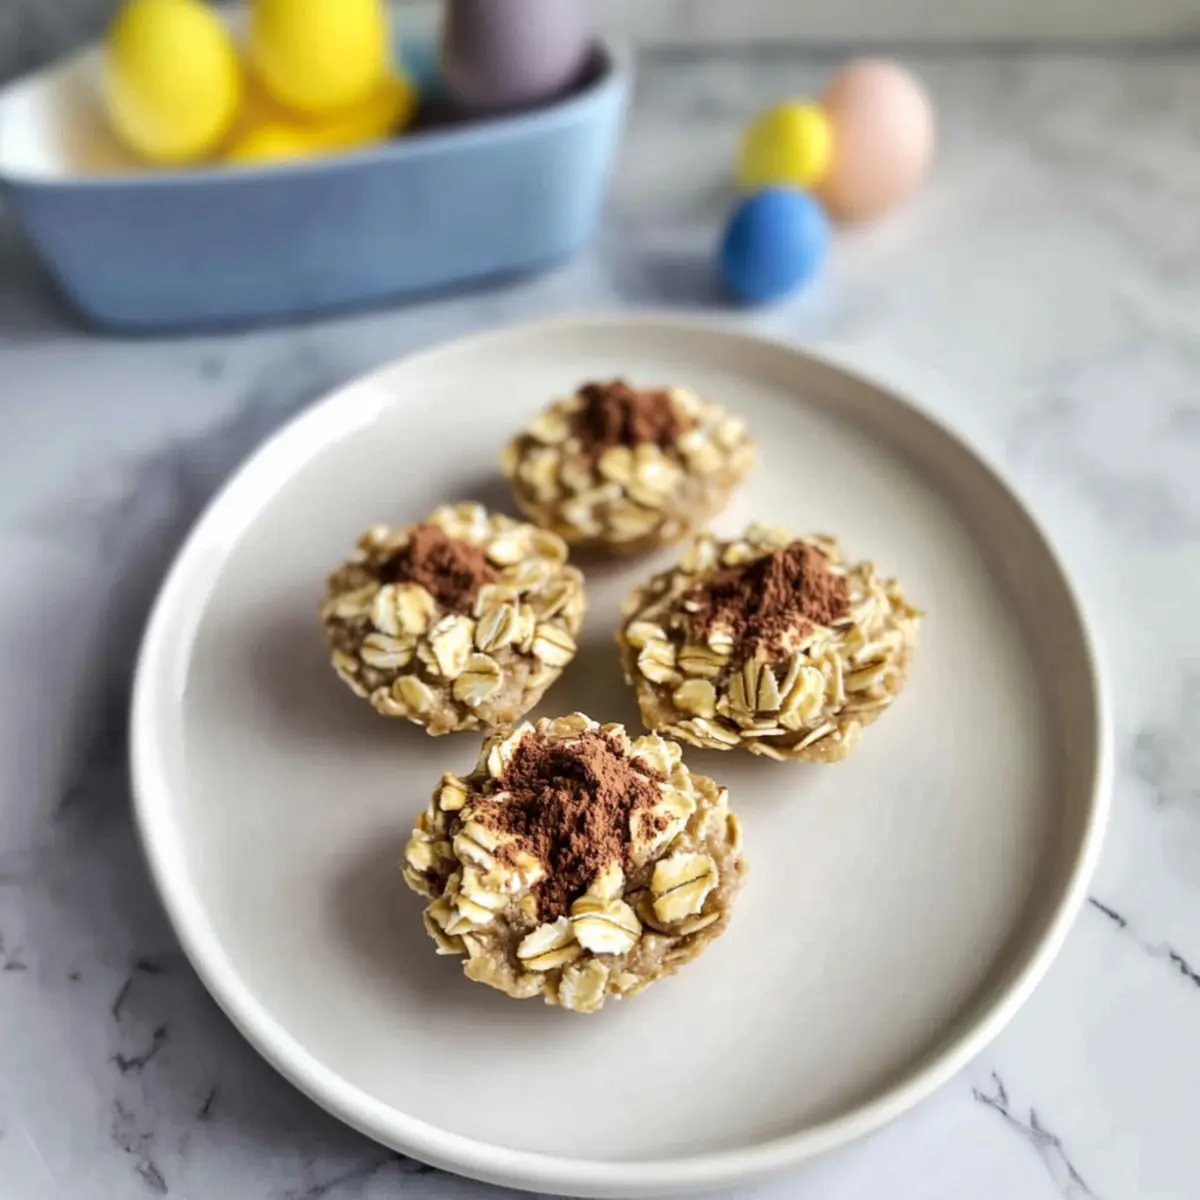
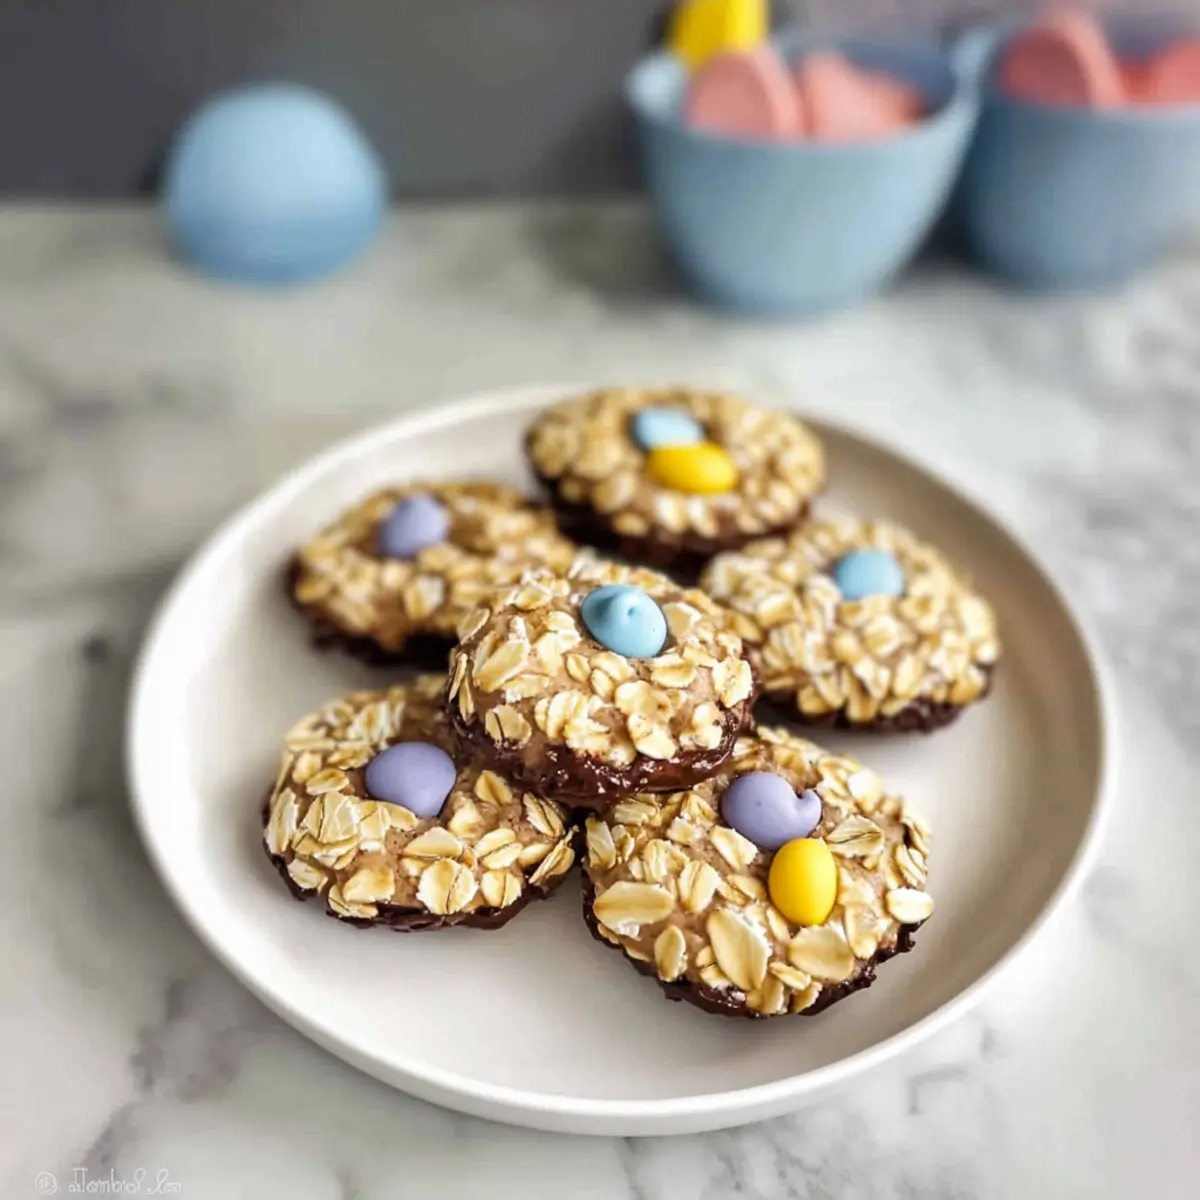
Scoop generous tablespoon-sized portions of the mixture and drop them onto a sheet of parchment paper. Use the back of your spoon or your fingers to flatten each mound slightly; this will help them hold their shape. The cookies should be uniform in size, giving them a neat appearance once they’re set, creating delightful Easter Rice Krispies Nests!
Step 5: Refrigerate to Set
Now, place your tray of formed cookies into the refrigerator for about 30 minutes. This cooling period allows the nut butter and sweetener to firm up, ensuring your no-bake chocolate oat cookies hold their shape. When they’re fully chilled, they will have a wonderful, chewy texture. Don’t skip this critical step; it’s key for the perfect finish.
Step 6: Serve and Enjoy
Once the cookies are set, remove them from the refrigerator and serve them on a pretty platter. These treats are best enjoyed cool, paired with a glass of milk or coffee. Their chewy texture and rich chocolatey flavor will make them a hit at your Easter gathering or any fun family occasion. Savor each bite of your homemade chocolate oat cookies!
How to Store and Freeze Chocolate Oat Cookies
Fridge: Store these delicious chocolate oat cookies in an airtight container in the refrigerator for up to one week, keeping them fresh and chewy.
Freezer: For longer storage, freeze the cookies for up to three months. Lay them flat on a baking sheet until frozen, then transfer to a freezer bag.
Reheating: To enjoy your cookies warm, thaw them in the fridge overnight and then microwave for just a few seconds to bring back their lovely texture.
Reminder: Always ensure the cookies are fully set before storing to maintain their delightful shape and taste, making your chocolate oat cookies an enjoyable treat anytime!
Make Ahead Options
These 4-Ingredient No-Bake Chocolate Oat Cookies are perfect for meal prep enthusiasts! You can prepare the cookie dough up to 24 hours in advance by combining the oats, cocoa powder, nut butter, and sweetener as directed. Store the mixture in an airtight container in the refrigerator to maintain freshness and prevent the ingredients from separating. When you’re ready to enjoy, simply scoop the dough, flatten it on parchment paper, and refrigerate for an additional 30 minutes to set. This way, you’ll have homemade treats ready at a moment’s notice, making snack time effortless and rewarding! Just imagine having your delicious cookies waiting for you after a long day!
What to Serve with 4-Ingredient No-Bake Chocolate Oat Cookies
Nothing brings out the joy of a sweet treat quite like knowing exactly how to complete your dessert experience!
-
Cold Milk: A classic pairing that balances the rich chocolate flavor, adding a refreshing touch to each bite.
-
Creamy Yogurt: Smooth and tangy, yogurt complements the cookies beautifully and makes for a satisfying snack-time duo. Pair with fruit for a burst of freshness!
-
Fresh Berries: Juicy strawberries or raspberries cut through the sweetness, providing a delightful contrast and a splash of color on your plate. Their vibrant taste elevates the whole experience.
-
Nutty Granola: For an added crunch, serve the cookies alongside a bowl of your favorite granola. The chewy cookies and crunchy granola together create an irresistible texture combination.
-
Dark Chocolate Drizzle: Drizzling some melted dark chocolate over your cookies enhances their richness, while adding an extra decadent flair that chocolate lovers will adore. This is truly a dessert to savor!
-
Hazelnut Coffee: The nutty undertones of hazelnut coffee create a warm and inviting pairing, perfect for a cozy afternoon treat shared with friends.
-
Ice Cream: Your favorite vanilla or chocolate flavor brings an indulgent creaminess to the cookies; a scoop on the side elevates them to an unforgettable dessert experience.
-
Chopped Nuts: Add some roasted almonds or pecans for a delightful crunch. Their nutty flavor melds perfectly with the cookies’ chewy texture.
-
Fruit Sorbet: A refreshing sorbet adds a light and fruity contrast to the rich cookies, making it a refreshing way to enjoy your treats, especially on a warm day.
Expert Tips for 4-Ingredient No-Bake Chocolate Oat Cookies
-
Measure Accurately: Ensure you measure your oats and cocoa powder precisely. Too much cocoa can make the cookies overly dry, while too little will affect their chocolate flavor.
-
Mix Well: It’s crucial to mix the nut butter thoroughly with the oats and cocoa. This will prevent dry pockets in your cookies and ensure a cohesive texture.
-
Chill Properly: Don’t skip the refrigeration step! Allowing the cookies to firm up for at least 30 minutes is essential for achieving the right chewy texture, especially for those no-bake chocolate oat cookies.
-
Customize Wisely: Experiment with mix-ins like dark chocolate chips, dried fruits, or nuts. Just remember that adding extra ingredients may require slight adjustments in the binding agents.
-
Storage Secrets: Keep the cookies fresh by storing them in an airtight container in the refrigerator. They can last up to a week, but they’re so delicious, they probably won’t last that long!
Variations & Substitutions for Chocolate Oat Cookies
Feel free to experiment and make this recipe your own, adding your personal touch to each delicious bite!
-
Gluten-Free: Use certified gluten-free oats to ensure everyone can enjoy these tasty cookies.
-
Nut-Free: Substitute nut butter with sunflower seed butter for a nut-free alternative that’s just as tasty. Your cookies will still be rich and delightful.
-
Vegan Option: Opt for agave syrup in place of honey and use coconut or sunflower seed butter. This way, everyone can indulge guilt-free.
-
Flavor Boost: Mix in a dash of vanilla extract or a sprinkle of cinnamon to enhance the cookie’s taste profile beautifully.
-
Textural Variation: Fold in some dark chocolate chips or chopped nuts like pecans for extra crunch and a delightful mix of textures. This adds luxury to the ooey-gooey goodness.
-
Dried Fruit Addition: Toss in some dried cranberries or raisins for a chewy, fruity twist that perfectly complements the chocolate.
-
Coconut Delight: Add shredded unsweetened coconut to the dough for a sweet tropical flair. It’s like a mini-vacation with every bite!
If you’re looking for even more delicious rice-based recipes, why not try our 30-Minute Prawn Rice or indulge in some savory bites with Savor Flavor Rice? Your taste buds will thank you!

4-Ingredient No-Bake Chocolate Oat Cookies Recipe FAQs
How do I choose the right oats for this recipe?
Absolutely! Quick oats are the best option for these no-bake chocolate oat cookies, as they provide a softer, chewier texture. If you only have old-fashioned oats, you can pulse them in a blender for a finer consistency, which will help replicate the chewiness.
How should I store the chocolate oat cookies?
To keep your cookies fresh and chewy, store them in an airtight container in the refrigerator for up to one week. I often use a sealed glass container, which helps maintain their texture and flavor nicely.
Can I freeze these cookies?
Yes! You can freeze the cookies for up to three months. First, lay them flat on a baking sheet lined with parchment paper until they are frozen solid. Then, transfer them to a freezer bag or an airtight container, separating layers with parchment paper to prevent sticking. This way, you can enjoy a sweet treat any time you want!
What if my mixture is too dry?
If you find that your chocolate oat cookie mixture is too dry, this can happen if there’s too much oat or cocoa powder compared to the wet ingredients. Simply add a tiny bit more nut butter or sweetener to moisten the mixture until it binds together nicely. Mixing it thoroughly should solve your issue, creating the perfect dough consistency.
Are these cookies safe for people with nut allergies?
Certainly! To create nut-free no-bake chocolate oat cookies, you can substitute nut butter with sun butter or even a seed butter like pumpkin seed butter. This ensures everyone can enjoy the cookies without worrying about allergies, while still keeping them delicious and satisfying.
Easy Easter Rice Krispies Nests for Fun Family Treats
Ingredients
Equipment
Method
- Combine the quick oats and cocoa powder in a mixing bowl and stir until well mixed.
- Add your choice of nut butter to the bowl and mix thoroughly until fully combined.
- Drizzle in honey or maple syrup and mix until the mixture has a dough-like consistency.
- Scoop tablespoon-sized portions onto parchment paper and flatten each mound slightly.
- Refrigerate for about 30 minutes to allow cookies to firm up.
- Remove from the refrigerator and serve on a platter.
Leave a Reply