
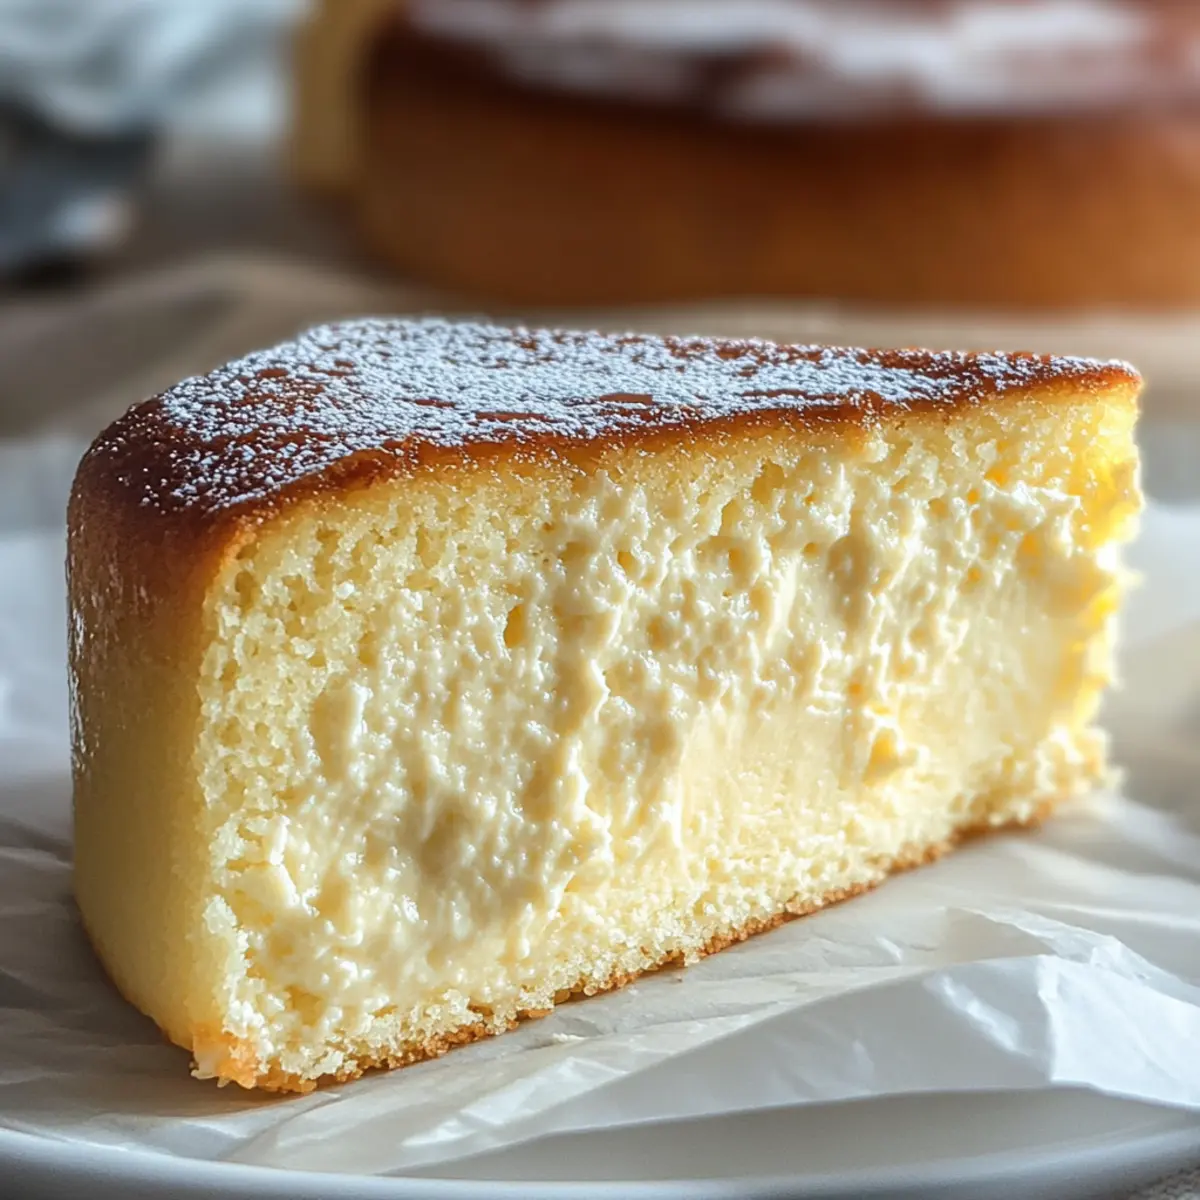
As I flipped through my recipe journal, I stumbled upon a gem: the 3 Ingredient Creamy Yogurt Cake. This delightful dessert offers an effortless way to indulge your sweet tooth without the fuss. Made with just three ingredients—Greek yogurt, eggs, and cornstarch—it’s not only quick to prepare but also gluten-free and vegetarian-friendly, making it a versatile addition to any home baker’s repertoire. Whether you’re craving a light afternoon treat or a subtle finish to your dinner party, this cake delivers a soft, cloudlike texture that melts beautifully in your mouth. Interested in jazzing it up? You can swap in flavored yogurts to create variations that will surprise your taste buds. What kind of twist will you give this dreamy dessert?
Why is this cake so special?
Simplicity at its finest: With only three ingredients, anyone can whip this up in no time, making it perfect for both novice and experienced bakers.
Marvelous texture: The cake achieves a unique combination of fluffy and creamy, reminiscent of a delicate soufflé.
Flavor customization: Substitute Greek yogurt with your favorite flavors, like lemon or strawberry, to personalize each bite, just like you can with my incredibly popular Milkshake Pound Cake.
Great for any occasion: It’s light enough for a casual snack yet elegant enough for a dinner party, standing out amongst more traditional desserts.
Easy to prepare in advance: Make ahead and store in the fridge for a ready-to-serve treat, just like my favorite Brazilian Carrot Cake.
3 Ingredient Creamy Yogurt Cake Ingredients
• Ready to create this delectable dessert? Let’s gather the essentials!
For the Cake Base
- Nonfat Vanilla Greek Yogurt – This ingredient lends creaminess and a slight tang, critical for achieving the cake’s unique texture. You can substitute with full-fat or flavored yogurt for a richer taste.
- Large Eggs – Binding everything together, these contribute to the cake’s fluffiness; whisk them until pale for the best results.
- Cornstarch – Essential for providing structure and a smooth body to the cake; potato starch can be a good substitute if necessary.
Feel the excitement building? Get ready to whip up the lightest, creamiest 3 Ingredient Creamy Yogurt Cake!
Step‑by‑Step Instructions for 3 Ingredient Creamy Yogurt Cake
Step 1: Preheat the Oven
Begin by preheating your oven to 177°C (350°F). If you’re using an air fryer, set it to 160°C (320°F). This initial step is crucial for achieving a perfectly baked 3 Ingredient Creamy Yogurt Cake. As the oven heats, gather your tools: a 15 cm round cake pan, cooking spray, and parchment paper.
Step 2: Prepare the Cake Pan
Next, grease the bottom and sides of your cake pan with cooking spray to prevent sticking. Line the bottom with parchment paper for an extra layer of protection. This preparation ensures your cake will release easily after baking, giving you a beautiful result to show off.
Step 3: Mix Yogurt and Eggs
In a large mixing bowl, combine your nonfat vanilla Greek yogurt and large eggs. Whisk them together until the mixture is completely smooth and creamy, taking about 2–3 minutes. The eggs should appear pale and well-blended, creating a luscious base for your creamy yogurt cake.
Step 4: Add Cornstarch
Now, gradually sprinkle in the cornstarch while continuously whisking. Keep mixing until the batter is lump-free and has a thick, velvety consistency. This step is key to achieving the right texture in your 3 Ingredient Creamy Yogurt Cake, so take your time to ensure everything is fully integrated.
Step 5: Pour Batter into the Pan
Carefully pour the batter into the prepared cake pan. Use a spatula to smooth the surface, ensuring it’s even all around. This will help your cake bake uniformly, yielding a delightful, golden top that’s characteristic of a well-made yogurt cake.
Step 6: Bake the Cake
Place the cake in the preheated oven and bake for 70–75 minutes, or 20–23 minutes in the air fryer. The cake should puff up and turn golden on top. Keep an eye on it towards the end; a toothpick inserted in the center should come out clean when it’s perfectly baked.
Step 7: Cool the Cake
Once baked, remove the 3 Ingredient Creamy Yogurt Cake from the oven and let it cool in the pan for at least 30 minutes. This cooling period allows it to set before you transfer it, ensuring that it maintains its lovely shape and texture.
Step 8: Chill in the Refrigerator
For optimal flavor and texture, refrigerate the cooled cake for up to 2 hours, or ideally overnight. This chilling process enhances the creamy consistency and helps the cake achieve its signature melt-in-your-mouth quality.
Step 9: Serve at Room Temperature
Before serving, take the cake out of the refrigerator and let it come to room temperature for 15–30 minutes. This step brings out the flavors beautifully and allows the cake to maintain its soft, creamy texture, ready to impress your guests with every bite.
3 Ingredient Creamy Yogurt Cake Variations
Feel free to explore these fun and delightful twists to make your yogurt cake even more enjoyable!
- Full-Fat Yogurt: Swap nonfat Greek yogurt for full-fat for a richer texture that’s ultra creamy.
- Fruit-Flavored Yogurt: Use strawberry, raspberry, or peach yogurt to infuse delicious fruitiness throughout. Each flavor offers a new experience!
- Citrus Zest: Add lemon or orange zest to the batter for a refreshing burst of brightness, enhancing the cake’s flavor beautifully.
- Spices: Incorporate a pinch of cinnamon or nutmeg for a warm, aromatic touch that pairs wonderfully with the cake’s creaminess.
- Coconut Milk Yogurt: For a tropical twist, substitute Greek yogurt with coconut milk yogurt, creating a truly unique flavor profile.
- Chocolate Drizzle: Top your cooled cake with a drizzle of melted dark chocolate for an indulgent, decadent finish. This pairs perfectly with the cake’s creamy base!
- Nutty Topping: Add chopped nuts or nut butter on top for added crunch and a nutritious boost. It contrasts beautifully with the soft texture of the cake.
- Refreshing Mint: Serve with fresh mint leaves on top or mixed into the yogurt for a refreshing touch that elevates the cake’s flavor.
These variations can take your 3 Ingredient Creamy Yogurt Cake to new heights, just like indulging in my delightful Cream Japanese Cake or enjoying a slice of Japanese Strawberry Cake. Happy baking!
How to Store and Freeze 3 Ingredient Creamy Yogurt Cake
Refrigerator: Keep the cake in an airtight container for up to 3 days to maintain its moist texture and flavor.
Freezer: Slice the cake and wrap each piece tightly in plastic wrap before placing in a freezer-safe bag. It can be frozen for up to 2 months.
Thawing: To enjoy frozen slices, transfer them to the refrigerator overnight to thaw, allowing the cake to retain its creamy consistency.
Reheating: If desired, reheat individual slices in the microwave for 10-15 seconds for a warm treat!
What to Serve with 3 Ingredient Creamy Yogurt Cake
Elevate your dessert experience with pairing options that enhance this soft, cloudlike cake and create a delightful meal.
- Fresh Berries: Bursting with color and flavor, berries like strawberries and blueberries add a juicy contrast that brightens each bite.
- Honey Drizzle: A warm drizzle of honey enhances the cake’s sweetness, bringing out its creamy tang for a decadent finish.
- Whipped Cream: Light and airy whipped cream creates a rich layer that adds indulgence, perfect for those who love a touch of luxury.
- Chocolate Sauce: Drizzling melted chocolate over the cake introduces a luscious depth, making each slice feel even more special.
- Citrus Zest: Grated lemon or orange zest sprinkled on top adds a refreshing zing that balances the cake’s richness and elevates the flavor.
- Spiced Chai Latte: Pair with a cozy cup of spiced chai for a warm and inviting complement, enhancing the cake’s flavors beautifully.
- Ice Cream: A scoop of vanilla or matcha ice cream pairs wonderfully, adding a creamy, cold element to the soft cake.
- Mint Tea: A soothing mint tea refreshes the palate, making it an ideal companion for this rich yet light dessert.
- Candied Nuts: Crunchy, sweet-salty candied nuts provide a delightful textural contrast and nutty flavor that pairs well with the silky cake.
Expert Tips for 3 Ingredient Creamy Yogurt Cake
-
Chill for Flavor: Allow your cake to sit in the fridge for at least 2 hours, or overnight, to enhance the creamy texture and overall flavor.
-
Whisk Gently: Be careful not to over-mix the batter once you add cornstarch; gently incorporate until just smooth for a light finish.
-
Yogurt Variations: Experiment with flavored yogurts like lemon or berry, to add a delightful twist to your 3 Ingredient Creamy Yogurt Cake.
-
Check for Doneness: Insert a toothpick in the center; if it comes out clean, your cake is perfectly baked. Avoid opening the oven door too often to prevent collapsing.
-
Room Temperature Serving: Let your cake warm to room temperature before serving. This allows all its delightful flavors to shine through beautifully.
Make Ahead Options
These 3 Ingredient Creamy Yogurt Cakes are perfect for meal prep enthusiasts! You can mix the Greek yogurt, eggs, and cornstarch up to 24 hours in advance, ensuring that your ingredients are ready when you are. Simply prepare the batter as directed and pour it into the greased cake pan. Cover it with plastic wrap and refrigerate until ready to bake. When you’re ready to enjoy this delightful cake, preheat your oven and follow the baking instructions; it will taste just as creamy and delicious. Don’t forget to chill the cake for up to 2 hours or ideally overnight after baking—this step helps lock in the flavors and achieve that luxurious texture!
3 Ingredient Creamy Yogurt Cake Recipe FAQs
What type of yogurt is best for the cake?
Absolutely! Nonfat vanilla Greek yogurt is recommended for its creaminess and tangy flavor, which creates the perfect texture. However, you can certainly switch things up with full-fat or even flavored yogurts like lemon or strawberry to suit your taste!
How should I store the cake after baking?
To keep your delicious 3 Ingredient Creamy Yogurt Cake fresh, store it in an airtight container in the refrigerator for up to 3 days. This ensures it maintains its wonderful texture and flavor.
Can I freeze the yogurt cake?
Of course! To freeze, slice the cake into pieces and wrap each piece tightly in plastic wrap. Place them in a freezer-safe bag to prevent freezer burn, and it will keep well for up to 2 months. When you’re ready to enjoy a slice, simply transfer it to the refrigerator to thaw overnight.
What do I do if the cake sinks in the middle?
If your cake sinks, it may have been overmixed or removed from the oven too soon. To prevent this, make sure to gently incorporate the ingredients without over-whisking once you add the cornstarch, and always perform the toothpick test to check for doneness!
Is this cake suitable for people with allergies?
Yes! The 3 Ingredient Creamy Yogurt Cake is gluten-free and vegetarian-friendly. However, if you’re serving anyone with egg allergies, consider using a suitable egg substitute, like a flaxseed mixture or applesauce, to get similar binding and moisture. Just remember that this may alter the cake’s final texture slightly!
How long should I chill the cake before serving?
I recommend refrigerating your cake for at least 2 hours, but for the best taste and texture, letting it chill overnight is ideal. This cooling time allows the cake to set properly and enhances its creamy consistency, making each bite a delightful experience.
3 Ingredient Creamy Yogurt Cake: Effortless Deliciousness Awaits
Ingredients
Equipment
Method
- Preheat your oven to 177°C (350°F) or 160°C (320°F) for air fryer.
- Grease the cake pan with cooking spray and line with parchment paper.
- Combine yogurt and eggs in a bowl, whisk until smooth and creamy.
- Gradually add cornstarch while whisking until lump-free.
- Pour batter into the prepared cake pan and smooth the surface.
- Bake for 70–75 minutes (20–23 minutes in air fryer) until golden.
- Let the cake cool in the pan for at least 30 minutes.
- Refrigerate the cooled cake for up to 2 hours, preferably overnight.
- Let the cake sit at room temperature for 15–30 minutes before serving.
Leave a Reply