
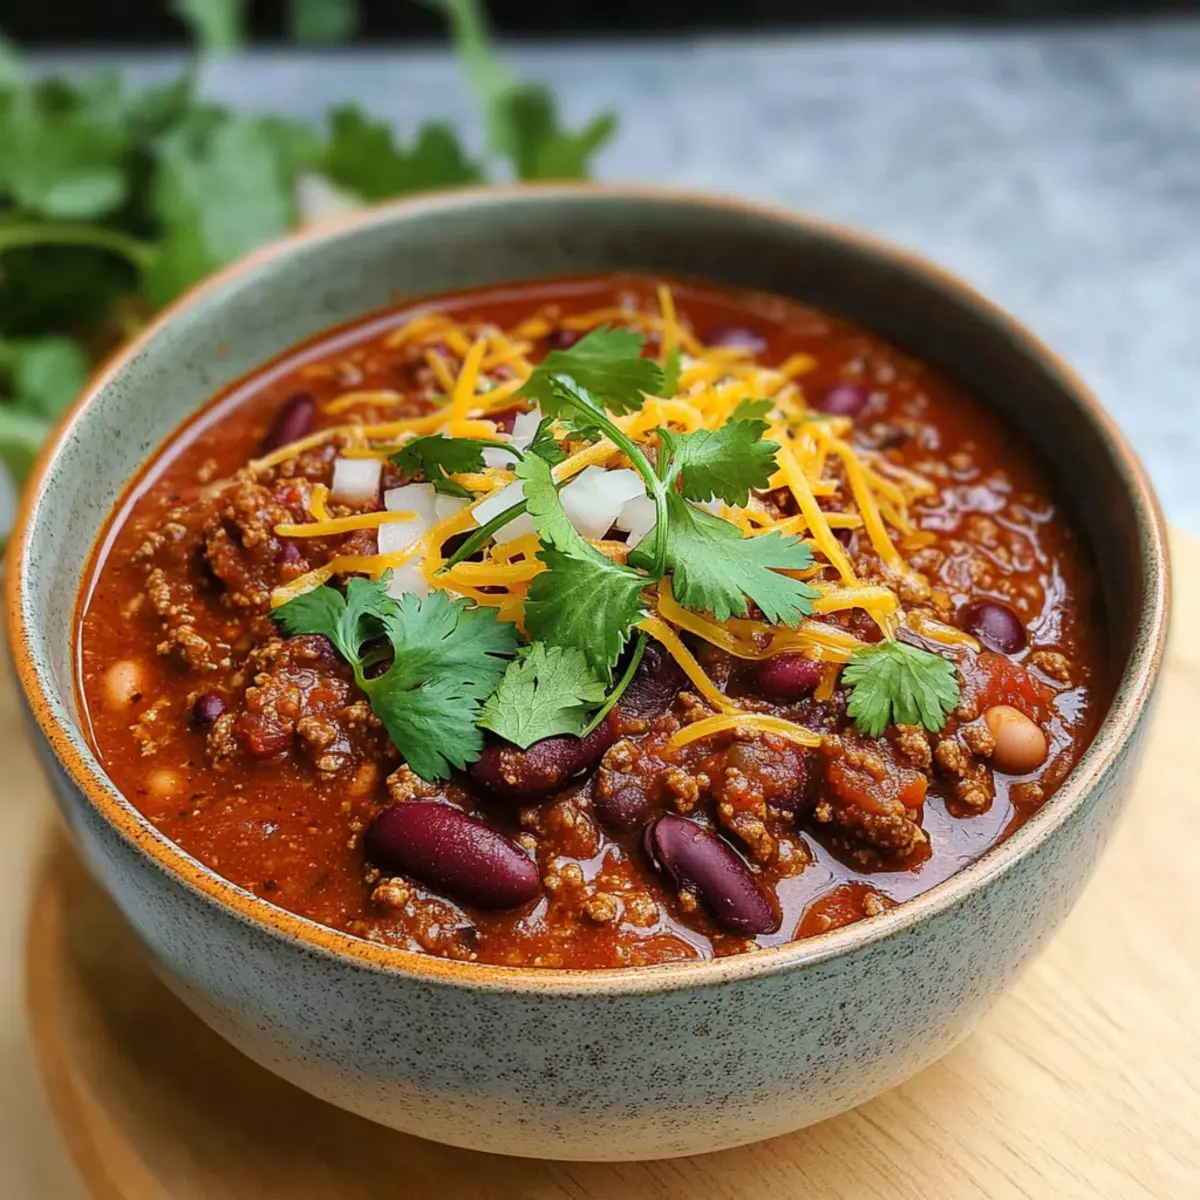
Imagine the scent of simmering spices wafting through your kitchen, evoking warmth and comfort that only a hearty meal can provide. That’s exactly what you’ll get with my recipe for The Best Ever Homemade Chili. This dish marries ground beef and beans, bringing together a satisfying medley of flavors that’s perfect for chilly nights, game day gatherings, or cozy potlucks. With minimal prep time and the ability to customize with your favorite toppings, it’s an easy, protein-rich meal that your family will adore. Plus, it’s packed with fiber, making it a nutritious option that balances flavor and wellness. Are you ready to create a bowl of chili that feels like a warm hug? Let’s dive into this delicious journey together!

Why is this chili recipe a must-try?
Hearty Comfort: This homemade chili delivers a warm, cozy experience perfect for any occasion.
Customizable Delight: Mix and match toppings like cheese, sour cream, and avocado for a personalized bowl of goodness.
Protein Powerhouse: Loaded with beef and beans, it’s a satisfying option that packs a protein-rich punch.
Quick Prep: With just a few simple steps, dinner is on the table in no time, making it a great choice for busy weeknights.
Family-Friendly Favorites: Kids and adults alike will adore this dish, creating a comforting family meal everyone will remember. Want to spice things up? Check out our Chicken Sandwich Homemade for more flavor inspiration!
The Best Ever Homemade Chili Ingredients
• Make sure to gather these delicious components to create a cozy chili experience!
For the Chili Base
- Ground Beef – Provides protein and a hearty texture; consider using lean ground turkey or chicken for a lighter option.
- Onion – Adds sweetness and depth; use a large white or yellow onion for the best results.
- Garlic – Enhances flavor with a rich aroma; fresh garlic (4 cloves) is highly recommended.
- Vegetable Oil – Essential for sautéing; any neutral cooking oil will work.
- Dried Oregano – Infuses earthy flavor; Mexican oregano gives a wonderful traditional touch.
For the Beans
- Red Kidney Beans – A fantastic source of protein and fiber; use 2 cans, drained and rinsed.
- Black Beans – Add complementary flavor and texture; you can substitute with pinto or cannellini beans (1 can required).
For the Sauces
- Chopped Tomatoes – Provide moisture and acidity; you can use fresh or canned for added depth.
- Tomato Sauce – Contributes to the chili’s richness (15 oz); it’s key for thickness.
- Tomato Paste – Concentrates flavor and thickens the chili (2 Tbsp); make sure to mix it well.
For the Heat
- Green Chili Pepper – Brings a mild heat; use a medium fresh chili or a can of diced green chilies for convenience.
- Chili Seasoning – This is where the magic happens; a homemade mix (4 Tbsp) is recommended for the best flavor.
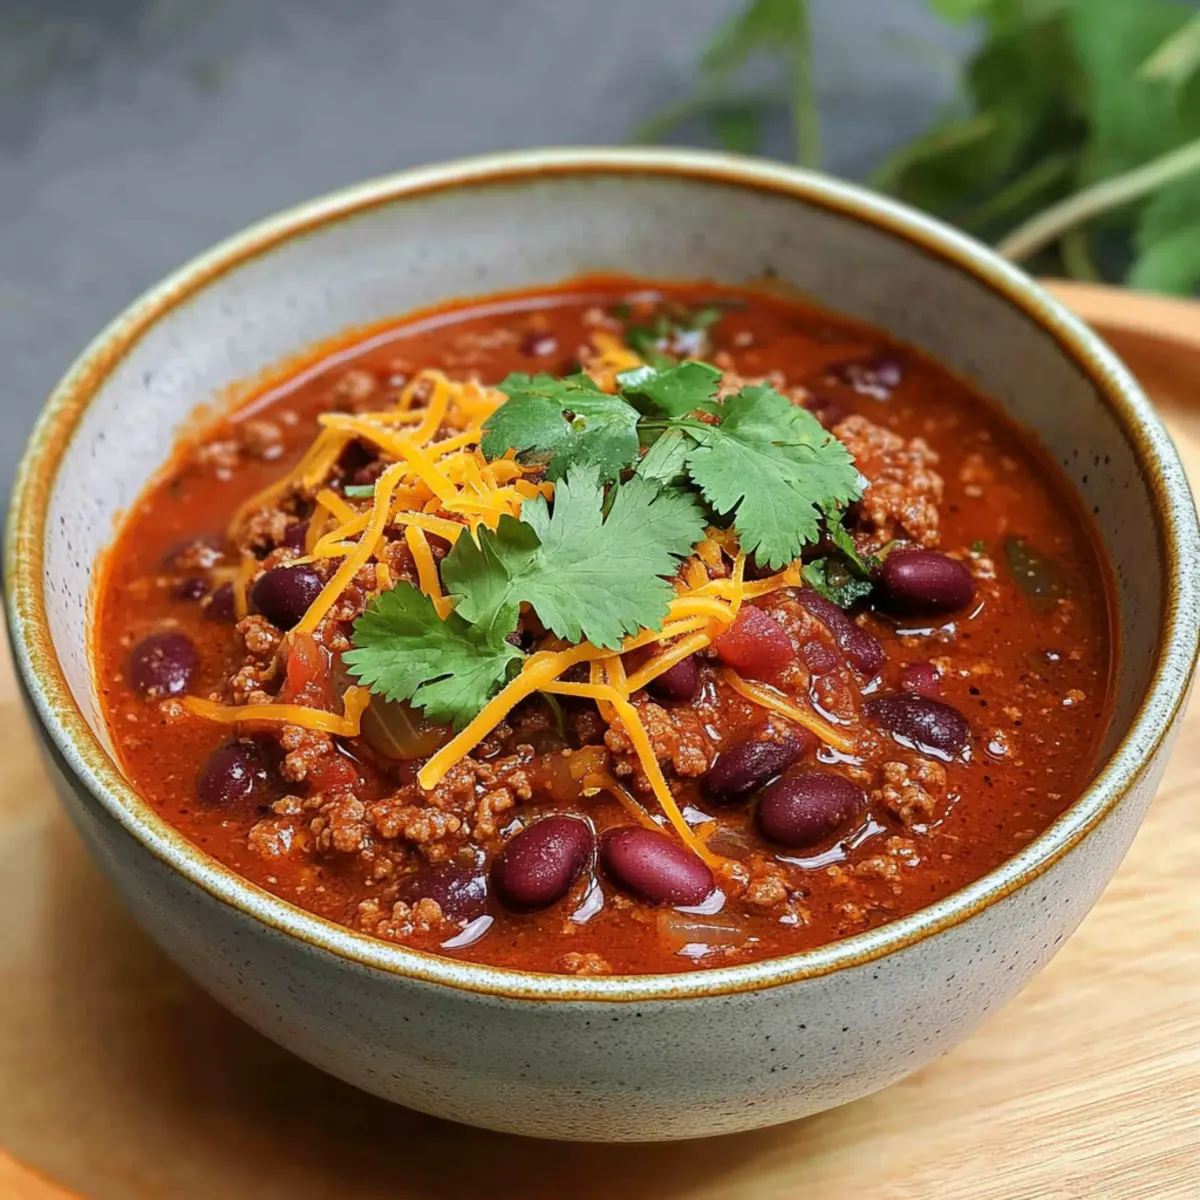
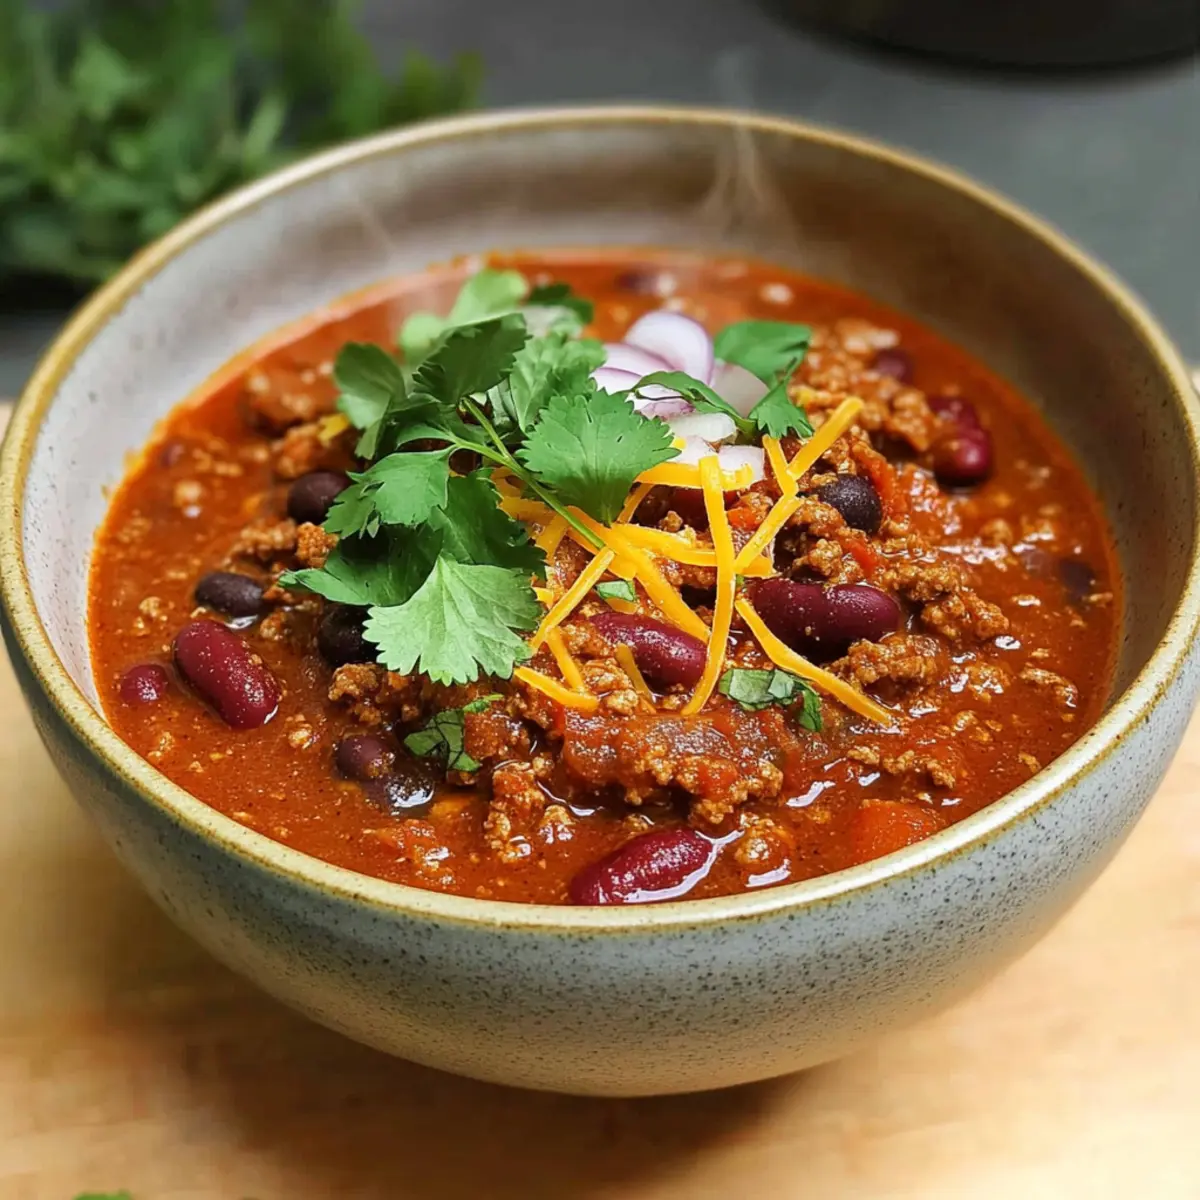
With these ingredients, you’ll create The Best Ever Homemade Chili that will warm hearts and satisfy appetites!
Step‑by‑Step Instructions for The Best Ever Homemade Chili
Step 1: Prepare Your Ingredients
Start by finely dicing one large onion and chopping two medium-sized tomatoes. Mince four cloves of fresh garlic and slice a medium green chili pepper. If you’re using canned beans, drain and rinse two cans of red kidney beans and one can of black beans to remove excess salt. This preparation sets a strong foundation for the delicious flavors in The Best Ever Homemade Chili.
Step 2: Sauté Aromatics
In a large skillet or Dutch oven, heat two tablespoons of vegetable oil over medium-high heat. Once hot, add the diced onion, minced garlic, and sliced green chili. Sauté these aromatic ingredients for about 2 minutes, stirring occasionally, until the onions are translucent and fragrant, creating a flavorful base for your chili.
Step 3: Cook the Ground Beef
Add one pound of ground beef to the skillet, breaking it into crumbles with a wooden spatula. Cook for 4-5 minutes, stirring frequently, until the beef is browned and fully cooked. Ensure it’s no longer pink and any excess fat is drained. This browning not only enhances flavor but is essential for The Best Ever Homemade Chili.
Step 4: Add the Seasonings
Stir in 4 tablespoons of chili seasoning and 1 tablespoon of dried oregano. Continue to sauté for about 1 minute, allowing the spices to bloom and release their aromatic oils. This step is crucial for developing the robust flavor that characterizes The Best Ever Homemade Chili, so don’t rush it!
Step 5: Incorporate Tomatoes and Sauce
Add 1 can of chopped tomatoes, 2 tablespoons of tomato paste, and 15 oz of tomato sauce to the skillet. Stir well to combine, ensuring everything is well-coated with the rich tomato mixture. Cover the skillet and let the chili simmer gently for about 20 minutes, allowing all the flavors to meld together beautifully.
Step 6: Stir in the Beans
After 20 minutes, uncover the skillet and fold in the drained red kidney beans and black beans. Allow the mixture to simmer uncovered for an additional 30 minutes, stirring occasionally. This simmering time enhances The Best Ever Homemade Chili’s thick texture and deepens the rich flavors, enabling all the ingredients to harmonize.
Step 7: Adjust Consistency and Flavor
As the chili simmers, check the consistency. If it’s too thick, stir in a splash of broth or water to achieve your desired thickness. Taste and adjust the seasoning if necessary, adding a pinch of salt or more chili seasoning to fit your personal preference. This step will ensure your chili is truly the best ever!
Step 8: Let Rest Before Serving
Once cooked to perfection, remove the skillet from the heat and let The Best Ever Homemade Chili rest for 5-10 minutes. This resting time allows flavors to settle and intensify. Prepare your favorite toppings while you wait, such as cheese, sour cream, or avocado, for that personalized touch.
The Best Ever Homemade Chili Variations
Feel free to explore these delicious twists to create your very own version of this comforting chili!
- Meat-Free: Swap ground beef for lentils or textured vegetable protein for a hearty vegan option. It’s loaded with fiber and flavor!
- Spicy Kick: Add diced jalapeños or a scoop of sriracha to turn up the heat. Each bite builds excitement and warms you from the inside out.
- Creamy Addition: Stir in a dollop of cream cheese or sour cream at the end for a rich, creamy finish. This touch adds a delightful contrast to the spices.
- Vegetable Boost: Mix in diced bell peppers, zucchini, or even corn for added texture and nutrients. It’s a great way to sneak in more veggies!
- Smoky Notes: Incorporate a splash of smoked paprika or chipotle in adobo for an intriguing depth of flavor. This addition transforms each spoonful into a smoky delight!
- Sweet and Savory: Toss in a tablespoon of brown sugar or maple syrup to balance the spice with a hint of sweetness. It’s a surprisingly wonderful touch.
- Herb Infusion: Fresh cilantro or parsley added just before serving brightens up the dish with fresh flavor. A burst of freshness elevates each bowl beautifully!
- Creamy Cheese: Top with shredded cheese or queso fresco after the chili is served. Melting cheese over the warm chili creates a deliciously gooey experience.
Want to round out your meal? Serve your chili with a slice of warm cornbread or over crispy nachos for a delightful crunch. You could also try it as a topping for baked potatoes, just as with our Savor Flavor Rice to create a fun food adventure. Dive into your kitchen and let your creativity shine!
How to Store and Freeze The Best Ever Homemade Chili
Fridge: Store leftover chili in an airtight container for up to 3-4 days. Let it cool completely before sealing to maintain freshness and prevent condensation.
Freezer: You can freeze The Best Ever Homemade Chili for up to 3 months. Be sure to use a freezer-safe container, leaving some space for expansion as it freezes.
Reheating: Thaw overnight in the fridge before reheating. Warm on the stovetop over medium heat, stirring occasionally, or use a microwave, stirring every minute until heated through.
Airtight Tip: For optimal freshness, consider dividing portions into smaller containers to allow for easy reheating and reduce waste.
Expert Tips for The Best Ever Homemade Chili
• Fresh Ingredients Matter: Always use high-quality, fresh ingredients, especially the ground beef and spices, for a more flavorful chili experience.
• Brown the Meat Well: Take the time to adequately brown the ground beef before adding liquids. This enhances the depth of flavor significantly in The Best Ever Homemade Chili.
• Adjust Consistency: If your chili thickens too much during cooking, don’t hesitate to add a splash of broth or water to achieve your desired consistency.
• Taste Test Before Serving: Before serving, always taste your chili and adjust seasoning as necessary. This step ensures the flavors are perfectly balanced, making it the best ever!
• Customize Wisely: Feel free to mix in your favorite vegetables or heat levels. Adding too many ingredients at once can dilute the solid chili flavors; sprinkle in toppings gradually for balance.
• Let it Rest: Allow your chili to sit for 5-10 minutes post-cooking. This resting period lets the flavors meld beautifully, ensuring The Best Ever Homemade Chili is as delicious as possible!
Make Ahead Options
These make-ahead strategies for The Best Ever Homemade Chili will save you precious time on busy weeknights! You can chop the onions, garlic, and green chili up to 24 hours in advance, storing them in an airtight container in the refrigerator to maintain freshness. Additionally, consider browning the ground beef and mixing in the spices ahead of time—this can be done up to 3 days before, and just keep it in the fridge until you’re ready to cook. When you’re set to serve, simply add your prepared ingredients into your pot with the tomatoes and beans, simmer for about 30 minutes, and enjoy a delicious, comforting meal that’s just as flavorful as when made fresh!
What to Serve with The Best Ever Homemade Chili
Cozy up to a complete meal experience that delights the senses and warms the heart.
-
Cornbread: A classic pairing, the slightly sweet, fluffy texture complements the spicy chili beautifully, perfect for soaking up every last drop.
-
Cool Sour Cream: Balance the heat of the chili with a dollop of creamy sour cream that adds a refreshing touch and richness to each bite.
-
Shredded Cheese: Sprinkle sharp cheddar or Monterey Jack generously atop your chili; the melty goodness enhances flavor and adds a delightful creaminess.
-
Avocado Slices: Creamy avocado is not only delicious but also a wonderful nutritional boost, lending a fresh taste that contrasts the rich chili.
-
Tortilla Chips: Crunchy tortilla chips offer a fun texture contrast and are great for scooping. Try them as a side or as toppings for extra crunch!
-
Pickled Jalapeños: For those who love an extra kick, spicy pickled jalapeños add zing and brightness, elevating the flavor profile of your chili.
-
Fresh Cilantro: Chop some fresh cilantro to garnish; its bright, herbaceous notes brighten the dish and add a beautiful pop of color.
With these delectable sides and toppings, your The Best Ever Homemade Chili becomes the centerpiece of a satisfying meal fit for any occasion!
The Best Ever Homemade Chili Recipe FAQs
What types of beans are best for chili?
I recommend using red kidney beans and black beans for The Best Ever Homemade Chili since they create a satisfying texture and add protein. However, you can also substitute with pinto or cannellini beans if you prefer. The key is to drain and rinse any canned beans to reduce extra sodium and improve flavor.
How long can I store leftover chili in the fridge?
You can store leftover chili in an airtight container for up to 3-4 days. Just remember to let it cool completely before sealing it up, as this will help maintain its freshness and prevent condensation from forming.
Can I freeze The Best Ever Homemade Chili?
Absolutely! You can freeze it for up to 3 months. Just make sure to use a freezer-safe container, and leave a little space at the top for expansion as it freezes. When you’re ready to enjoy it again, thaw overnight in the fridge before reheating.
How can I adjust the spiciness of the chili?
If you want to spice things up, you can easily modify the heat level. Start by adding fresh diced jalapeños or a few teaspoons of cayenne pepper. For a smokier note, include a chipotle in adobo. Just remember to add spices gradually, tasting as you go, to achieve the perfect balance that suits your palate.
Are there any dietary considerations for The Best Ever Homemade Chili?
If you have dietary restrictions, feel free to customize! For a gluten-free option, make sure your chili seasoning is gluten-free. I’ve seen folks swap ground beef for lean turkey or chicken for a lighter meal. Keep in mind that if you’re serving it to pets, onions and garlic are toxic to them, so avoid sharing those parts. Always consult with your family and friends to ensure everyone’s dietary needs are met.
The Best Ever Homemade Chili: Hearty, Flavorful Comfort Food
Ingredients
Equipment
Method
- Finely dice one large onion and chop two medium-sized tomatoes. Mince four cloves of fresh garlic and slice a medium green chili pepper. Drain and rinse the beans.
- In a large skillet or Dutch oven, heat two tablespoons of vegetable oil over medium-high heat. Add diced onion, minced garlic, and sliced green chili. Sauté for about 2 minutes until onions are translucent.
- Add one pound of ground beef, breaking it into crumbles. Cook for 4-5 minutes until the beef is browned and fully cooked. Drain excess fat.
- Stir in 4 tablespoons of chili seasoning and 1 tablespoon of dried oregano. Continue to sauté for about 1 minute.
- Add 1 can of chopped tomatoes, 2 tablespoons of tomato paste, and 15 oz of tomato sauce. Stir well, cover, and let simmer for about 20 minutes.
- Uncover and fold in the drained red kidney beans and black beans. Simmer uncovered for an additional 30 minutes, stirring occasionally.
- Check the consistency and adjust if necessary with broth or water. Adjust seasoning to taste.
- Remove from heat and let rest for 5-10 minutes before serving. Prepare your favorite toppings.
Leave a Reply