
Walking through a bustling street market in Japan, I stumbled upon a vibrant stall showcasing colorful rice cups filled with fresh veggies and creamy avocado. This delightful discovery inspired me to recreate those easy Sushi Cups at home. These charming little bites bring the taste of sushi to your table in a fun and accessible way, making them perfect for appetizers, snacks, or even a light meal. With minimal prep time and the option to customize ingredients, you’ll find joy in experimenting with flavors, all while impressing your family and friends. Plus, they come together without any cooking required, so it’s hassle-free! What’s your favorite filling for sushi cups? Let’s dive in!
Why Are Sushi Cups So Appealing?
Simplicity at Its Best: Assembling these sushi cups requires minimal effort, making them an ideal choice for both novice cooks and seasoned chefs alike.
Endless Customization: With the ability to swap out veggies and sauces, each batch can reflect your personal taste, whether you prefer vibrant bell peppers or refreshing cucumbers.
Perfect for Any Occasion: Serve them as a fun appetizer at gatherings or as a quick and healthy snack for yourself.
Gluten-Free Option: Easily adapt the recipe to suit dietary needs by substituting quinoa for the sushi rice.
Quick & Easy: No cooking required means you can whip up these delightful treats in no time, leaving you more room to relax and enjoy, just like with this Sushi Bake New recipe!
Sushi Cups Ingredients
For the Cups
• Sushi Rice – Base for the cups, providing structure; quinoa can be used for a gluten-free option but may not hold shape as well.
• Water – Essential for cooking the sushi rice.
For the Filling
• Chopped Veggies – Adds flavor and nutrition; feel free to use any raw vegetable of your choice based on what’s in season or your preferences.
• Steamed Mukimame (Shelled Edamame) – Provides protein and texture; regular edamame pods can be used if mukimame is not available.
• Diced Avocado – A creamy element that enhances flavor; prep note: use ½ small avocado for the recipe.
For the Sauce
• Sauce (Soy sauce, tamari, or coconut aminos) – Enhances flavor; personalize by selecting your preferred sauce.
• Mayo – Base for the spicy mayo, adding creaminess; vegan mayonnaise can be used for a vegan version.
• Sriracha Sauce – Adds heat to the spicy mayo; adjust to taste based on your spice preference.
• Honey – Balances the heat in the spicy mayo; maple syrup works for a vegan option.
• Sesame Oil – Provides a nutty flavor to the mayo.
For Garnish
• Black Sesame Seeds – Adds a beautiful touch for presentation.
Now that you have all the ingredients in hand, let’s roll up our sleeves and prepare these mouthwatering sushi cups that are sure to be a hit!
Step‑by‑Step Instructions for Sushi Cups
Step 1: Prepare Rice
Rinse 1 cup of sushi rice under cold water until the water runs clear, removing excess starch. In a medium pot, combine the rinsed rice with 1.5 cups of water, then bring to a boil over medium-high heat. Once boiling, reduce to low, cover, and simmer for 20 minutes, or until the water is absorbed and the rice is tender.
Step 2: Form Rice Cups
After cooking, allow the sushi rice to cool for about 10 minutes. Grease a silicone muffin tin with a light layer of oil. Press 2 heaping tablespoons of the rice into each cup, compacting firmly to create a sturdy base. Place the muffin tin in the refrigerator for at least 20 minutes, until the rice cups are set and hold their shape.
Step 3: Mix Filling
While the rice sets, prepare the filling for the sushi cups. In a mixing bowl, combine your choice of chopped veggies—such as cucumber, bell pepper, and carrots—with the steamed mukimame and diced avocado. Drizzle in your chosen sauce, mixing well to coat the ingredients evenly, creating a colorful and nutritious filling.
Step 4: Prepare Spicy Mayo
In a separate bowl, whisk together ½ cup of mayonnaise, 1-2 tablespoons of Sriracha (adjust based on your spice preference), 1 tablespoon of soy sauce or coconut aminos, 1 teaspoon of honey, and 1 teaspoon of sesame oil. Blend these ingredients until smooth, setting aside this creamy and spicy mayo as a delicious drizzle for your sushi cups.
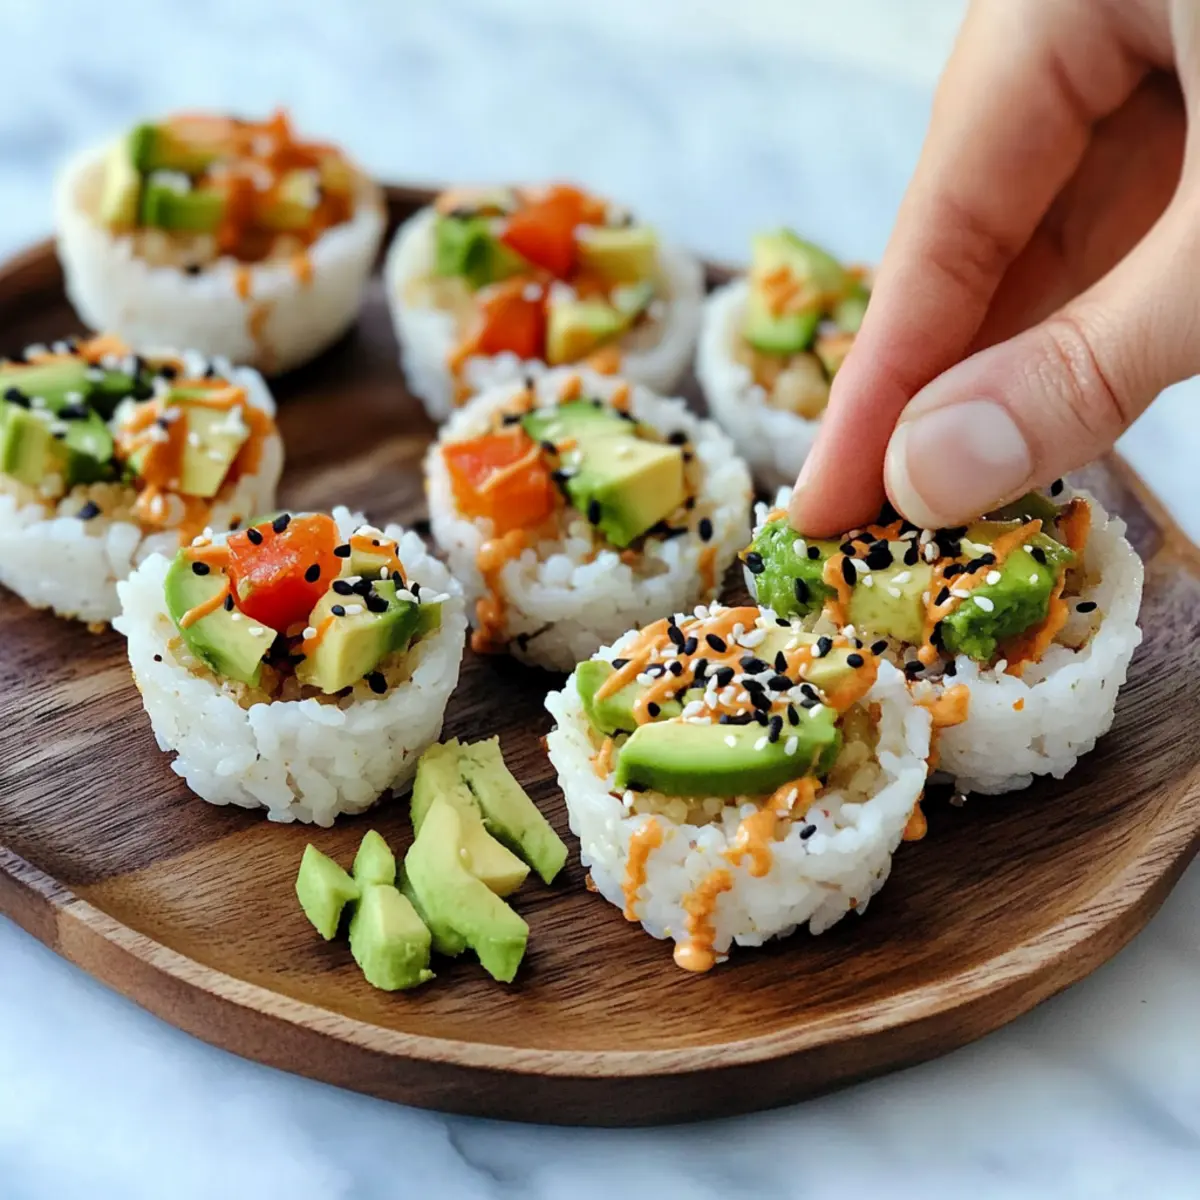
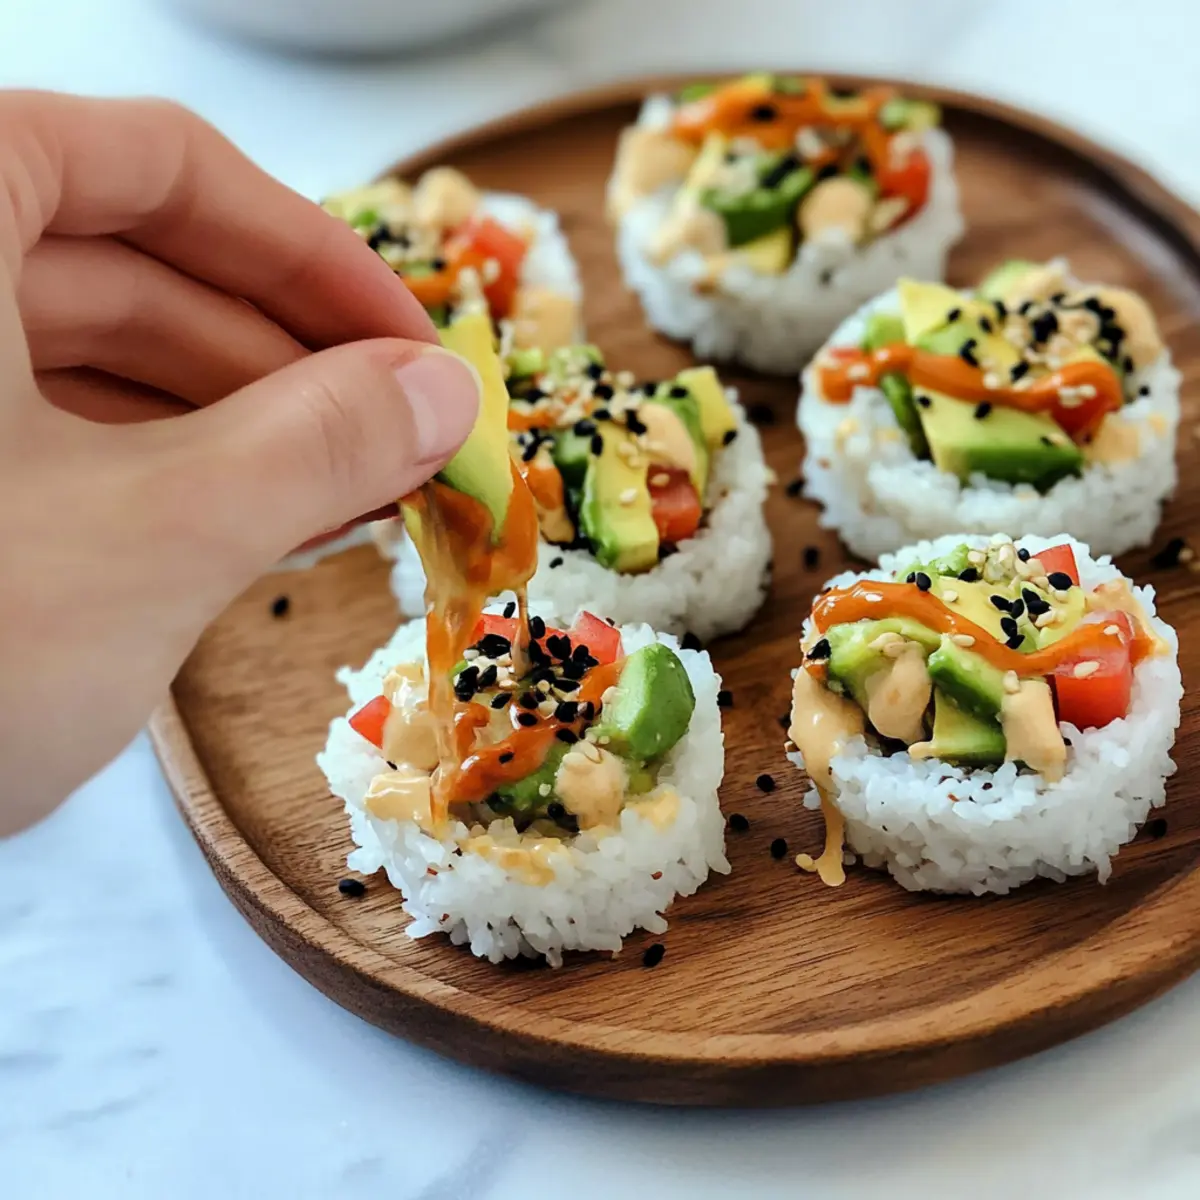
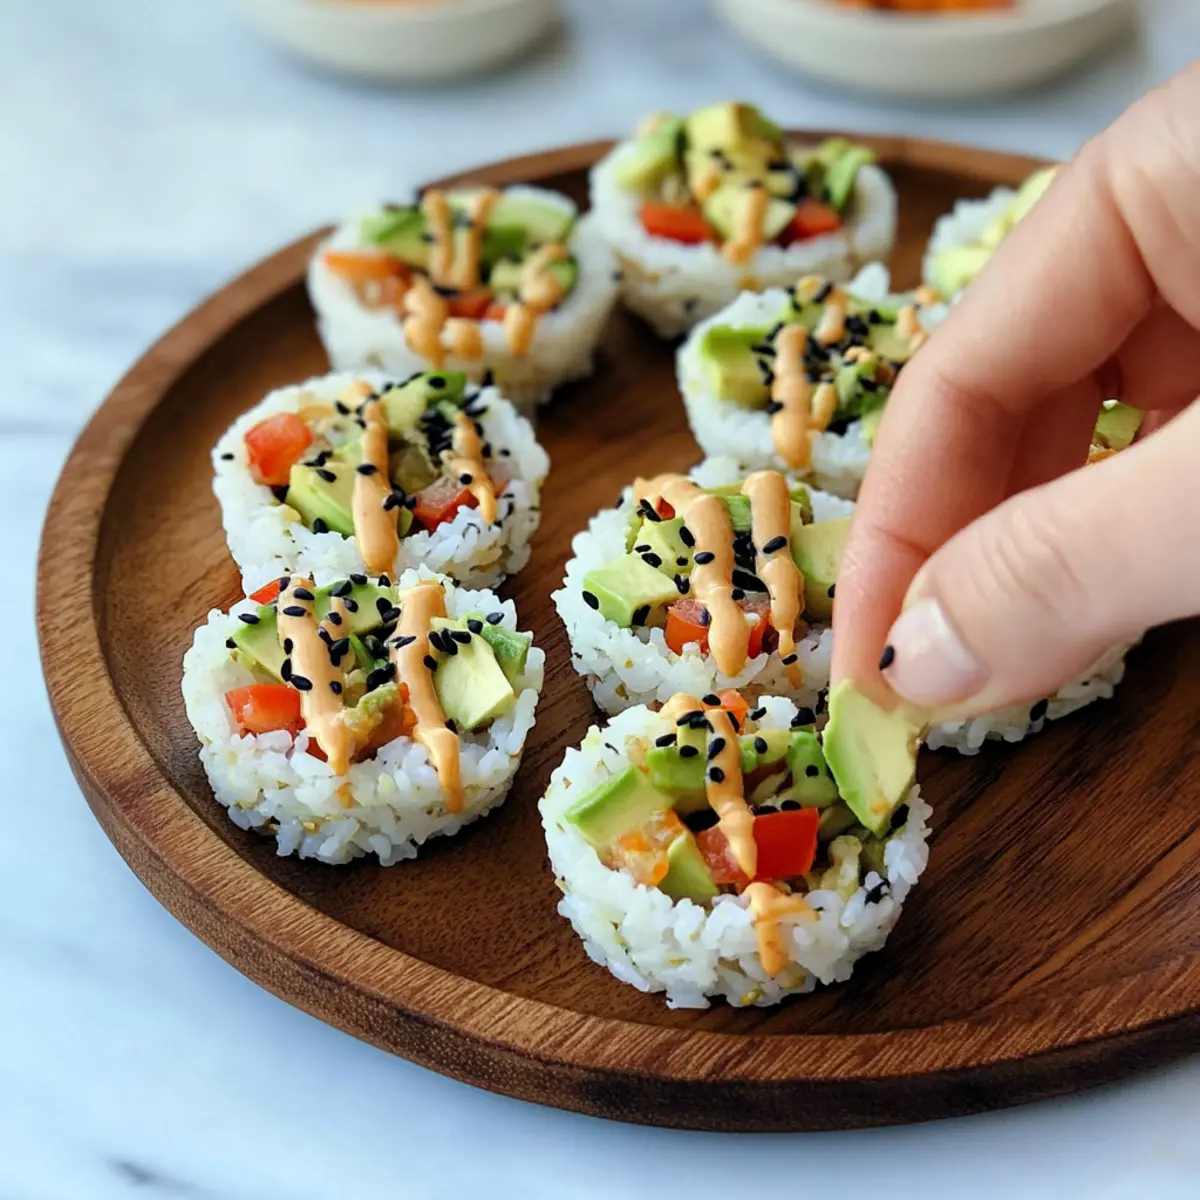
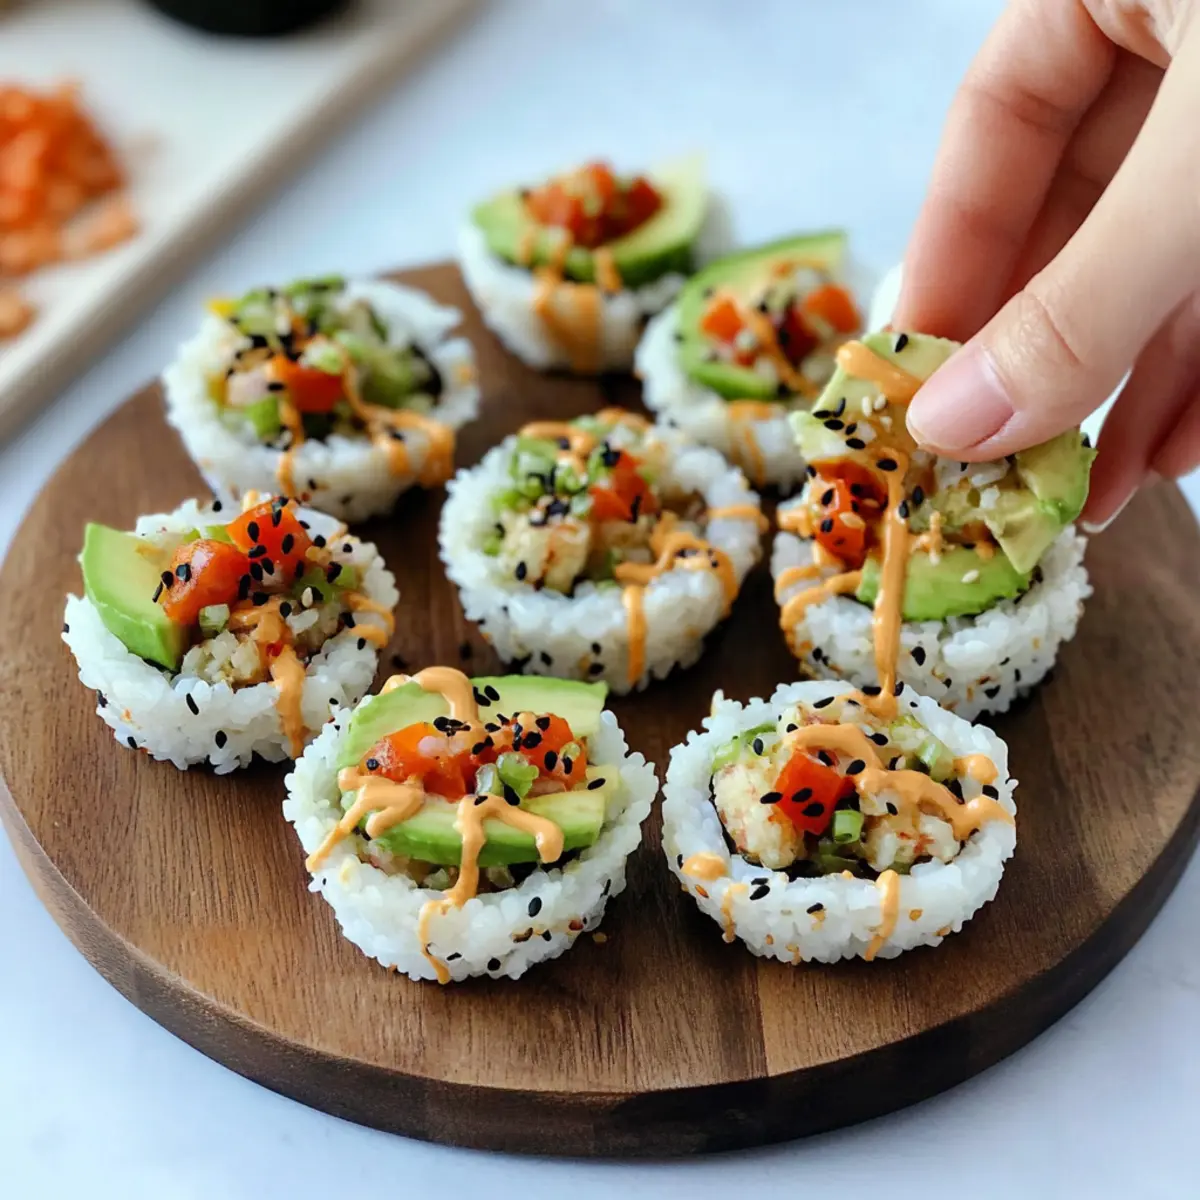
Step 5: Assemble Cups
Once the rice cups have chilled and held their shape, remove them from the refrigerator. Carefully spoon the veggie filling on top of each rice cup, leaving a small space for the drizzle. Generously drizzle the prepared spicy mayo over the filled sushi cups, enhancing their flavor and presentation.
Step 6: Garnish and Serve
To elevate your sushi cups further, sprinkle black sesame seeds on top of the spicy mayo for a decorative touch. Serve these delightful sushi cups immediately as a fun appetizer during gatherings or as a quick and nutritious snack. Enjoy the vibrant flavors and textures of your homemade sushi cups!
Expert Tips for Sushi Cups
-
Firmly Press Rice: To avoid crumble, make sure to pack the sushi rice tightly in the muffin tin. This helps each cup hold its shape as you remove them.
-
Veggie Variety: For the best flavor, choose a colorful mix of veggies. Think about including different textures like crunchy carrots and creamy avocado in your sushi cups.
-
Spicy Mayo Balance: Adjust the amount of Sriracha according to your heat preference. Start with a little and add more if you crave extra heat in your sushi cups.
-
Chill Time is Key: Don’t skip the chilling step! Letting the rice cups set in the fridge ensures they maintain their shape longer when filled.
-
Prep Ahead: Assemble the cups in advance; they can be prepared up to 24 hours ahead. Store in an airtight container but consume them within 2 days for the best taste.
-
Season to Taste: Feel free to experiment with sauces! Different sauces can completely change the flavor profile of your sushi cups—try teriyaki or peanut sauce for a fun variation.
What to Serve with Easy Sushi Cups with Spicy Mayo Drizzle?
The perfect pairings elevate your sushi cups into a delightful meal experience, enriching flavors and textures.
-
Crispy Seaweed Salad: This light, crunchy salad adds a refreshing contrast, enhancing the oceanic essence of the sushi cups.
-
Miso Soup: A warm, savory soup balances the cool, fresh elements of sushi cups, creating a comforting dining experience.
-
Pickled Vegetables: Their tanginess offers a great palate cleanser, cutting through the creaminess of the avocado and mayo.
-
Edamame: Steamed and lightly salted, these tender beans add protein and a satisfying bite to the meal.
-
Cucumber Kimchi: For a spicy kick, this fermented dish introduces bold flavors that complement the sushi cups beautifully.
-
Mint Green Tea: A chilled glass of this fragrant tea refreshes the palate while harmonizing with the sushi’s fresh ingredients.
-
Fresh Fruit Platter: Sweet slices of melon or berries provide a light, juicy finish to balance the savory notes of the meal.
-
Sparkling Water with Lime: This effervescent drink cleanses the palate and keeps the dining experience both refreshing and light.
Sushi Cups: Endless Variations Await!
Feel free to bring your imagination to life and customize these sushi cups with these delicious twists!
- Vegetarian Delight: Add diced tofu or tempeh for a protein-packed vegetarian version.
- Spice It Up: Toss in some pickled jalapeños or spicy radishes for an extra kick of heat. You can even try adding sriracha directly to the filling for an added layer of flavor.
- Low-Carb Option: Use cauliflower rice instead of sushi rice for a lighter, low-carb version, though the texture will be softer.
- Creamy Swap: Replace mayonnaise with Greek yogurt for a tangy twist that retains creaminess.
- Innovative Fillings: Experiment with flavors by adding fruit like mango or pineapple for a sweet surprise that pairs wonderfully with creamy avocado.
- Seafood Option: For seafood lovers, consider including imitation crab meat or shrimp for a taste reminiscent of traditional sushi. This addition can elevate your sushi cups to gourmet level!
- Nutty Crunch: Incorporate crushed peanuts or almonds for some added texture and crunch. This pairs beautifully with the creamy avocado and adds a nice contrast.
- Sauce Swaps: Try different sauces, such as a sweet chili sauce or peanut sauce, to change up the flavor profile. Pair it with your favorite dipping sauce for extra enjoyment; for instance, this pairs wonderfully with a classic Sushi Bake New!
Make Ahead Options
These easy Sushi Cups are perfect for meal prep enthusiasts! You can prepare the sushi rice and mold it into cups up to 24 hours in advance; just ensure they are tightly covered and refrigerated to maintain their shape. Additionally, chop your veggies and mix the spicy mayo ahead of time—both can be stored in airtight containers for up to 3 days. When it’s time to serve, simply assemble the cups by adding the prepped fillings to the rice bases, drizzle with the spicy mayo, and garnish with black sesame seeds. This handy prep method saves you time and stress, ensuring your sushi cups are just as delicious and fresh for your next gathering!
How to Store and Freeze Sushi Cups
Fridge: Keep your sushi cups in an airtight container in the refrigerator for up to 2 days. This maintains freshness and prevents any sogginess from moisture.
Make-Ahead: Prepare the sushi cups up to 24 hours in advance and store them in the fridge. This allows for an easy and convenient appetizer option when you’re short on time.
Freezer: Although sushi cups are best enjoyed fresh, you can freeze the plain rice cups (without filling) for up to 1 month. Just wrap them tightly in plastic wrap and place them in a freezer-safe container.
Reheating: To enjoy a chilled sushi cup, simply thaw it in the fridge overnight, then top with fresh veggies and spicy mayo before serving.
Sushi Cups Recipe FAQs
How do I choose ripe ingredients for my sushi cups?
When selecting vegetables for your sushi cups, look for vibrant colors and firm textures. Cucumbers should be crisp without any dark spots, and bell peppers should feel heavy for their size. Choose avocados that yield slightly when pressed but aren’t overly soft, as this ensures they’ll add creaminess without being mushy.
How should I store leftover sushi cups?
To maintain freshness, store your sushi cups in an airtight container in the refrigerator for up to 2 days. Make sure to keep any sauces separate until you’re ready to serve to prevent the rice from becoming soggy.
Can I freeze sushi cups, and how?
You can freeze the plain rice cups (without filling) for up to 1 month. To do this, wrap each rice cup tightly in plastic wrap and place them in a freezer-safe container. When ready to use, thaw overnight in the fridge before filling with fresh veggies and spicy mayo.
What should I do if my rice cups are falling apart?
If your sushi cups are crumbling, it’s essential to pack the rice firmly into the muffin tin during assembly. After pressing it down, refrigerate the cups for at least 20 minutes to help them set. If they still fall apart, try adding a bit more water when cooking the rice for extra stickiness.
Are sushi cups safe for pets?
Generally, these sushi cups are safe for pets; however, be cautious with ingredients like avocado and sauces. Avocados can contain persin, which may not be suitable for some animals. Always consult your veterinarian before sharing any human food with your pets.
What are some alternatives if I have allergies?
If you have gluten allergies, substitute sushi rice with quinoa or cauliflower rice for a low-carb option. For those allergic to certain vegetables, feel free to swap in others like bell peppers or zucchini. You can also use vegan mayonnaise and ensure sauces like soy sauce are gluten-free variants.
Savory Sushi Cups: Easy, Customizable, and Deliciously Fun
Ingredients
Equipment
Method
- Rinse 1 cup of sushi rice under cold water until the water runs clear. In a medium pot, combine the rinsed rice with 1.5 cups of water, bring to a boil, then reduce to low, cover, and simmer for 20 minutes.
- Allow the sushi rice to cool for about 10 minutes. Grease a silicone muffin tin and press 2 heaping tablespoons of the rice into each cup. Place the muffin tin in the refrigerator for at least 20 minutes.
- In a mixing bowl, combine your choice of chopped veggies with the steamed mukimame and diced avocado. Drizzle in your chosen sauce and mix well.
- In a separate bowl, whisk together ½ cup of mayonnaise, 1-2 tablespoons of Sriracha, 1 tablespoon of soy sauce or coconut aminos, 1 teaspoon of honey, and 1 teaspoon of sesame oil.
- Remove the rice cups from the refrigerator and spoon the veggie filling on top. Drizzle the spicy mayo over the filled sushi cups.
- Sprinkle black sesame seeds on top for garnish and serve immediately.
Leave a Reply