
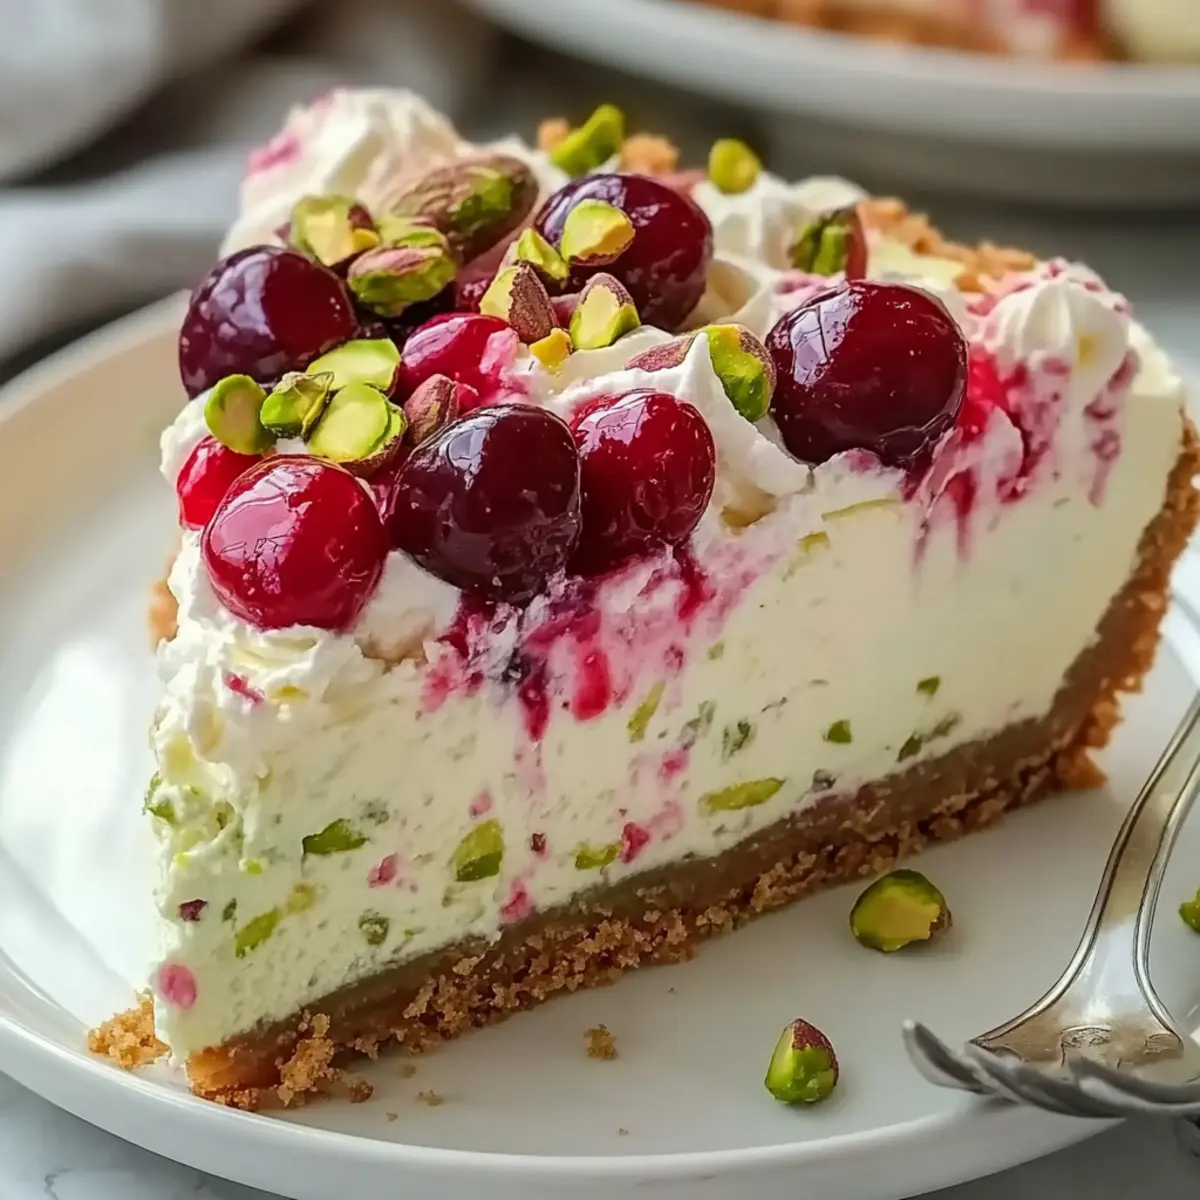
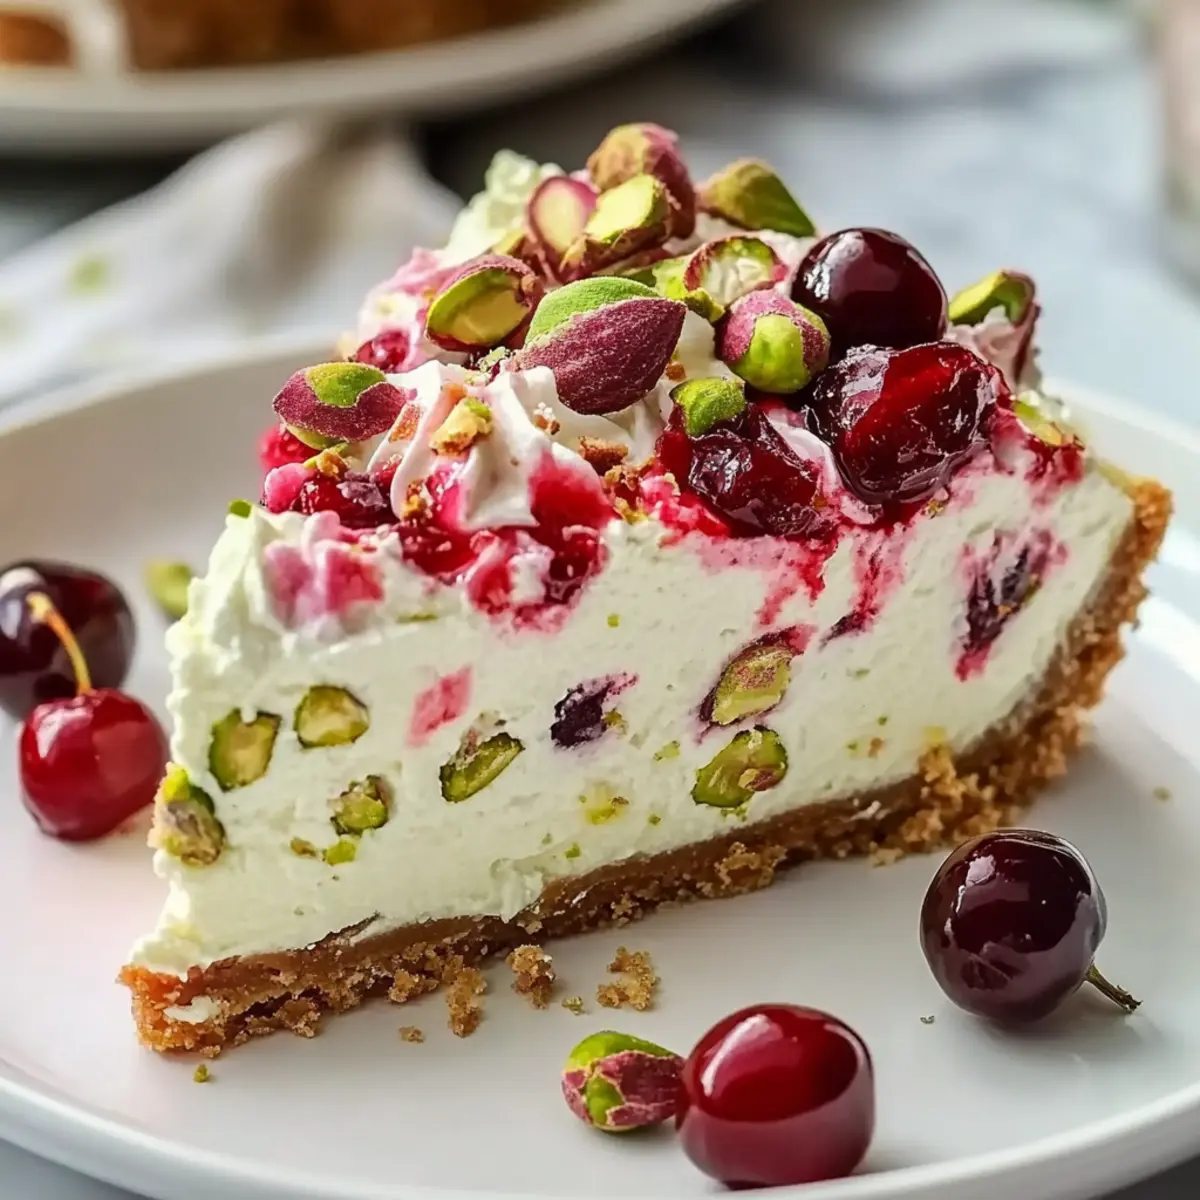
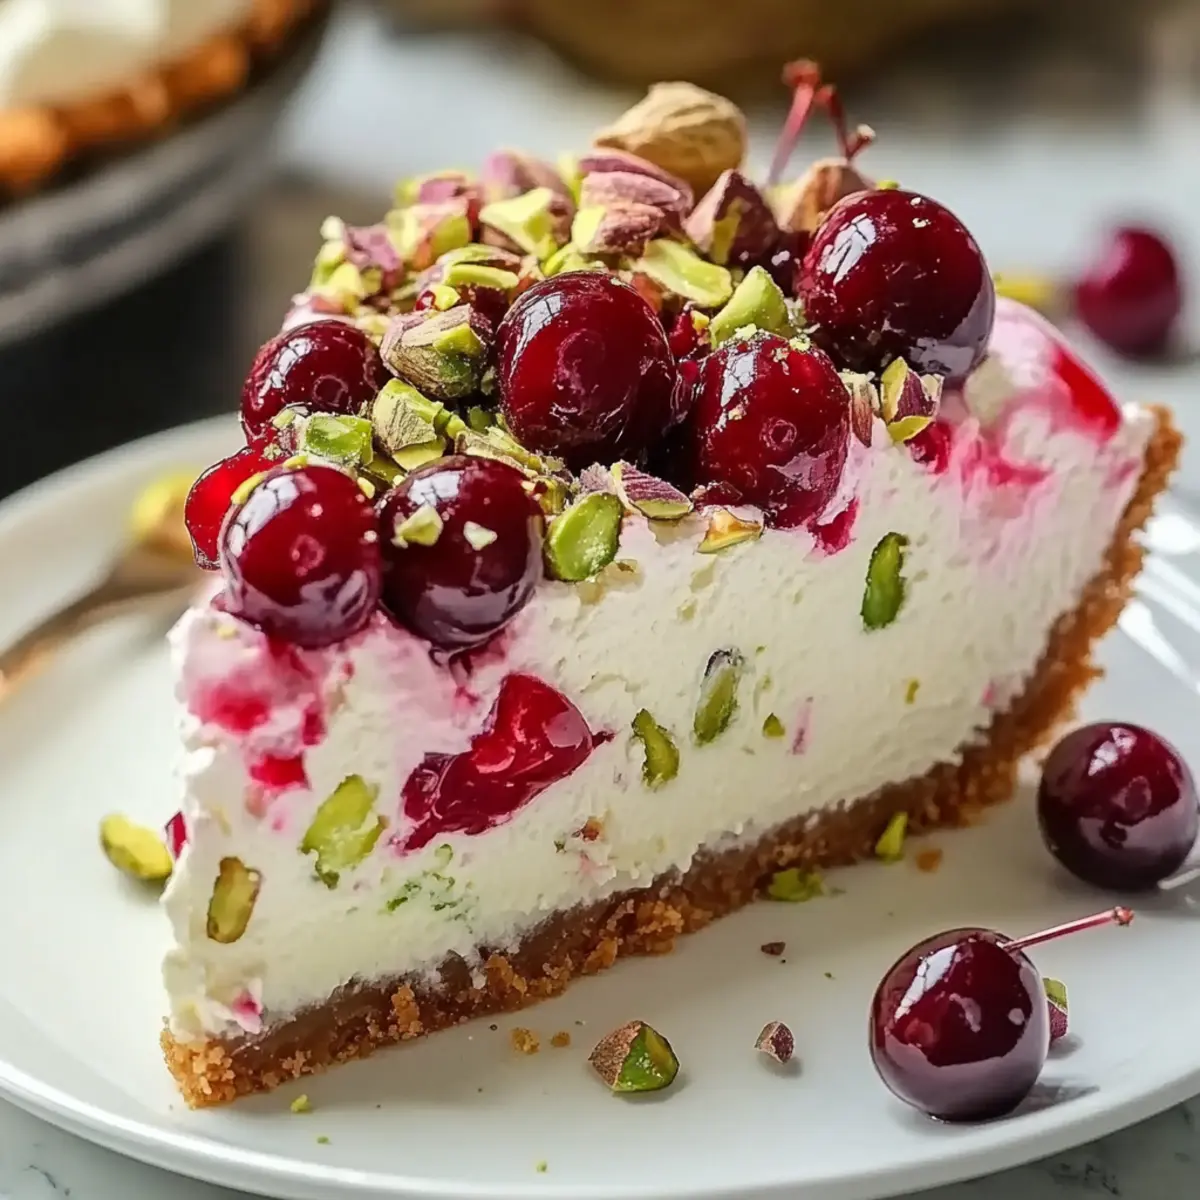
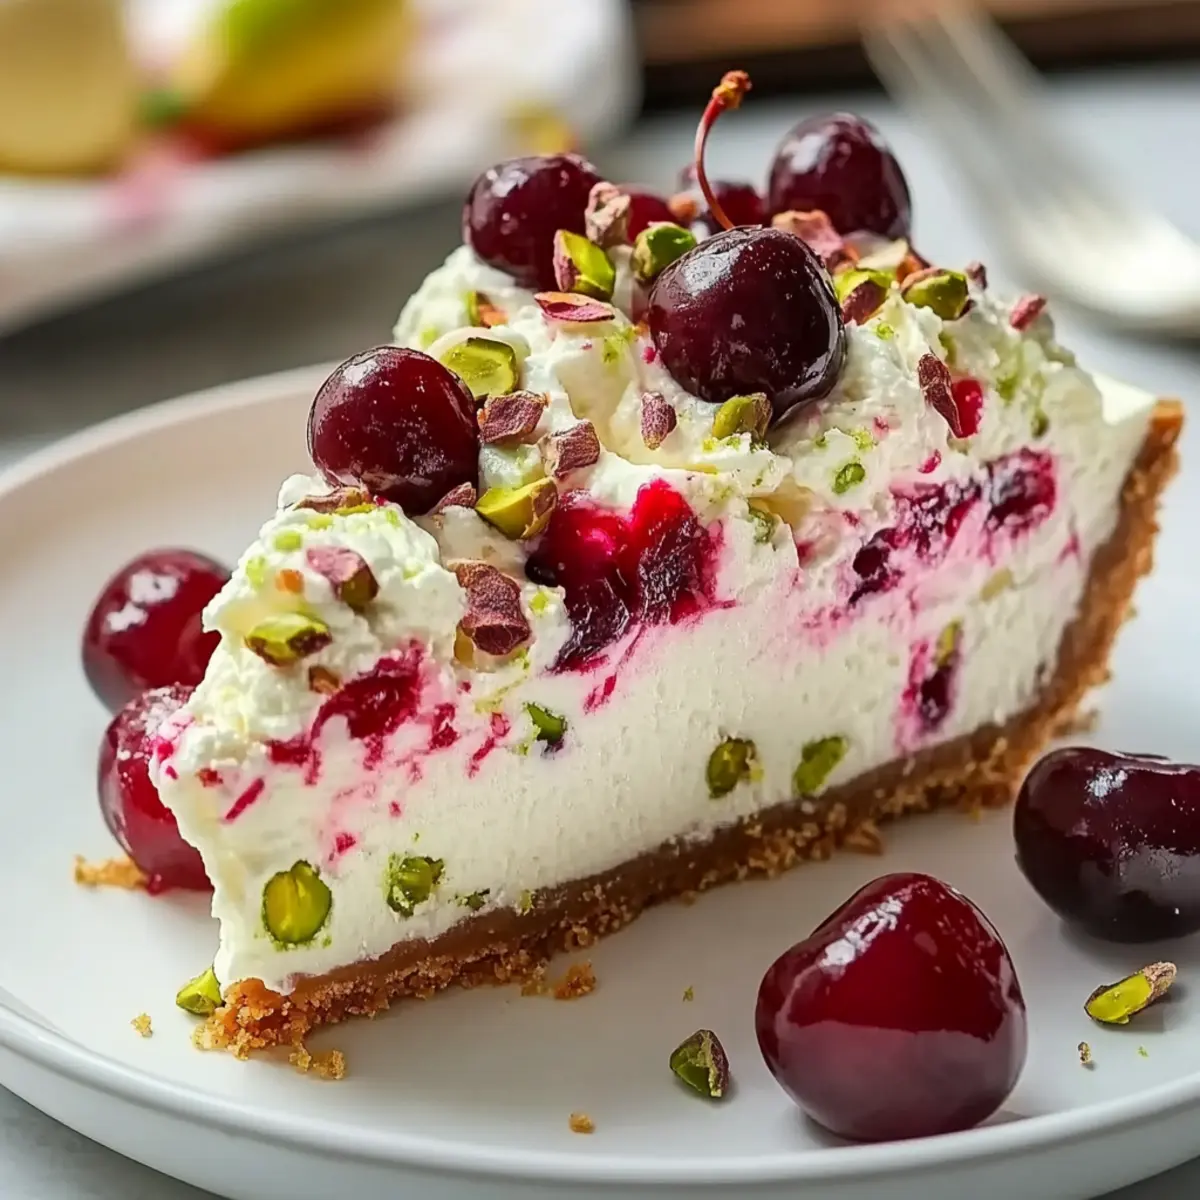
As I stood in my kitchen, the scent of zesty lemons and limes wafted through the air, instantly lifting my spirits. This Luscious Lemon-Lime Cherry Pistachio Cheesecake is not just a dessert—it’s an experience that brings summer vibes into any season. Bursting with vibrant flavors, this cheesecake intertwines the tartness of fresh citrus with the sweet surprise of juicy cherries, all while offering a delightful crunch from pistachios. Perfect for gatherings, it’s an approachable recipe that even novice bakers can tackle. Plus, with a gluten-free option available by swapping out graham crackers, it’s a dessert that everyone can enjoy. Curious about the best tips to create this stunning treat? Let’s dive into the refreshing world of cheesecake!
Why Is This Cheesecake So Irresistible?
Vibrant Flavors: This cheesecake brilliantly marries the zesty notes of lemon and lime with juicy cherries, creating a refreshing flavor explosion that’s hard to resist.
Easy to Make: Even if you’re a novice baker, the step-by-step instructions guide you to a stunning dessert, ensuring success every time.
Textural Delight: With a creamy filling offset by a crunchy pistachio topping, this cheesecake delivers an inviting contrast that tantalizes the palate.
Crowd-Pleasing Appeal: Perfect for gatherings, it offers a light, fruity finish that leaves guests craving more, making it the star of any event.
Gluten-Free Option: With a simple swap of the graham crackers, you can enjoy this dessert gluten-free, just like my Ricotta Pistachio Honey bites or the delightful Mini Oreo Cheesecake.
Indulge in a slice and experience the joy of homemade goodness!
Luscious Lemon-Lime Cherry Pistachio Cheesecake Ingredients
For the Crust
• Graham Cracker Crumbs – Base structure for the crust; substitute with gluten-free graham crackers for a gluten-free option.
• Granulated Sugar – Provides sweetness and contributes to a tender crumb; stick with this for the best flavor.
• Unsalted Butter – Binds the crust ingredients while adding richness; brown the butter for a more complex flavor.
For the Filling
• Full-Fat Cream Cheese – Key for a rich, creamy filling; always use block cream cheese for the best texture.
• Large Eggs – These help the cheesecake set; make sure they are at room temperature for smooth mixing.
• Sour Cream – Adds creaminess and balances sweetness; can be substituted with full-fat Greek yogurt.
• Fresh Lemon Juice and Zest – Essential for a bright, zesty flavor; fresh is best for maximum impact.
• Fresh Lime Juice and Zest – These deepen the tropical vibe; always opt for fresh over bottled juice.
• Fresh Cherries – Sweet bursts throughout the cheesecake; ripe cherries are ideal, but thawed frozen ones can work too.
• Chopped Pistachios – Provides a crunchy texture and nutty flavor; can be swapped with slivered almonds or pecans if needed.
Combine these delightful ingredients, and you’ll be well on your way to creating your very own Luscious Lemon-Lime Cherry Pistachio Cheesecake that’s sure to impress!
Step‑by‑Step Instructions for Luscious Lemon-Lime Cherry Pistachio Cheesecake
Step 1: Prep Crust
Start by preheating your oven to 325°F (163°C). In a medium bowl, combine graham cracker crumbs, granulated sugar, and melted unsalted butter. Mix until the crumbs are well-coated and have a sandy texture. Press this mixture firmly into the bottom of a 9-inch springform pan, creating an even layer. Bake for 10 minutes until set, then remove and allow it to cool completely.
Step 2: Make Filling
While the crust cools, prepare the filling. Use a stand mixer or hand mixer to beat the softened full-fat cream cheese and granulated sugar in a large mixing bowl until smooth and creamy. This should take about 3-4 minutes on medium speed. Make sure there are no lumps, and scrape down the sides of the bowl as needed to ensure a uniform mixture.
Step 3: Add Cream Ingredients
Next, add the large eggs, one at a time, mixing gently after each addition to maintain the mixture’s airy consistency. Then, incorporate the sour cream, fresh lemon juice, lime juice, and their respective zests. Mix on low speed until just combined, ensuring everything is well-blended but avoiding overmixing, which could lead to cracks in your Luscious Lemon-Lime Cherry Pistachio Cheesecake.
Step 4: Incorporate Mix-ins
Now it’s time to add in the delightful mix-ins. Gently fold the chopped fresh cherries and pistachios into the cheesecake filling using a spatula. Be careful not to over-mix; you want to preserve the integrity of the cherries and the crunch of the pistachios. This step adds bursts of flavor and texture to your cheesecake.
Step 5: Bake Cheesecake
Pour the luscious filling over the cooled crust in the springform pan, smooth the top with a spatula, and place it in the preheated oven. Bake for 55-60 minutes, or until the edges are set but the center still jiggles slightly when gently shaken. Keep an eye out for a lightly golden top, indicating it’s perfectly baked.
Step 6: Cooling
After baking, turn off the oven and leave the door ajar, letting your Luscious Lemon-Lime Cherry Pistachio Cheesecake cool slowly in the warm oven for about 1 hour. This gradual cooling helps prevent cracks and ensures a smooth finish. Avoid moving the cheesecake during this time to maintain its structure.
Step 7: Chill
Once cooled, cover the cheesecake lightly with plastic wrap and transfer it to the refrigerator. Chill for at least 4 hours, but preferably overnight. This not only helps set the filling but also enhances the flavors, making every slice even more delicious. A well-chilled cheesecake is vital for that perfect, creamy texture when served.
Make Ahead Options
These Luscious Lemon-Lime Cherry Pistachio Cheesecakes are perfect for meal prep enthusiasts! You can prepare the crust and filling up to 24 hours in advance, allowing you to simply assemble and bake before serving. To do this, mix and press the crust into the springform pan and make the filling, then refrigerate both components separately. When you’re ready to complete the cheesecake, pour the filling over the crust and bake as directed. This method not only saves you time on busy days but also ensures your dessert retains its fresh flavors and creamy texture, making it just as delicious as if you made it all at once!
What to Serve with Luscious Lemon-Lime Cherry Pistachio Cheesecake
Elevate your dessert experience with these delightful pairings that complement the vibrant flavors of your cheesecake.
-
Whipped Cream: A dollop of freshly whipped cream adds a luscious, airy touch, balancing the cheesecake’s rich creamy texture.
-
Mint Leaves: Fresh mint brings a refreshing herbal note that beautifully contrasts the citrus zest, enhancing each bite of cheesecake.
-
Fresh Berries: A medley of juicy strawberries, blueberries, and raspberries creates a colorful burst that complements the cherries and adds a delightful tartness.
-
Light Dessert Wine: A glass of Moscato or a spritz of Prosecco pairs wonderfully with the sweet and tart flavors, enhancing the fruity notes in the cheesecake.
-
Citrus Sorbet: The light, icy texture of citrus sorbet offers a refreshing palate cleanser, perfectly complementing the cheesecake’s rich creaminess.
-
Pistachio Crumble: Add a sprinkle of crushed pistachios on top for an extra crunch that ties into the cheesecake’s nutty flavor while adding visual appeal.
Indulge in these delicious accompaniments for a truly memorable dessert experience!
How to Store and Freeze Luscious Lemon-Lime Cherry Pistachio Cheesecake
Fridge: Keep the cheesecake covered in the refrigerator for up to 4 days. Use plastic wrap or an airtight container to prevent it from absorbing other odors.
Freezer: For longer storage, freeze slices wrapped individually in plastic wrap, then place in a freezer-safe container. It will last up to 2 months, preserving the fresh flavors.
Thawing: To enjoy your frozen Luscious Lemon-Lime Cherry Pistachio Cheesecake, transfer it to the fridge 24 hours before serving to allow it to thaw gradually.
Reheating (if preferred): While not typically reheated, you can bring the cheesecake to room temperature for about 30 minutes before serving for enhanced flavor and creaminess.
Luscious Lemon-Lime Cherry Pistachio Cheesecake Variations
Feel free to get creative with this recipe and make it your own! Here are some delightful twists to enhance your cheesecake experience.
-
Nut-Free: Swap pistachios for sunflower seeds or pumpkin seeds for a crunchy topping that’s safe for those with nut allergies.
A sprinkle of toasted seeds will provide texture while being nut-free, perfect for gatherings where allergies are a concern. -
Enhanced Citrus: Add orange zest along with lemon and lime for an additional depth of flavor.
This twist infuses a subtle sweetness to balance the tartness, elevating your cheesecake’s citrus profile beautifully. -
Fruity Fusion: Replace cherries with fresh raspberries or strawberries for a berry-infused cheesecake.
The sweet, slightly tart flavors of these berries will add a lovely pop of color and taste, creating a visually stunning dessert. -
Chocolate Swirl: Incorporate melted dark chocolate into the filling for a rich and indulgent twist.
This simple addition will create a luxurious flavor contrast that transforms your cheesecake into a decadent chocolatey experience. -
No-Bake Option: For a refreshing twist, make a gelatin-based filling without baking for a lighter version.
Start by mixing gelatin with a bit of water to set, then fold into your cheesecake mixture for a no-bake delight. -
Spicy Kick: Add a hint of cayenne pepper or ginger to the filling for a surprising heat that contrasts the sweetness.
A little spice can go a long way, making each bite exhilarating, perfect for adventurous eaters! -
Coconut Cream: For a tropical flair, substitute sour cream with coconut cream.
This luscious cream adds a tropical richness, bringing a unique dimension to the already vibrant flavors. -
Layered Cheesecake: Create a layered effect by dividing the filling and mixing lemon in one part and lime in another.
Alternate layers of different citrus will not only look stunning but also give a delightful splash of flavor with each slice.
Feeling inspired? Mix and match these variations, and pair your creation with a refreshing mint garnish or a sweet drizzle of honey for an extra touch!
Expert Tips for Luscious Lemon-Lime Cherry Pistachio Cheesecake
-
Room Temperature Ingredients: Ensure all dairy ingredients are at room temperature to achieve a smooth and creamy filling without lumps.
-
Gentle Mixing: Avoid overmixing after adding the eggs—this prevents cracks on the surface of your Luscious Lemon-Lime Cherry Pistachio Cheesecake.
-
Slow Cooling: Cool the cheesecake gradually in the oven, with the door ajar, to minimize the risk of cracks during the cooling process.
-
Perfect Storage: For best flavor, chill your cheesecake overnight. Wrap it gently in plastic wrap to avoid condensation while storing in the fridge.
-
Fresh Ingredients: Always opt for fresh lemon and lime juice rather than bottled juice; this will elevate the zesty flavor of your cheesecake significantly.
Luscious Lemon-Lime Cherry Pistachio Cheesecake Recipe FAQs
How do I select ripe cherries for this cheesecake?
Absolutely! Look for cherries that are firm, plump, and have a deep color. Avoid any with dark spots or soft spots, as they may be overripe. When in doubt, give them a gentle squeeze; they should feel slightly firm but not too hard. Fresh cherries really elevate the flavors in your Luscious Lemon-Lime Cherry Pistachio Cheesecake!
What is the best way to store leftovers of the cheesecake?
To store your cheesecake, cover it with plastic wrap or place it in an airtight container and refrigerate for up to 3-4 days. It’s important to keep it wrapped or sealed to prevent it from absorbing odors from your fridge. Make sure it’s fully cooled before you store it—this helps maintain its delightful creamy texture!
Can I freeze my Luscious Lemon-Lime Cherry Pistachio Cheesecake?
Very! To freeze, first allow the cheesecake to cool completely. Slice it into individual portions and wrap each slice tightly in plastic wrap. Then, place the wrapped slices in a freezer-safe container. Your cheesecake can stay fresh in the freezer for up to 3 months. When you’re ready to enjoy a slice, simply transfer it to the fridge for 24 hours to thaw.
What should I do if my cheesecake cracks during baking?
Don’t worry! Cracks happen to the best of us. To avoid this in the future, remember to mix your ingredients gently—especially after adding the eggs—as overmixing can introduce too much air and cause cracks. Additionally, cooling your cheesecake slowly in the oven with the door ajar helps to minimize rapid temperature changes. If cracks still occur, you can cover them up beautifully with whipped cream or fresh cherries when serving!
Is there a gluten-free option for this cheesecake?
Absolutely! Simply substitute the graham cracker crumbs with gluten-free graham crackers or digestive biscuits. You still get the same delightful crust without the gluten. This makes it easier for everyone to indulge in this delicious Luscious Lemon-Lime Cherry Pistachio Cheesecake!
Can my pet eat any of the ingredients in this cheesecake?
While the lemon and lime zest can be safe for small amounts for dogs, it’s best to be cautious. Many ingredients here, like sugar and cream cheese, are not recommended for pets in large quantities. It’s safest to enjoy this treat yourself and find pet-friendly alternatives to share with your furry friends!
Luscious Lemon-Lime Cherry Pistachio Cheesecake Bliss
Ingredients
Equipment
Method
- Preheat your oven to 325°F (163°C). Combine graham cracker crumbs, granulated sugar, and melted unsalted butter in a bowl. Press into the bottom of a springform pan and bake for 10 minutes.
- In a large bowl, mix softened cream cheese and granulated sugar until smooth. Add eggs one at a time, then add sour cream, lemon juice, lime juice, and zests, mixing until just combined.
- Gently fold in fresh cherries and chopped pistachios. Pour filling into the cooled crust and smooth the top. Bake for 55-60 minutes.
- Allow cheesecake to cool in the oven with the door ajar for 1 hour. Cover and chill in the refrigerator for at least 4 hours or preferably overnight.
Leave a Reply