
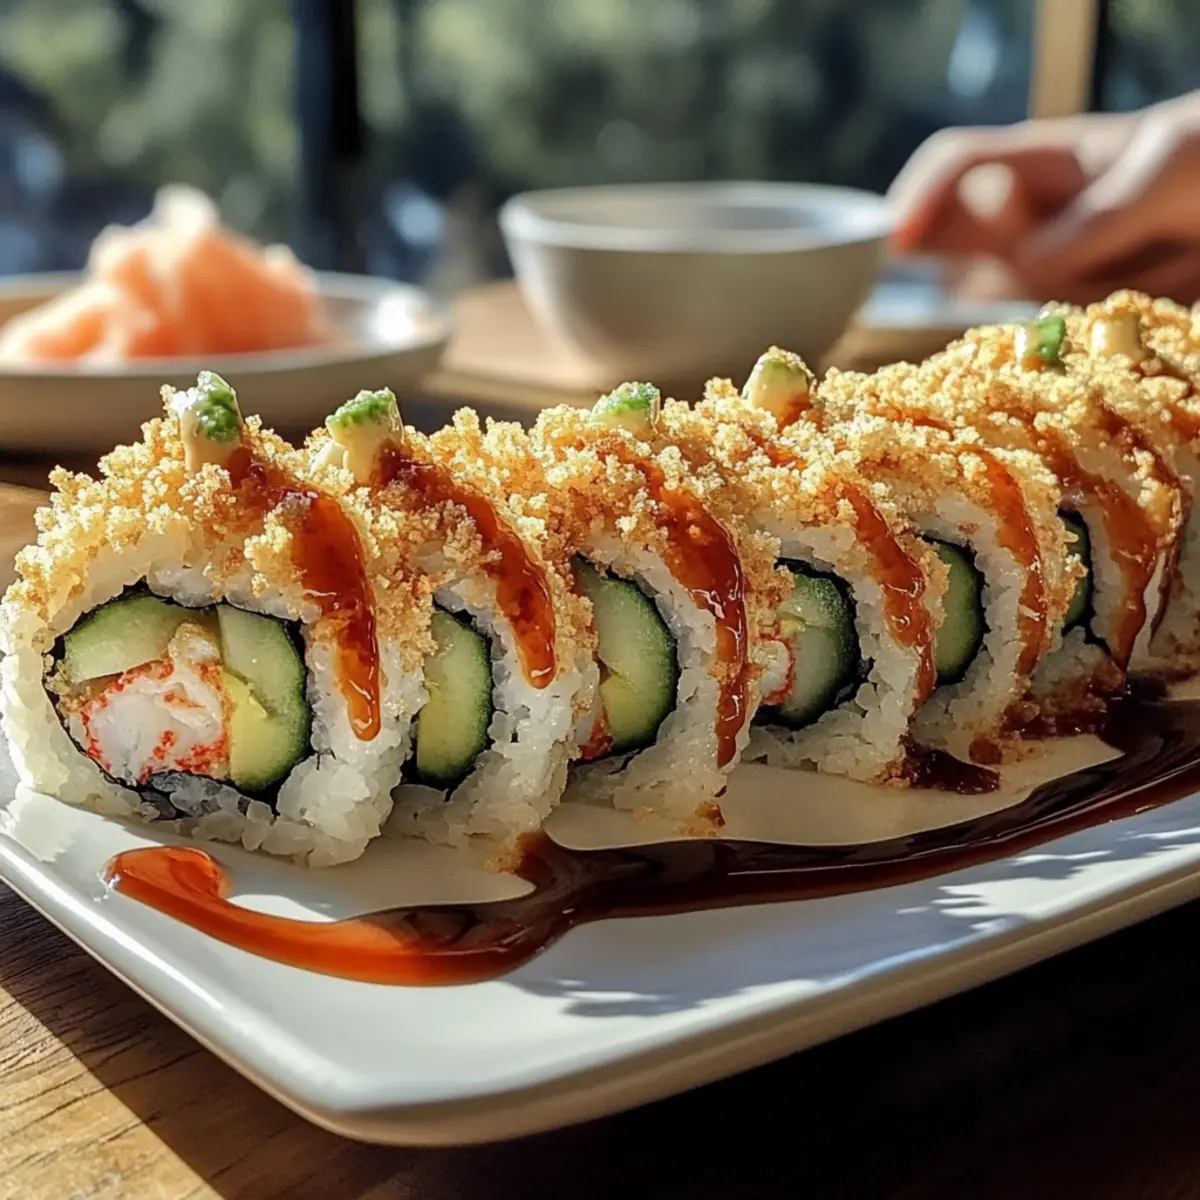
As I knelt down to pick up the last sushi roll that had miraculously rolled itself off the table, I couldn’t help but chuckle at my homemade sushi night gone slightly awry. Fear not, because with my Homemade California Crunch Roll Sushi, even a little chaos can lead to culinary joy. This delightful dish combines creamy avocado, crunchy cucumber, and the sweet flavor of imitation crab, all wrapped snugly in seasoned sushi rice and nori. With its enticing textures and flavors, this sushi is not only beginner-friendly but also impressively customizable, making it the perfect choice for those tired of takeout or wanting to impress friends at your next gathering. Plus, the added crunch of fried onions or panko takes this roll to a whole new level! Are you ready to indulge in sushi-making fun?
Why Make Homemade Sushi?
Deliciously Customizable: You can tailor your California Crunch Roll to your taste by swapping in different proteins or adding your favorite vegetables.
Perfect for Beginners: With just a few simple steps, this recipe is perfect for those who might feel intimidated by sushi making.
Healthier Option: Say goodbye to fast food! Using fresh, wholesome ingredients allows you to create a dish that’s nutritious and satisfying.
Crowd-Pleasing Appeal: Whether you’re hosting a dinner party or a cozy movie night, impress your friends with a homemade sushi experience! For more easy-to-make recipes, check out my Sushi Bake New or the delicious Chicken Sandwich Homemade.
Quick & Easy: In under an hour, you can prepare a fresh sushi roll that tastes like it’s straight from a restaurant. Get ready to roll your way to a delightful dinner!
Homemade California Crunch Roll Sushi Ingredients
• Get ready to roll!
-
For the Sushi Roll
-
Sushi Rice – Essential for creating that sticky texture to secure your roll.
-
Roasted Nori Sheets – These seaweed sheets provide an authentic sushi taste; opt for sushi-grade for best results.
-
Imitation Crab (or Real Crab Meat) – Adds a sweet and savory flavor; for a vegan option, marinated tofu works beautifully.
-
Avocado – Creamy and rich, ripe avocados elevate your roll’s flavor and texture.
-
Cucumber – Adds a refreshing crunch; be sure to cut into thin strips for easy rolling.
-
Spicy Mayo – Mix mayonnaise and sriracha (2 parts mayo to 1 part sriracha) for a creamy kick.
-
Eel Sauce – A sweet and savory sauce that enhances the roll; teriyaki sauce can be a tasty substitute.
-
For the Crunchy Topping
-
Toasted Panko Breadcrumbs or French Fried Onions – Adds that satisfying crunch to your sushi; feel free to mix toppings for a delightful texture.
Creating your own Homemade California Crunch Roll Sushi is an adventure filled with flavor and fun! Enjoy personalizing it to suit your taste.
Step‑by‑Step Instructions for Homemade California Crunch Roll Sushi
Step 1: Prepare the Sushi Rice
Rinse 1 cup of sushi rice under cold water until the water runs clear. Cook the rice with 1¼ cups water in a rice cooker or on the stovetop, bringing it to a boil, then reducing to low heat for 20 minutes. Once cooked, remove from heat and let it rest for 10 minutes. Gently fold in a mixture of 3 tablespoons rice vinegar, 1 tablespoon sugar, and ½ teaspoon salt, then let the rice cool to room temperature.
Step 2: Set Up Rolling Station
While the rice cools, prepare your rolling area. Wrap a bamboo sushi mat in plastic wrap to keep it clean, and gather a small bowl of water mixed with a splash of rice vinegar to prevent sticking. Organizing your ingredients—nori sheets, fillings, and toppings—will streamline the assembly of your Homemade California Crunch Roll Sushi, making it easier to roll.
Step 3: Assemble the Roll
Place a sheet of nori shiny side down on the sushi mat. With wet fingers, grab a handful of cooled sushi rice and spread it evenly over the nori, leaving a ½-inch gap at the top. Flip the nori so the rice faces down towards the mat, then layer a mix of imitation crab, slices of avocado, thin cucumber sticks, and any optional fillings like cream cheese or jalapeño, horizontally across the rice-covered nori.
Step 4: Roll the Sushi
Begin rolling the sushi by lifting the edge of the mat closest to you and tucking it over the filling. Roll tightly, pressing gently as you go to ensure a firm sushi roll. Continue rolling until you reach the exposed edge of the nori, and dampen it with water to seal the end of your Homemade California Crunch Roll Sushi securely.
Step 5: Add the Crunch
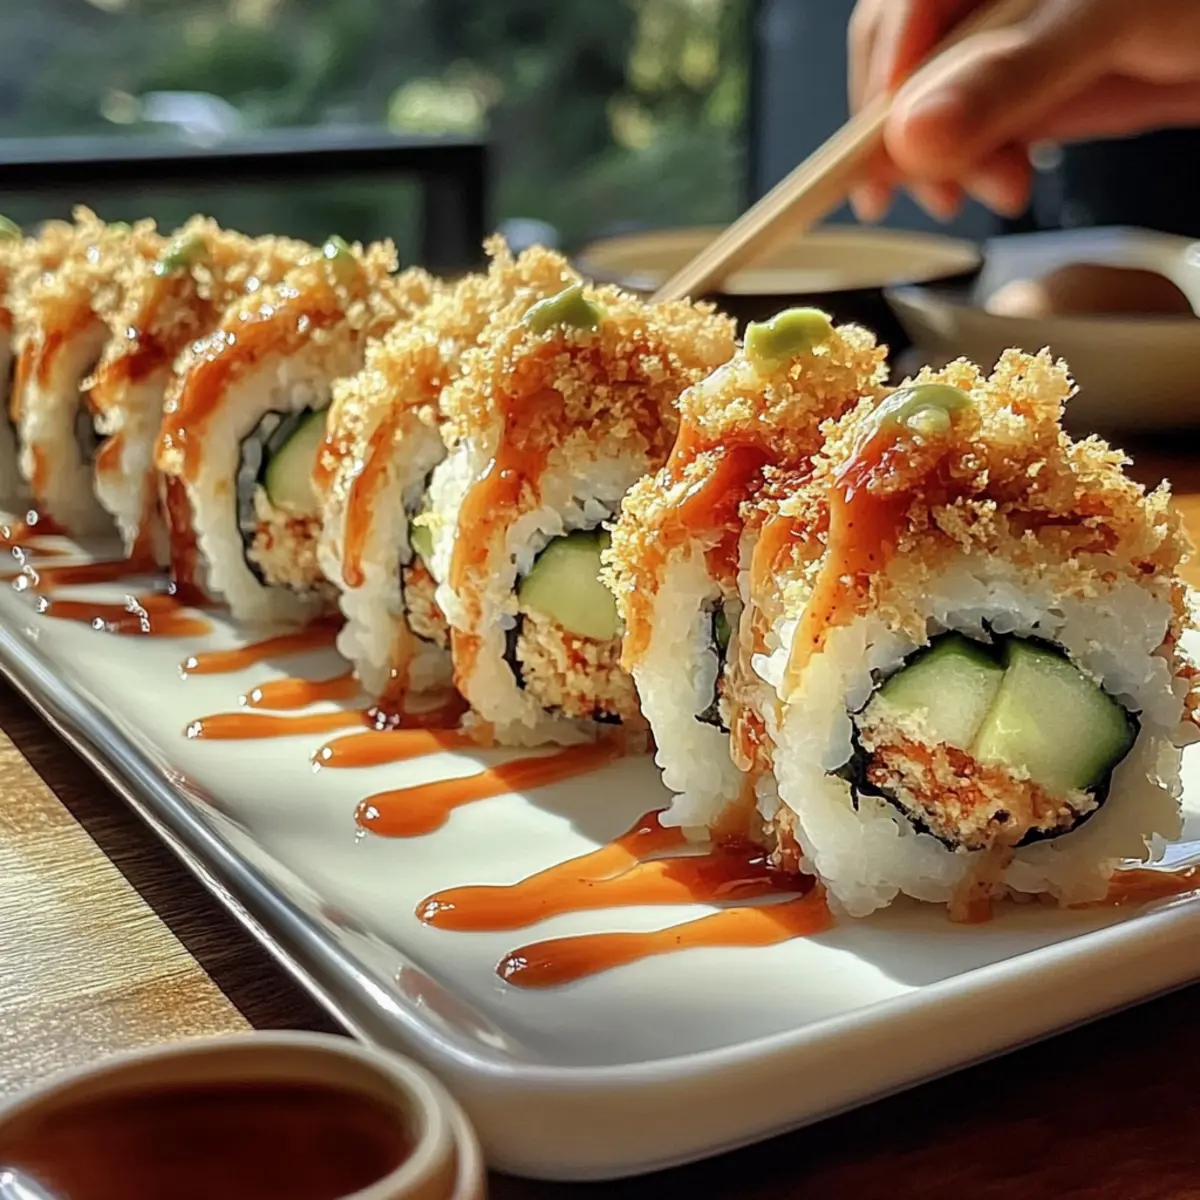
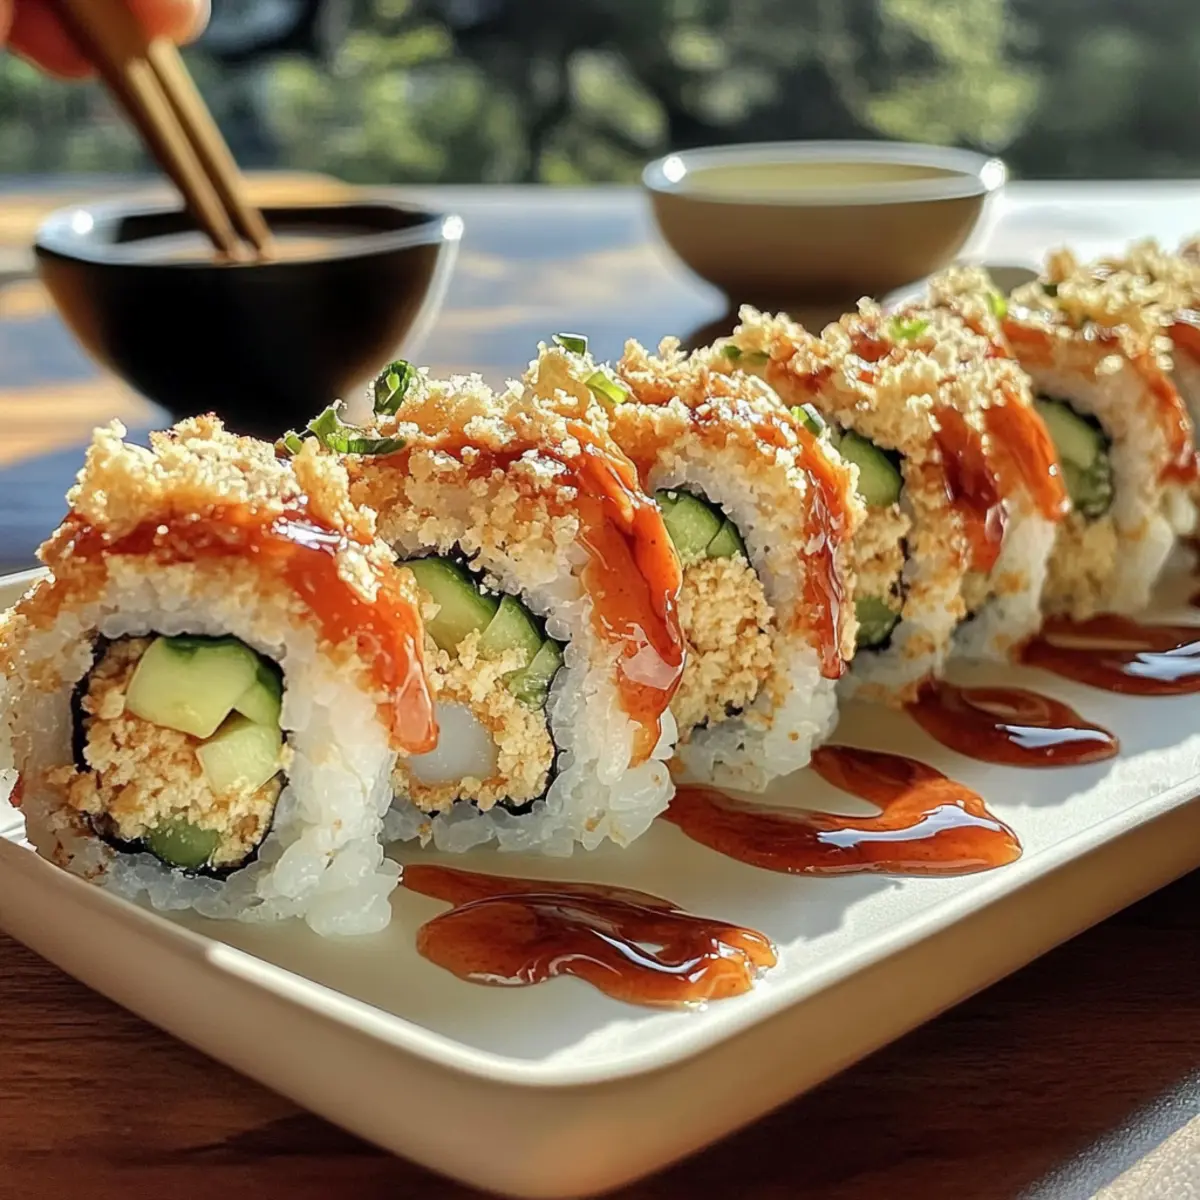
Carefully place your completed sushi roll on a cutting board, seam side down. Brush the top of the roll with a generous drizzle of spicy mayo or eel sauce, then sprinkle with your chosen crunchy topping, such as toasted panko breadcrumbs or French fried onions, pressing lightly to adhere the toppings to the roll.
Step 6: Slice and Serve
Using a sharp, damp knife, slice the sushi roll into 8 equal pieces, applying even pressure to avoid squishing it. Serve your beautiful Homemade California Crunch Roll Sushi with soy sauce, pickled ginger, and wasabi on the side for an authentic sushi experience. Enjoy the satisfying burst of flavors and textures!
Homemade California Crunch Roll Sushi Variations
Feel free to let your imagination run wild and customize your crunch roll to your taste!
-
Vegan Delight: Substitute imitation crab with marinated tofu or jackfruit for a delicious plant-based twist. You’ll still get that satisfying texture and flavor!
-
Brown Rice Base: Use brown rice instead of white for a nuttier flavor and added fiber. It’s a healthier alternative that doesn’t sacrifice taste.
-
Creamy Addition: For a rich and luxurious touch, add cream cheese to the filling. This extra creaminess pairs beautifully with the other ingredients.
-
Heat Things Up: Spice it up by adding sliced jalapeños or a splash of Sriracha to your spicy mayo. A little heat can balance the creaminess perfectly!
-
Shrimp Lovers: Feel free to switch the crab with cooked shrimp for a different flavor profile. The shrimp enhances the sushi with a sweet ocean taste.
-
Extra Crunch: Toss in toasted sesame seeds along with your panko for an additional layer of texture and nuttiness that offers a lovely contrast to the creaminess.
-
Fusion Flair: Consider adding thin strips of mango or bell peppers for a refreshing floral note. The sweetness will surprise and delight your taste buds.
-
Zesty Twist: Replace eel sauce with homemade citrus ponzu for a bright, tangy flavor that wakes up the palate. It adds a lovely brightness to each bite!
For more delicious ideas, I highly recommend checking out my recipes for Sushi Bake New and Strawberry Cream Roll where you can explore how jazzing up classics can lead to mouthwatering results!
Expert Tips for Homemade California Crunch Roll Sushi
-
Prep Ingredients First: Ensure all ingredients are prepped and laid out before rolling to minimize stress and maximize fun while making your homemade California Crunch Roll sushi.
-
Mind the Fillings: Avoid overfilling your rolls; excess ingredients can lead to messy bursts while slicing. Less is often more when it comes to flavor balance!
-
Keep It Wet: Dampen your knife with water between cuts to prevent the rice from sticking, ensuring clean, beautiful slices that highlight the colors and textures of your sushi.
-
Use the Right Rice: Always choose short-grain sushi rice for the best texture; it helps the roll hold together beautifully while providing that authentic sushi experience.
-
Feel Free to Experiment: Don’t hesitate to swap out ingredients to suit your taste—try different sauces, proteins, or additional veggies to craft your perfect homemade California Crunch Roll sushi.
-
Serve Fresh: For the best flavor and texture, enjoy your sushi rolls immediately after making them, but they can last for up to one day in the fridge if necessary.
How to Store and Freeze Homemade California Crunch Roll Sushi
Fridge: Store leftover sushi rolls tightly wrapped in plastic wrap or placed in an airtight container for up to 1 day. Enjoy freshness by consuming them sooner rather than later!
Freezer: While sushi is best enjoyed fresh, if you need to freeze it, wrap tightly in plastic wrap and then foil for up to 1 month. Thaw in the fridge overnight before serving, but note that texture may be affected.
Reheating: Sushi rolls should not be reheated in the microwave as it can alter the texture. Instead, enjoy cold or at room temperature for the best experience.
Quality Tip: For the best results, always prepare your Homemade California Crunch Roll Sushi fresh.
What to Serve with Homemade California Crunch Roll Sushi
As you immerse yourself in the delightful world of homemade sushi, let’s explore the perfect accompaniments that enhance and elevate your dining experience.
-
Pineapple Cucumber Salad: This refreshing side offers a sweet and crunchy contrast to the creamy sushi, awakening your palate with every bite. It’s light, bright, and a fabulous way to balance the richness of the rolls.
-
Miso Soup: A warm bowl of miso soup adds umami flavor and comfort to your meal, making it feel like a trip to your favorite sushi restaurant. The savory broth perfectly complements the freshness of the sushi.
-
Edamame: Lightly salted edamame is a simple, nutritious snack that provides a fun pop of flavor. Its tender beans are a delightful and healthy way to start your sushi experience.
-
Japanese Pickles: Offering a sweet and tangy bite, these pickles cleanse the palate between sushi pieces. Their unique flavor enhances the overall meal, making each roll taste even better.
-
Green Tea: Steaming cups of green tea create a calming ambiance while enhancing digestion. Its subtle earthiness pairs beautifully with sushi, making every sip a refreshing complement.
-
Dessert Option – Matcha Mochi: This chewy, sweet treat adds a wonderful finish to your meal. The earthy flavor of matcha in the mochi rounds out the sushi experience and leaves a delightful, lingering sweetness.
These pairings not only enrich your dining table but also make for a memorable sushi night at home!
Make Ahead Options
These Homemade California Crunch Roll Sushi are perfect for busy weeknights when you want a delicious, quick meal. You can prep the sushi rice up to 24 hours in advance; simply store it in an airtight container in the refrigerator to keep it fresh. Additionally, slice your cucumbers and avocados ahead of time, storing them separately in an airtight container to prevent browning. When you’re ready to enjoy your sushi, assemble the rolls by placing the rice and fillings on the nori and rolling tightly as instructed. Drizzle with spicy mayo or eel sauce and add your crunchy topping just before serving for that fresh, delicious crunch you crave!
Homemade California Crunch Roll Sushi Recipe FAQs
How do I choose ripe avocados for my sushi?
Absolutely! Look for avocados that yield slightly to gentle pressure when squeezed. They should be dark green to black on the outside. Avoid those with dark spots or blemishes as this may indicate overripeness.
What’s the best way to store leftover sushi?
To keep your Homemade California Crunch Roll Sushi fresh, tightly wrap the rolls in plastic wrap or place them in an airtight container. They can be stored in the refrigerator for up to 1 day. Remember, sushi is best enjoyed fresh!
Can I freeze my California Crunch Rolls?
Yes, you can freeze your sushi! Wrap each roll tightly in plastic wrap, then in foil, and store them in the freezer for up to 1 month. To enjoy, thaw in the refrigerator overnight. However, keep in mind that the texture may be impacted after freezing, so it’s best to eat them fresh.
What if I accidentally overfill my sushi rolls?
Very common! If your roll feels too full and is bursting, carefully unwrap it and gently re-roll with less filling. Clean your rolling mat and wet your fingers to minimize sticking. For next time, remember that a little goes a long way; try to keep your fillings to a moderate amount to avoid mess.
Are there any dietary considerations for the ingredients?
Definitely! If you have allergies, make sure to check the labels, especially for mayonnaise and imitation crab, as they can contain seafood or other allergens. For a gluten-free option, use gluten-free soy sauce and ensure your other ingredients are labeled gluten-free.
Can I make this recipe vegan?
Absolutely! You can substitute imitation crab with marinated tofu, and enjoy the creamy richness of the California Crunch Roll without the seafood. This way, everyone can savor the delightful flavors of your Homemade California Crunch Roll Sushi.

Homemade California Crunch Roll Sushi: Easy, Crispy Delight
Ingredients
Equipment
Method
- Rinse sushi rice under cold water until the water runs clear. Cook the rice with water in a rice cooker or on stovetop, bringing it to a boil, then reducing to low heat for 20 minutes. Let it rest for 10 minutes and fold in vinegar, sugar, and salt. Cool to room temperature.
- Prepare your rolling area by wrapping a bamboo sushi mat in plastic wrap, and gather a bowl of water mixed with rice vinegar.
- Place a sheet of nori shiny side down on the sushi mat. With wet fingers, spread cooled sushi rice over the nori, leaving a ½-inch gap at the top. Flip the nori so the rice faces down, then layer imitation crab, avocado, cucumber, and any optional fillings.
- Begin rolling the sushi by tucking the edge of the mat closest to you over the filling. Roll tightly, pressing gently as you go until you reach the exposed edge of the nori, then dampen it to seal.
- Carefully place the completed roll on a cutting board, seam side down. Brush with spicy mayo or eel sauce, and sprinkle with crunchy topping. Press lightly to adhere.
- Using a sharp, damp knife, slice the sushi roll into 8 equal pieces. Serve with soy sauce, pickled ginger, and wasabi.
Leave a Reply